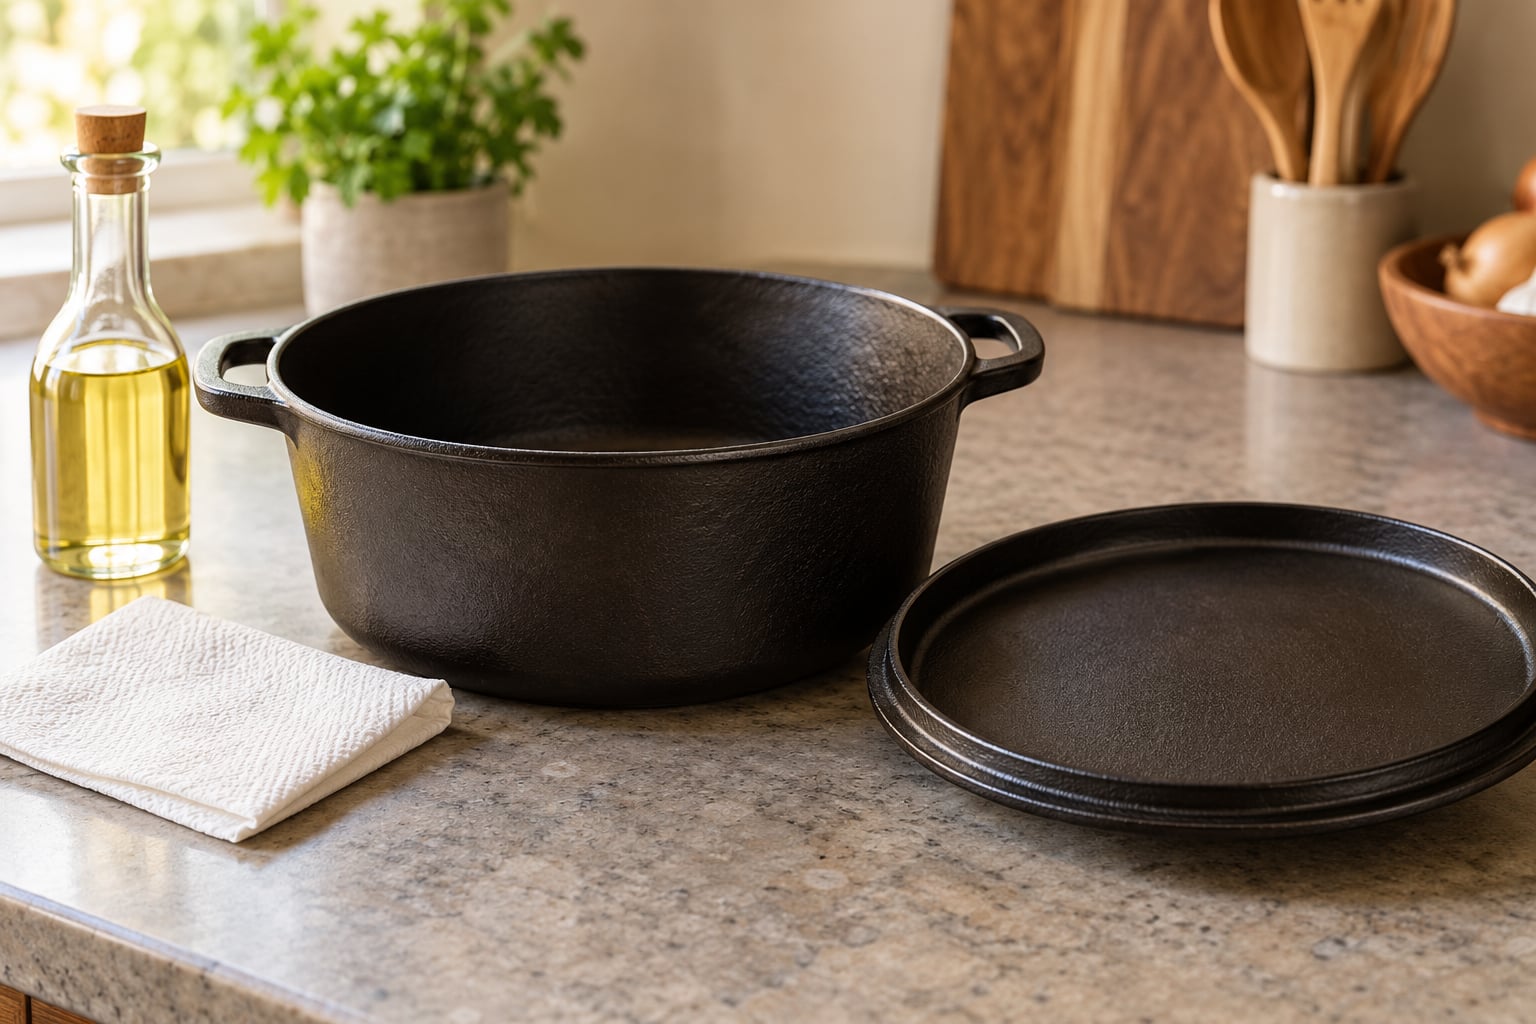
To season a Dutch oven, wash it, dry it completely, wipe on a very thin coat of high-smoke-point oil, and bake it upside down at 450°F for one hour, then cool it inside the oven. If the pot is enameled or nonstick aluminum, skip all of that. Seasoning is a treatment for bare cast iron only, and the enamel is glass.
The whole job takes about 90 minutes of oven time plus drying, and most of the effort is in the thin layer. A thick coat bakes into a sticky shell, which is the single problem I see over and over in Dutch oven seasoning questions from readers.
Here is the method, step by step, with the differences for bare cast iron, enameled cast iron and nonstick-coated aluminum called out as they come up.
Table of Contents
What You Need to Season a Dutch Oven the Right Way
Before you buy a single bottle of oil, work out what the pot actually is. Seasoning a pot that does not need it wastes an afternoon and, in the case of a coated pot, can do real damage.
Look at the base and the rim, not just the color of the glaze. Bare cast iron is matte black or grey with a sand-cast, slightly rough texture you can feel with a fingertip. Enameled cast iron is glassy, colored, and smooth, and the cooking surface never looks metallic. Nonstick aluminum is lighter for its size and usually has a dark speckled coating or a clearly non-metallic base.
Then read the care sheet that came with the pot. Manufacturers of pre-seasoned Dutch ovens ship with an oil or wax already on the surface, and their instructions usually say to wash, dry and cook, not to bake. If the maker says not to season it, that instruction outranks anything here.
Supplies for bare cast iron
- A hot, soapy water wash with a stiff brush or chainmail scrubber
- Coarse kosher salt and a little oil, for stubborn carbon or a strip-down
- White vinegar, for rust
- Paper towels and a stovetop burner for drying, plus a hairdryer or oven for hard-to-reach spots
- A high-smoke-point oil of your choice
- A sheet of aluminum foil to line the oven floor or a lower rack
Supplies for enameled cast iron
- Warm water, a soft sponge or nylon brush, and a mild dish soap
- No oil and no oven at 450°F
Supplies for nonstick-coated aluminum
- Warm water, a soft sponge, and mild dish soap
- No metal scourer, no baking, no oil
Which seasoning oil to use
Smoke point matters less than most guides claim, and the fatty acid profile matters more, but for a Dutch oven you will use almost anything in the top half of this table and be fine. The real requirement is that it is a neutral, unsaturated oil and that you apply it thin.
| Oil | Smoke point | Fatty acid profile | Verdict for a Dutch oven |
|---|---|---|---|
| Grapeseed oil | About 480°F | Polyunsaturated, high linoleic acid, polymerises well | Excellent, a top-two choice |
| Avocado oil | About 480°F | Mostly monounsaturated oleic acid | Excellent, very forgiving in a thick pot |
| Flaxseed oil | About 440°F | Very high in alpha-linolenic acid, an omega-3 | Good and fast, but only in a thin coat |
| Sunflower oil | About 440°F | High-oleic varieties are mostly monounsaturated | Good, check the bottle for high oleic |
| Canola oil | About 400°F | Mixed, moderately polyunsaturated | Good, and the easiest oil to find in a kitchen |
| Vegetable or soybean oil | About 400°F | Polyunsaturated, more linoleic acid | Usable, but the most likely to go sticky if you overdo it |
| Olive oil | About 410°F | Mostly monounsaturated | Works, but the flavor lingers in a deep pot |
| Coconut oil | About 350°F | High in saturated fat | Usable, but it can smoke before the pot is hot enough |
| Butter | About 350°F | High in saturated fat, high water content | Skip it, the milk solids burn on |
| Cooking spray such as a propellant can | Varies | Additives and propellants leave a residue | Never, this is the classic sticky-pan cause |
Community consensus is also simpler than the table suggests: use whatever plain neutral oil you already have. A thin coat of canola beats a thick coat of flaxseed every time.
Step-by-Step: How to Season a Dutch Oven
Step 1: Identify Your Dutch Oven and Check Its Instructions
Decide which pot you own before you start, because the three types diverge completely from here.
Bare cast iron gets the full treatment below. Enameled cast iron never gets seasoned, because the enamel is a glass-fused coating that does not bond to oil, and there is no bare iron underneath for the oil to sit on. Nonstick-coated aluminum is in the same category: the coating is the cooking surface, and a baked oil layer only makes it sticky and can degrade the coating with heat cycling.
Factory pre-seasoned cast iron is a special case. Many Dutch ovens ship with a light coat of oil or wax already on them, and owners on cast iron forums routinely cook with those straight out of the box with no trouble. If the surface is smooth and even rather than tacky, that is enough seasoning to start. If it feels sticky and smears onto a paper towel, the factory coat is too heavy and needs the strip-and-redo route.
Step 2: Clean Away Old Food and Seasoning
For bare cast iron, wash the pot and lid with hot water, a small amount of mild dish soap and a stiff brush or chainmail scrubber. Soap is fine. The old advice that any soap strips seasoning has not been true for a long time, and a modern seasoning layer is far tougher than a soft sponge.
For carbon welded to the surface, scrub with coarse kosher salt and a dab of oil, then rinse. For a full strip-down, coat the interior with oil, scrub with coarse salt until the grey-black film gives way to bright metal, rinse, and dry.
For rust, wet a coarse scrubber or a piece of steel wool with white vinegar and work the spot until the orange stain is gone, then rinse. Vinegar dissolves the oxide; the mechanical action removes what is left.
Skip all of this on enamel. Enamel needs only warm water, mild soap and a soft sponge. Steel wool and abrasive powder will scratch the glass surface and dull it permanently. Nonstick gets the same treatment as enamel, and a metal scourer ends the coating’s life.
Step 3: Dry the Dutch Oven Thoroughly
Put the pot and lid upside down on a burner over medium heat for a few minutes, then wipe them with a paper towel. Water hiding in the bail handle’s rivets and under the lid’s rim is the usual reason a freshly seasoned pot flashes orange-brown overnight.
For the awkward spots, set the pot upside down in a warm oven for 15 minutes or run a hairdryer over the handle mounts. Seasoning needs a bone-dry surface, and moisture under the oil layer turns to steam and pushes the seasoning off in patches.
Step 4: Apply a Thin Layer of Oil
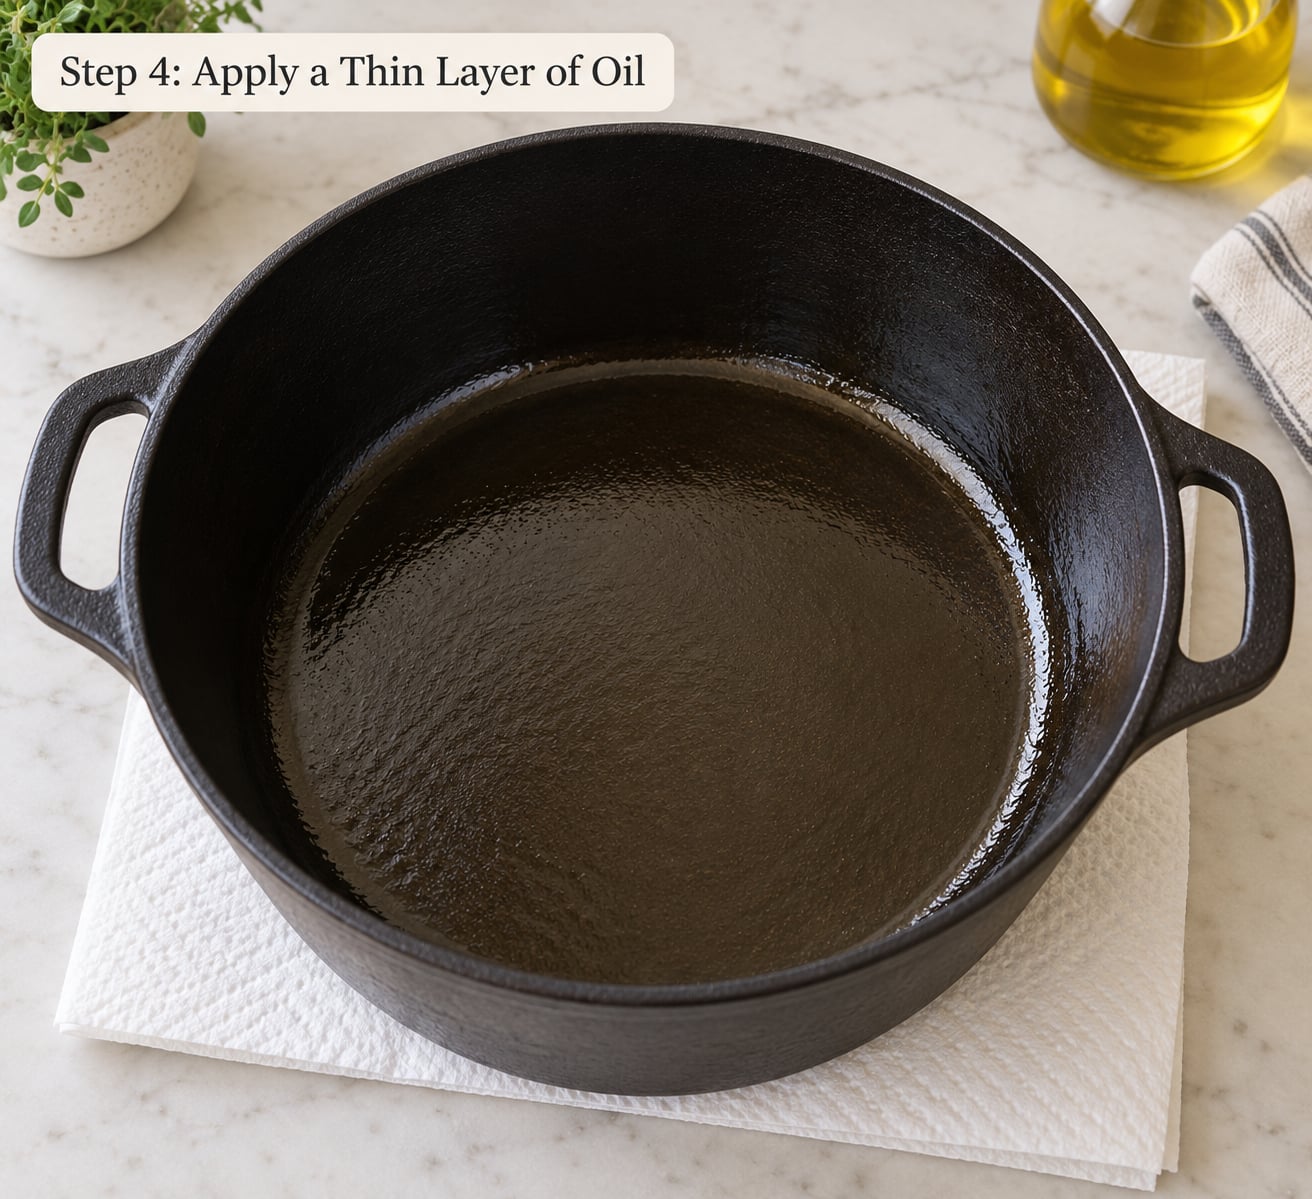
Put a teaspoon of oil in the pot, then wipe it around the base and up the walls with a folded paper towel until the surface looks almost dry. Then wipe it a second time with a clean, dry section of the same towel. That second wipe is the step people skip, and it is the step that decides whether your seasoning is satin or tacky.
Coat the interior lightly, the exterior if you want to slow rust on the sides, and the lid’s cooking surface. A Dutch oven is deep, so the bottom gets the least oil and the walls get the most attention. A shiny, almost invisible film is the target. If you can see beads of oil pooling, wipe again.
Do not oil an enameled or nonstick Dutch oven. Factory enamel is already nonstick, and an oil film on a nonstick coating turns sticky at cooking temperature.
Some enameled pots have a bare cast iron ring at the base that the enamel does not cover. That ring is the one spot where a wiped-on coat of oil is acceptable, and only if the maker’s care sheet does not say otherwise.
Step 5: Heat, Cool, and Inspect the Seasoning
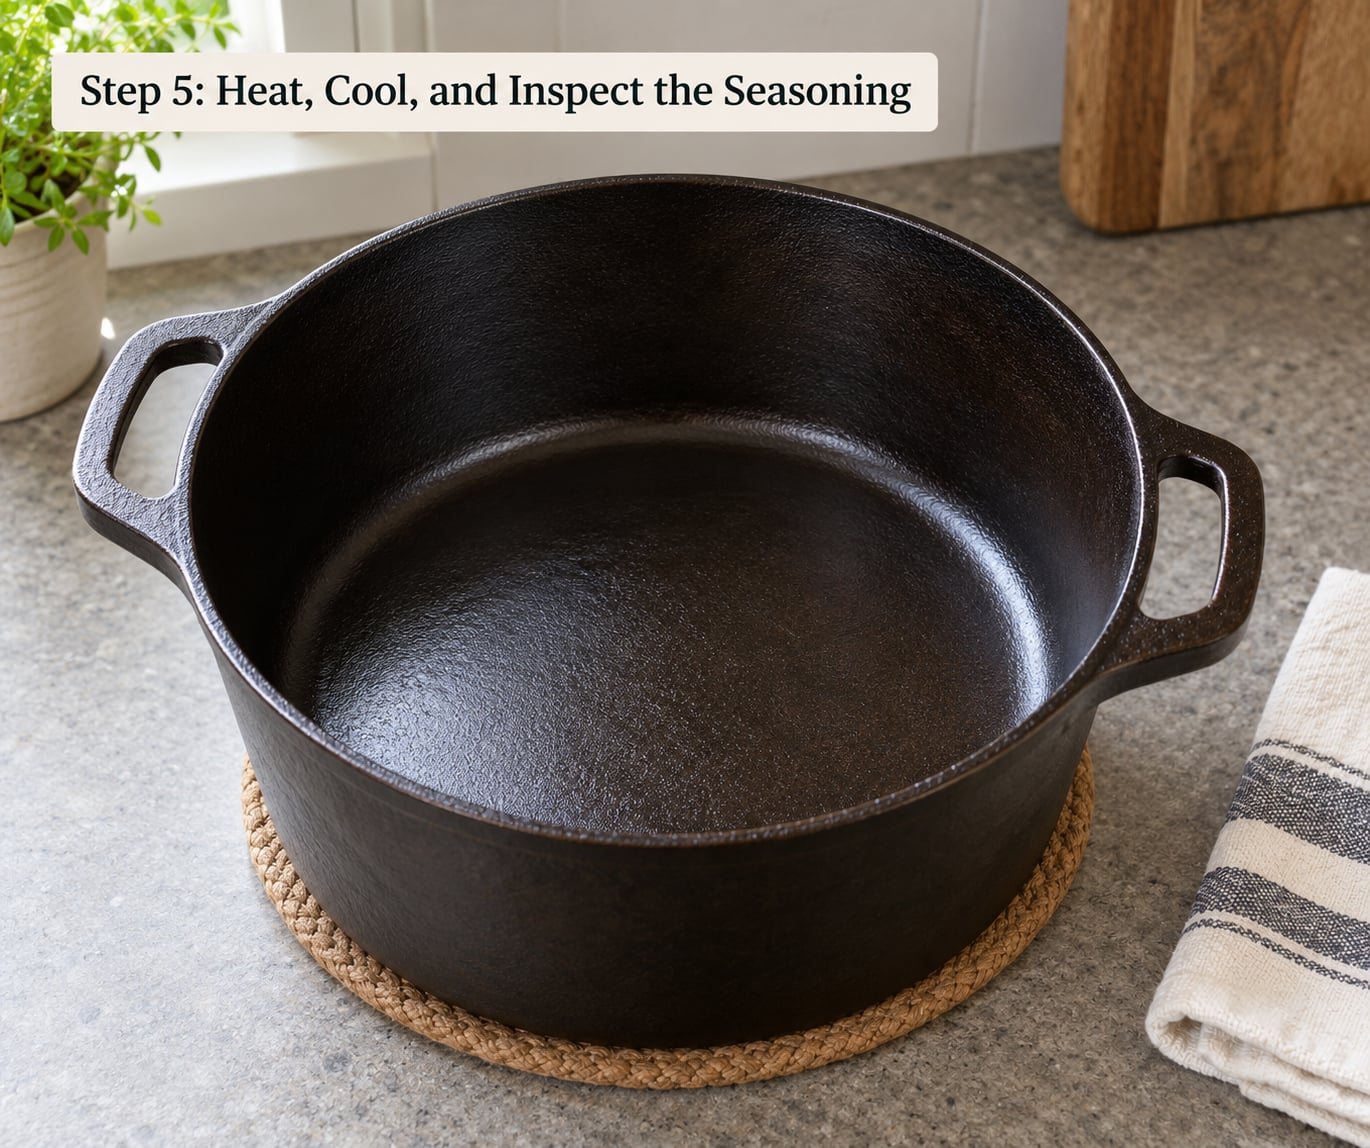
Heat the oven to 450°F. Set the pot upside down on a middle rack with a sheet of foil on a lower rack to catch drips, and put the lid upside down beside it so both surfaces get air and heat. Bake for one full hour.
Open the door and let everything cool completely inside the oven, another 45 to 60 minutes. Moving hot cast iron into cooler air shocks the metal and can blister a fresh layer. Do not cool the pot on a wet towel or a stone counter, which pulls heat out far too fast and does the same thing.
Ventilation is not a small detail here. Seasoning at 450°F puts a light haze of smoke in the room, and the bake plus the cool-down window means an hour and a half of it. Crack a window, run a range hood if you have one, and keep the knob and any plastic fittings away from the heat. If the knob is plastic, remove it before baking, or season the lid separately.
What you are looking for afterwards is an even, matte-to-satin dark finish with no tacky patches and no bare grey streaks. A brand new bare pot often shows a lighter factory patina that darkens with the first few cooks, and that is normal. Bare grey metal showing through means the coat was wiped too dry, not too thin.
Step 6: Repeat Only When Needed
Two more cycles build a solid base on new or stripped cast iron, so three baking sessions total is a good target. Beyond that you are usually just adding weight.
After that, maintenance seasoning is enough: a drop of oil after washing, wiped until the pot looks dry, and you are finished. If you cook acidic things like tomato sauce, brined meat or a long batch of chili, do a light re-oil the same day, because acid softens the polymer layer.
You need another full cycle when the surface goes blotchy or sticky, when a bare patch appears where food keeps welding itself on, or when a cast iron pot has been stripped down for a deep clean.
To repair a bad layer without a full strip: scrub the interior with coarse salt and a little oil, rinse, dry, apply a fresh thin coat and bake again. Baking soda works as a mild abrasive for a gentler pass. One or two cycles usually bring it back to an even finish.
Common Mistakes That Ruin a Dutch Oven Seasoning
Soaking the pot in water. A pot that sits in a sink overnight will flash rust by morning. Wash and dry in the same session.
Using too much oil. This is the number one cause of sticky seasoning, and it comes from judging the coat by how it looks going on rather than after the wipe-back. Thick layers have nowhere to go during baking but cure into a gummy shell.
Using a propellant cooking spray. The additives and propellants leave a residue that never fully cures. Spray the food, not the pan.
Seasoning a coated pot like bare cast iron. Enamel and nonstick do not need seasoning and can be damaged by an hour at 450°F. People do it out of habit, and they end up with a pot that releases food worse than it did before.
Cooling on a cold or wet surface. A fresh layer needs to cool slowly with the pan. Thermal shock lifts seasoning in blisters and flakes.
Forgetting the lid and knob. The underside of the lid cooks as much as the base. If it is untreated, food welds to it within a couple of meals. Bake the lid upside down alongside the pot, and take off a plastic knob first.
Using the lid as a cover for something else. Steam and condensation under a lid that is covering a simmering pan will strip the seasoning from the lid’s top surface. This is a common and usually baffling failure, because the pot itself still looks fine.
Store it dry with air inside. A closed pot holds moisture. A shed or garage with wide temperature swings will crack cast iron and rust the seams. Store it with the lid ajar and a paper towel inside.
Tips for Better Results
Rinse after every cook, dry on the burner, wipe with a thin coat of oil, and put it away with the lid cracked open. That loop is what keeps a season intact for years.
Skip the dishwasher entirely. The heat, the detergent and the trapped moisture do more damage in one cycle than a decade of hand washing will.
Cook acidic food less often if you can, and re-oil the same day when you do. Short of that, most bare cast iron Dutch ovens improve with use, since every cook adds a fresh layer to the polymer already there.
Frequently Asked Questions
Can you season a Dutch oven made from enameled cast iron?
No, and trying it is one of the most common avoidable mistakes. Enameled cast iron has a glass-fused coating that does not bond with oil the way bare iron does, so the oil just sits on top and cures into a sticky film that makes food release worse. The enamel itself is already nonstick. Clean it with warm water, mild dish soap and a soft sponge, dry it, and skip the oven entirely.
How long does it take to season a Dutch oven?
Each cycle is about one hour at 450F plus 45 to 60 minutes of cooling inside the oven, so budget roughly two hours per pass. New or stripped bare cast iron usually wants two to three cycles to build a solid base. A pre-seasoned pot that just needs a refresh coat is done after one. Set aside most of an afternoon so you are not tempted to rush the cool-down, which is the part that actually matters.
Should I use soap when cleaning a seasoned Dutch oven?
Yes. Modern dish soap and a modern seasoning layer are both far tougher than the old rules assumed, so a small amount of mild soap with hot water and a stiff brush will not strip a healthy season. What does damage cast iron is soaking, which traps water in the pores and causes rust, and the dishwasher, which combines heat, harsh detergent and trapped moisture. Wash it, dry it on the burner, and add a light coat of oil.
What oil is best for seasoning a cast iron Dutch oven?
Grapeseed and avocado oil are the strongest all-rounders, and plain canola is the most practical choice because you already have it. Flaxseed oil polymerises fast but only in a genuinely thin coat. Olive oil works and leaves a faint flavor in a deep pot. Skip butter, which burns, and any propellant cooking spray, which leaves residue that cures sticky. The oil matters far less than how little of it you leave behind.
How do I know when a Dutch oven is fully seasoned?
The surface should be even and smooth, matte to satin rather than glossy, with no tacky patches, no bare grey streaks and no flaking at the edges. A lighter factory patina on a new pot is normal and will darken over the first few cooks. The real test is cooking: food should release with a spatula and slide without scraping. If it sticks in one spot repeatedly, that spot needs another scrub and cycle.
How do I remove rust from a Dutch oven?
Wet a coarse scrubber or a piece of steel wool with white vinegar and work the rust spot until the orange stain lifts, then rinse and dry immediately on a burner. For heavy rust, fill the pot with equal parts water and vinegar and let it sit for a few hours, then scrub it out. Once the metal is clean and bare, strip any remaining seasoning with coarse salt and oil, give the pot one light coat of oil and bake one cycle. Never soak bare cast iron in water.
Conclusion
Start by finding out what the pot is made of, because that single check decides everything else. Bare cast iron gets cleaned, dried, wiped with the thinnest coat of neutral oil you can manage, and baked upside down at 450°F for an hour, then cooled inside the oven and repeated twice more. Enameled and nonstick pots get washed, dried and used, with no oil and no oven.
That is the whole process. Nearly every sticky, blotchy or failing Dutch oven I have seen traces back to too much oil, a skipped wipe-back, or a pot that cooled too fast.