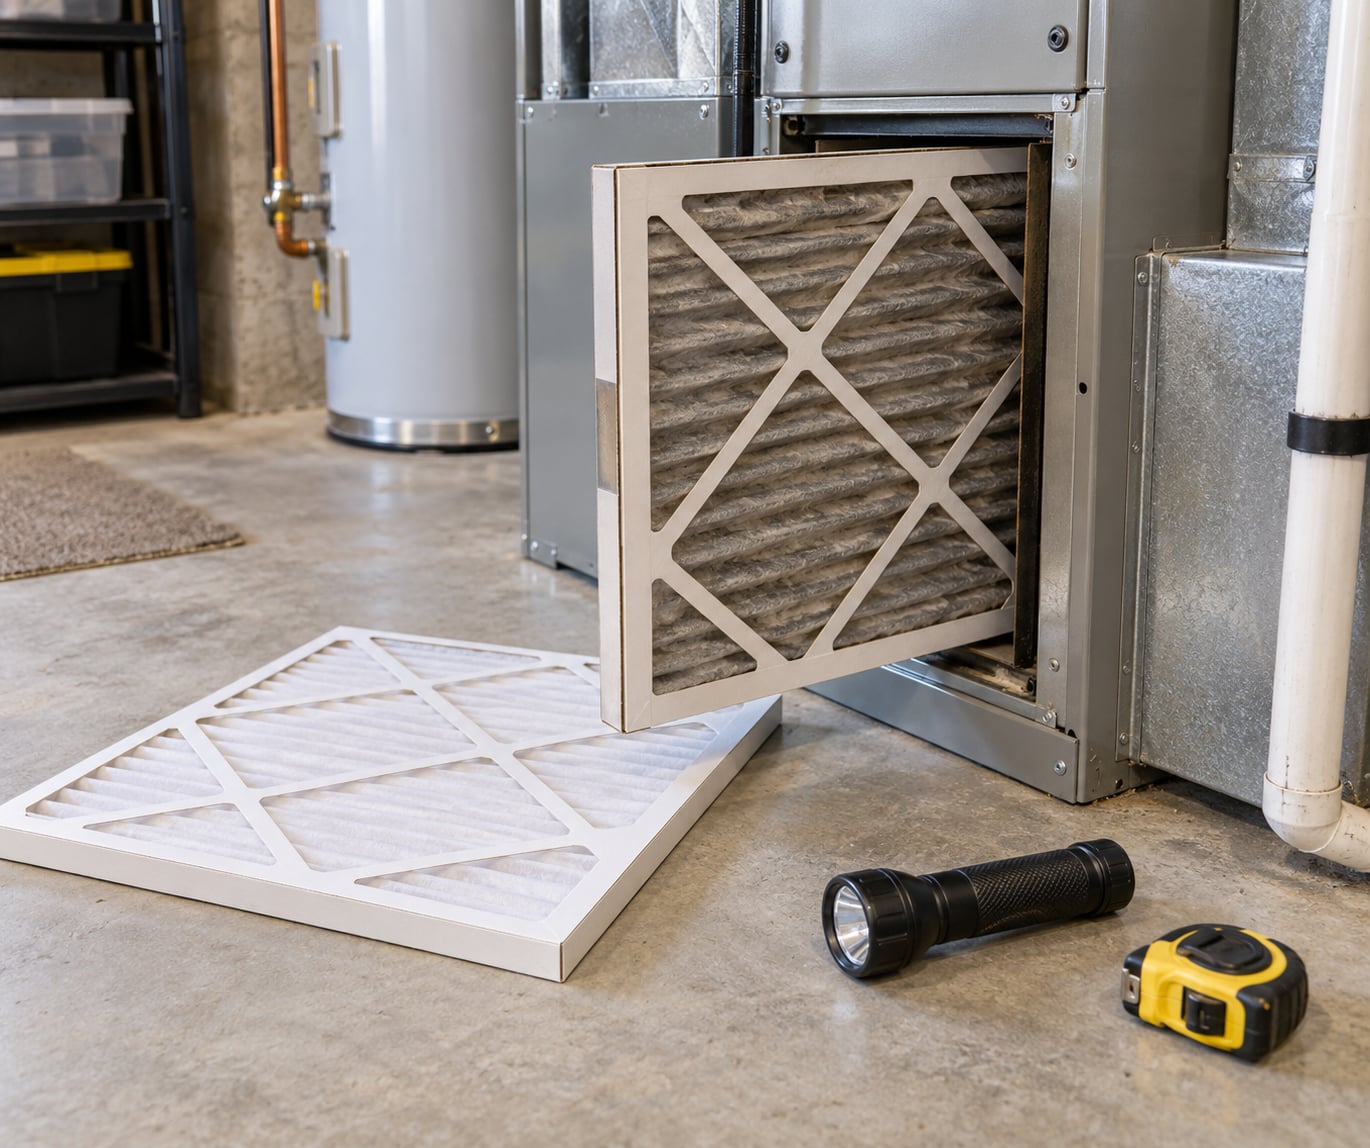
You can tell if your furnace filter needs changing by pulling it out and looking at it, holding it up to a light, and feeling the airflow at your supply vents. A filter that is still white or light-colored, lets light through easily, and comes out when you hold a tissue against a vent is fine. Grey, matted, damp, or light-blocking means replace it now.
The whole check takes about ten minutes and needs nothing more than a flashlight. The tricky part is that most advice out there tells you a change interval and leaves it at that. Intervals assume an average home with no pets, no construction nearby and no wildfire smoke, which is not what most of us live in.
So instead of a calendar, use evidence. Below is a repeatable inspection sequence where each step has a clear pass or fail result, plus what to do when the evidence points somewhere other than the filter.
Table of Contents
- What You Need
- Step-by-Step: How to Tell If Your Furnace Filter Needs Changing
- Common Mistakes and What to Do Instead
- Frequently Asked Questions
- How often should a furnace filter be changed?
- Should I change a reusable furnace filter or clean it instead?
- Why does my furnace still have weak airflow after I changed the filter?
- Do pets or recent renovations require more frequent furnace filter changes?
- Can I clean a disposable furnace filter and reuse it?
- What to Do First
What You Need
Before you open anything, gather these so you are not stopping halfway through with the blower compartment open.
- The filter currently installed, or the size marking printed on its edge
- One clean replacement filter in the correct size, which doubles as your comparison reference
- A flashlight, for looking into the filter rack and at the media from behind
- A ruler or tape measure, for confirming depth on a 4-inch or 5-inch media filter
- Basic hand tools only: usually none, but a utility knife helps trim a damaged reusable media filter
- The furnace or air handler manual, which is usually taped inside the unit or in the basement near the equipment
Keeping the clean filter in hand during the inspection is the small habit that makes this much easier. Comparing two filters side by side on the floor answers the “is this grey or just grey?” question that trips up most homeowners faster than any gauge.
If you have never located the filter, start where the air comes from rather than where the furnace is. The filter is always in the return air path, so find the largest return vent in the house, often a big grille on an interior wall, and trace that duct back. Most systems put the filter in one of four places: sliding into the return duct before it reaches the furnace, mounted on the return grille itself, in a slot on the side of the blower compartment where the filter rack door opens, or on top of a horizontal furnace in an attic or crawl space. A horizontal unit installed high up is the one people miss for years.
Step-by-Step: How to Tell If Your Furnace Filter Needs Changing
1. Confirm the Filter Size and Manufacturer Guidance
Start with what the equipment expects, because a wrong-size filter is a false signal in both directions. Read the size printed along the edge of the installed filter. A marking such as 16x25x1 means a nominal 16 by 25 inches and 1 inch thick, and it may be printed as 15 7/8 by 24 1/2 so it slides into the rack.
Note the airflow arrow printed on the cardboard edge. It points toward the blower, meaning the dirty side faces the return air, and installing it backward roughly doubles the pressure drop through the media. That mistake alone can produce the airflow complaints that send people looking for a filter problem.
Then check two other things in the manual: the MERV rating the system is rated for, and the manufacturer’s stated inspection interval. Manufacturers differ, and the manual beats any generic schedule you find online. If your unit came with a specified filter thickness, matching it matters, since a thicker filter in a shallow rack will not seal properly.
MERV is the Minimum Efficiency Reporting Value, a 1 to 16 scale that describes how small a particle the media can trap. Higher is finer filtration, and the tradeoff is airflow, because a tighter weave means the fan has to work harder to pull air through. A 1-inch pleated filter rated MERV 13 can starve a blower that would happily run that same filter at MERV 8 on a 4-inch cabinet.
Reading your required size takes about a minute. Write it down where you will see it, because every filter you buy from then on starts with the same number.
Success check: you know the exact size, the correct MERV range, which way the arrow points, and how often the manufacturer says to look at it.
2. Compare the Installed Filter With a Clean One
Turn the system off before you pull anything. Set the thermostat to cool so the compressor will not start, then switch the furnace or air handler to off at the disconnect, following your manual. Some systems have a filter door switch or interlock that stops the blower when the door opens, but not all of them, so do not rely on it.
Slide the filter out along the rack rails and lay it on the floor next to the clean replacement. Start at the upstream face, the side facing the return air.
Look for these, in rough order of importance:
- Dust loading: a color shift from white or light grey to medium grey, tan or brown. Even a uniform grey film means it is working; it does not mean it is spent.
- Matted debris: a thick, felt-like layer or clumps of hair, lint and pet dander. This is the “thick debris” condition, not a discoloration.
- Light transmission: hold it up to a lamp or a bright window. A filter with no light coming through is fully clogged.
- Collapsed or bent pleats: pleats pressed flat or folded over reduce the surface area even when the media looks only lightly grey.
- Physical damage: tears, rips, a cracked cardboard frame, a missing gasket or a filter that was trimmed too large to seat against the rack.
- Fit: any gap around the edge means unfiltered air is bypassing the media and arriving at the coil already dirty.
- Wetness or odor: damp media, a musty smell, dark spotting or a slimy surface suggests microbial growth, and InterNACHI guidance is to replace a filter showing that condition immediately rather than clean it.
You can distinguish a dirty filter without much trouble as long as you have a clean one next to it for reference. The tricky comparison is not dirty versus clean, it is lightly grey versus matted.
The light test is the closest thing to an objective check a homeowner has, so give it a fair run. Take the filter to a window or hold it under a bright lamp with the light behind it, and look through the media rather than at it. You should see light through most of the surface on a filter with real life left in it. If light only shows in patches around clumps, or comes through as a dim uniform glow with no visible fiber detail, the media is loaded up. Zero light means replace it and wonder what happened upstream, because that filter was doing more than catching household dust.
A related habit worth naming, because it resolves the greyness debate every time: write the install date on the frame in marker. Next time you pull it, you are comparing the filter against a known interval rather than against a vague memory of when you last did something about the furnace.
Success check: you can state in one sentence what changed, and how much of the media is covered.
3. Check for Airflow, Dust, and Odor Warning Signs
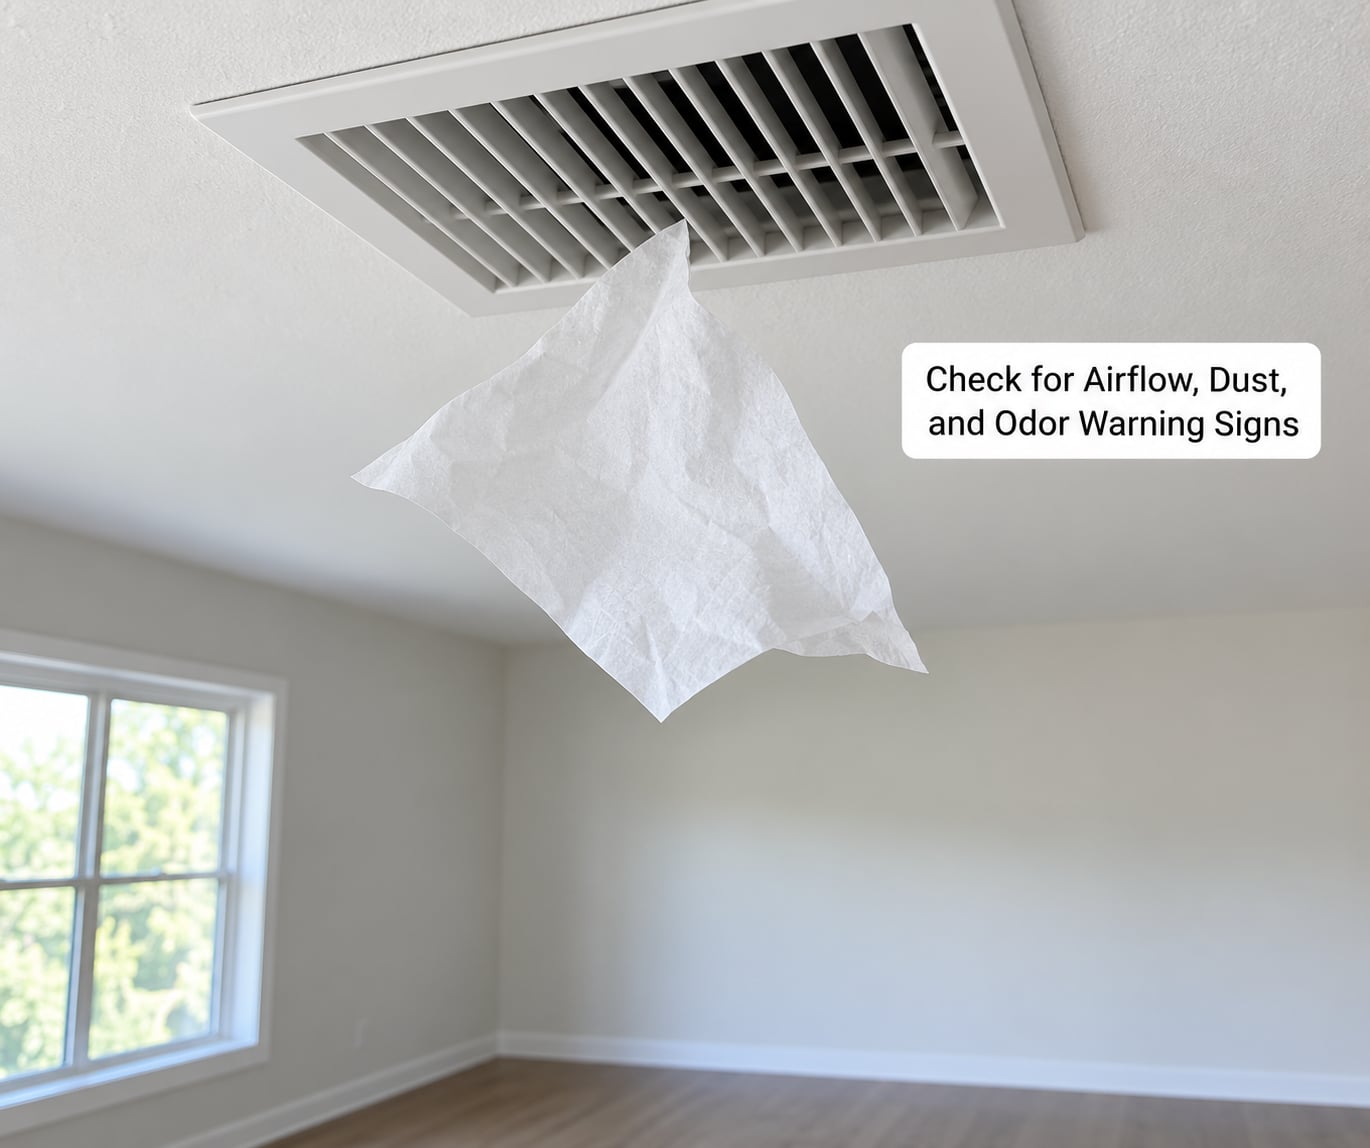
Put the clean filter in, restore the disconnect and thermostat, and let the system run a full cycle before judging anything. Symptoms noticed earlier may simply have been the old filter, so testing afterward gives you a clean comparison.
Now run these checks:
- Supply airflow: hold a tissue or a few strands of hair at a supply register. All registers should push air firmly and evenly. One noticeably quieter register often means an airflow balance problem, not a filter problem.
- Return airflow: stand at the return vent and confirm air is being drawn in. If the return feels dead while supplies are weak, the duct or the fan is the suspect.
- Run time and cycling: a furnace that starts and stops within a few minutes is short cycling. Restricted airflow is one cause; a limit switch, a failing capacitor or a dirty evaporator coil is another.
- Room comfort: cold rooms at the end of a duct run, a furnace running nearly constantly at moderate thermostat settings.
- Dust and odor: new dust on top of the return grille or on surfaces near the vents, a dusty smell when the fan first starts, or a faintly sweet or musty smell once heat kicks in.
- Water on the floor near the furnace in summer mode, which points at a frozen evaporator coil, a problem a dirty filter can cause but does not explain on its own.
Symptoms alone never prove the filter is the cause. They tell you to go look at the filter, then keep looking if a fresh one does not fix things.
Health symptoms follow the same logic, with a caveat worth stating plainly. Allergy and asthma symptoms that flare inside the home and settle when you leave are a real signal that something in the air is wrong, and a loaded filter is one candidate among several. High-efficiency media capture fine particulate well, and leaving dust and dander trapped in the media instead of circulating it is the point. But a filter does not remove gases, odors or mold already growing on a wet coil, which is why a musty smell that survives a filter change needs a technician rather than another swap.
Bill math is the other one people want quantified. You will not find a single published percentage for the penalty, because it moves with filter depth, system design and how dirty the filter is, and anyone quoting you one fixed number is selling something. What is defensible: a restricted filter makes the fan draw more static pressure for the same airflow, and the compressor and blower both run longer to do the same job. If your gas usage climbs in a winter month with similar weather and no thermostat change, the filter is worth checking that month rather than at the end of the season.
Success check: you know whether airflow improved after a clean filter went in, and that single data point is worth more than any list of symptoms.
4. Check Filter Pressure or System Gauges When Available
Some furnaces have a filter pressure indicator or a delta (differential) pressure gauge, often a round dial on the return duct near the filter rack or on the filter housing itself. It compares the pressure before and after the filter, so it tells you how hard the fan is working to pull air through.
How to use it: run the system the way you normally would, read the dial, and compare it against the range printed on the gauge face or stated in the manual. The gauge itself usually marks the acceptable band with green and an over-limit area in red. Follow those limits rather than any number you find on a forum, because the rating depends on your system and the gauge.
Interpret it as supporting evidence. A reading above the marked range confirms that the filter is restricted. A reading inside the range does not clear a filter that is visibly matted, and a low reading on a dirty filter can mean the gauge itself is inaccurate or that the system is running below its normal airflow for a different reason.
If you want an objective number without installing a gauge, a manometer is the tool technicians use, and most home HVAC suppliers rent them. Check the reading with the old filter in place and again with the new one. A large improvement confirms the filter was the restriction; no improvement means the restriction lives somewhere in the ductwork, coil or blower.
Success check: you have a before-and-after pressure reading, if your system supports one.
5. Decide Whether the Filter Needs Changing
This is where the evidence turns into a decision. Weight it like this: visible loading and damage first, fit second, airflow symptoms third, pressure reading fourth, elapsed time fifth and household factors last as a tiebreaker.
Change it now if you find matted debris, a filter that blocks light, collapsed pleats, tears or a poor seal, damp or moldy media, or a pressure reading past the marked limit. Also change it if your system has been running hard, short cycling or bill-shooting with no other obvious cause.
Give it another month if it is only lightly grey, holds its shape, lets plenty of light through, seals cleanly and the system runs normally. This is the case that causes the most disagreement, and a slightly grey filter with clean airflow is usually still serviceable.
Investigate a different problem when a new filter does not change the airflow, when registers are uneven regardless of filter condition, when the fan rattles or runs slowly, or when there is water or ice near the coil. Those are fan, duct, coil or refrigerant issues, and swapping filters will not touch them.
Thin filters load far faster than most people expect, which is the variable that explains most of the conflicting advice online:
| Filter thickness | Typical service life | Notes |
|---|---|---|
| 1 inch (flat or pleated) | About 1 to 2 months | Least media for the space it takes up, loads fastest, easiest to install wrongly |
| 2 inches | About 2 to 3 months | A reasonable middle ground when a thicker rack is not available |
| 4 inches (pleated) | About 6 months | Holds a higher MERV rating without starving the blower |
| 5 inches or more | About 12 to 18 months | Needs a matching deep filter cabinet; many people forget these exist |
The EPA’s general guidance is to check monthly and change at least every three months, with shorter intervals for homes with pets or allergy sufferers. Treat that as the floor for a 1-inch filter, not the target.
Two numbers matter more than either: how much media the filter has, and how dirty your air is. A 4-inch pleated filter carries several times the media of a 1-inch of the same face area, which is why it lasts roughly four times longer in the same house. If your cabinet accepts 4-inch media and you keep putting 1-inch filters in it, you are leaving most of the capacity unused.
Upgrading a 1-inch cabinet to accept thicker media usually involves a replacement filter cabinet and some ductwork, commonly a few hundred dollars rather than a trivial weekend part swap. Whether that pays off depends on how much you would otherwise buy and how often you would remember. In a home with pets, it usually does. In a small house with a well-sealed envelope, monthly 1-inch filters are perfectly reasonable and nobody needs to spend money.
6. Replace It Correctly and Confirm the Result
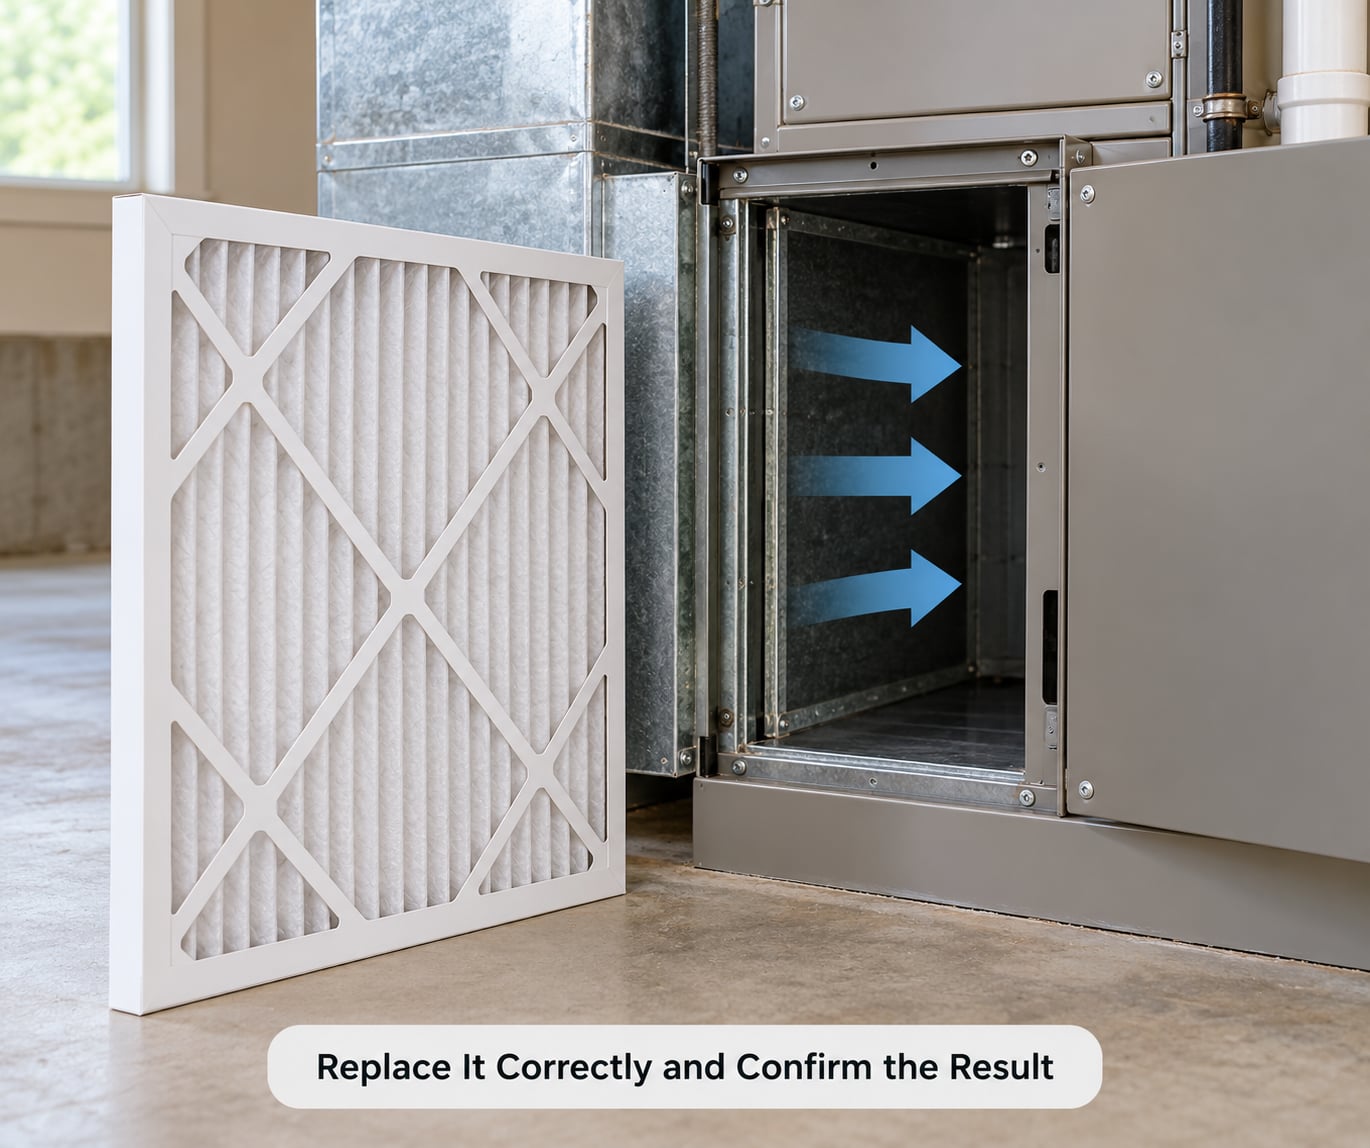
Once you have decided, the swap itself takes a few minutes. Follow your manual for the shutdown sequence, since a heat pump may have specific lockout steps that a gas furnace does not.
- Set the thermostat to cool or to off so the outdoor unit will not start.
- Switch the system off at the disconnect switch near the furnace, or at the panel breaker.
- Open the filter door or cover and slide the old filter out. Note the arrow direction before it comes out.
- Check the empty rack. Vacuum or brush out dust and check the gasket for cracks or a compressed edge.
- Insert the new filter with the airflow arrow pointing toward the blower. Confirm it sits flat against the rack and seals all the way around.
- Close the door, restore power and the thermostat, then run the system for a full cycle.
- Write the date on the filter frame with a marker and note the date you inspected it, so your next check has a starting point.
Confirm the result by repeating the tissue test at two or three registers and listening for even airflow. If you had a pressure gauge connected, read it again and compare.
Success check: strong even airflow at the registers and normal run time. If nothing improved, the filter was not the main problem, and now you know that for certain.
Some households load a filter far faster than the standard interval assumes. Check monthly if any of these apply: pets shedding indoors, someone who smokes indoors, a wood stove or fireplace that shares the duct system, construction or renovation nearby, wildfire smoke in the region, allergies or asthma in the household, a large garden or workshop producing fine dust, or a home that went a long stretch without anyone looking at the filter.
Common Mistakes and What to Do Instead
Installing the filter backward
Almost invisible from a standing position and one of the most common causes of a system that seems dirty no matter what you do. Check the arrow on the frame against the manual before sliding it in.
Forcing a filter that does not fit
A filter trimmed or bent to squeeze into the wrong rack leaves gaps that let dirty air bypass the media entirely. Buy the nominal size your rack is built for. If your cabinet is only 1 inch deep, a 4-inch media filter belongs in a deeper cabinet, not compressed into the old one.
Judging condition by the calendar alone
A 90-day-old filter in a home with two shedding cats can be finished, and a 60-day-old filter in an empty house can be fine. Use the schedule as a reminder to inspect, not as the verdict. This is the single biggest reason people end up replacing clean filters or leaving loaded ones in place.
Throwing away care instructions on reusable filters
Washable or electrostatic media filters are designed to be cleaned and reinstalled, but only on the schedule and method the manufacturer specifies. Trimming pleats with scissors or using a compressed-air blast can damage electrostatic media beyond repair.
Assuming the interlock stopped the blower
Filter door switches exist in some units and not others, and a bypassed or failed one means the blower can start with the compartment open. Always shut the system down at the disconnect rather than trusting the door.
Assuming every airflow problem is the filter
Duct collapses, a disconnected return, a failing blower motor, a blocked coil and a tripped limit switch all produce weak airflow or short cycling too. A new filter that changes nothing is useful information, not wasted effort, so test airflow again after the change and call a technician if it stays weak.
Maintenance habits that keep this simple
A few minutes once a month, on a date you can remember, beats guessing. Look at the filter, hold it to the light, and feel a vent. Keep a short written log of change dates; a technician will ask for it, and it is the only way to connect symptoms with timing. Follow manufacturer guidance over anything you read online, including this article, and get professional service for persistent airflow trouble, pressure readings outside the marked range, water near the unit, unusual noise or a repeated limit switch shutdown.
A few questions come up repeatedly, and the answers are shorter than they sound.
Frequently Asked Questions
How often should a furnace filter be changed?
Check it monthly and change it when the inspection says so, not when a date says so. As a general guideline the EPA advises checking monthly and changing at least every three months, which suits a 1-inch filter in a low-dust home. A 4-inch pleated filter typically lasts about six months and 5-inch media about a year. Homes with pets, indoor smokers, nearby construction or wildfire smoke should shorten those intervals considerably.
Should I change a reusable furnace filter or clean it instead?
Clean it, but only as the manufacturer describes. Washable and electrostatic media filters are built for repeated service, and washing or rinsing them on a regular cycle is normal use rather than a shortcut. Follow the stated cleaning method, dry the media fully before reinstalling it, and replace it instead if the frame, gasket or pleats are damaged. Never compress pleats or use high-pressure air on electrostatic media.
Why does my furnace still have weak airflow after I changed the filter?
Because the filter probably was not the restriction. A collapsed or disconnected return duct, a dirty evaporator coil, a blower motor losing speed, a closed or blocked damper and low static pressure all reduce airflow the same way a clogged filter does. Confirm the problem by testing airflow at the registers with a clean filter installed. If it stays weak, the cause is upstream of the filter and a technician should inspect it.
Do pets or recent renovations require more frequent furnace filter changes?
Yes, and significantly so. Pet dander, tracked-in construction dust, drywall grit and wildfire ash load a filter far faster than normal household dust. In those homes a 1-inch filter can look spent in a few weeks. Check monthly at minimum during those periods, consider a higher MERV-rated 4-inch filter if your system and cabinet can take one, and change immediately after renovation dust settles rather than waiting for the next monthly look.
Can I clean a disposable furnace filter and reuse it?
You can rinse a clean disposable pleated filter and get a few more months out of it, but it is a short-term measure, not real maintenance. Washing collapses the pleats and can strip the adhesive that holds media to the frame, and wet media mats as it dries. A filter that is matted, torn, damp or showing dark spotting should be replaced, not cleaned, because microbial growth lives in loaded media.
What to Do First
Shut the system down the way your manual describes, slide the filter out, and put it next to a clean one on the floor. Color, debris and the light test will tell you most of what you need in under a minute. Then put the clean filter in, run the system and feel the vents. If airflow is strong and even, you are done. If it is not, the filter was not the problem and you have ruled out the most common cause for free.