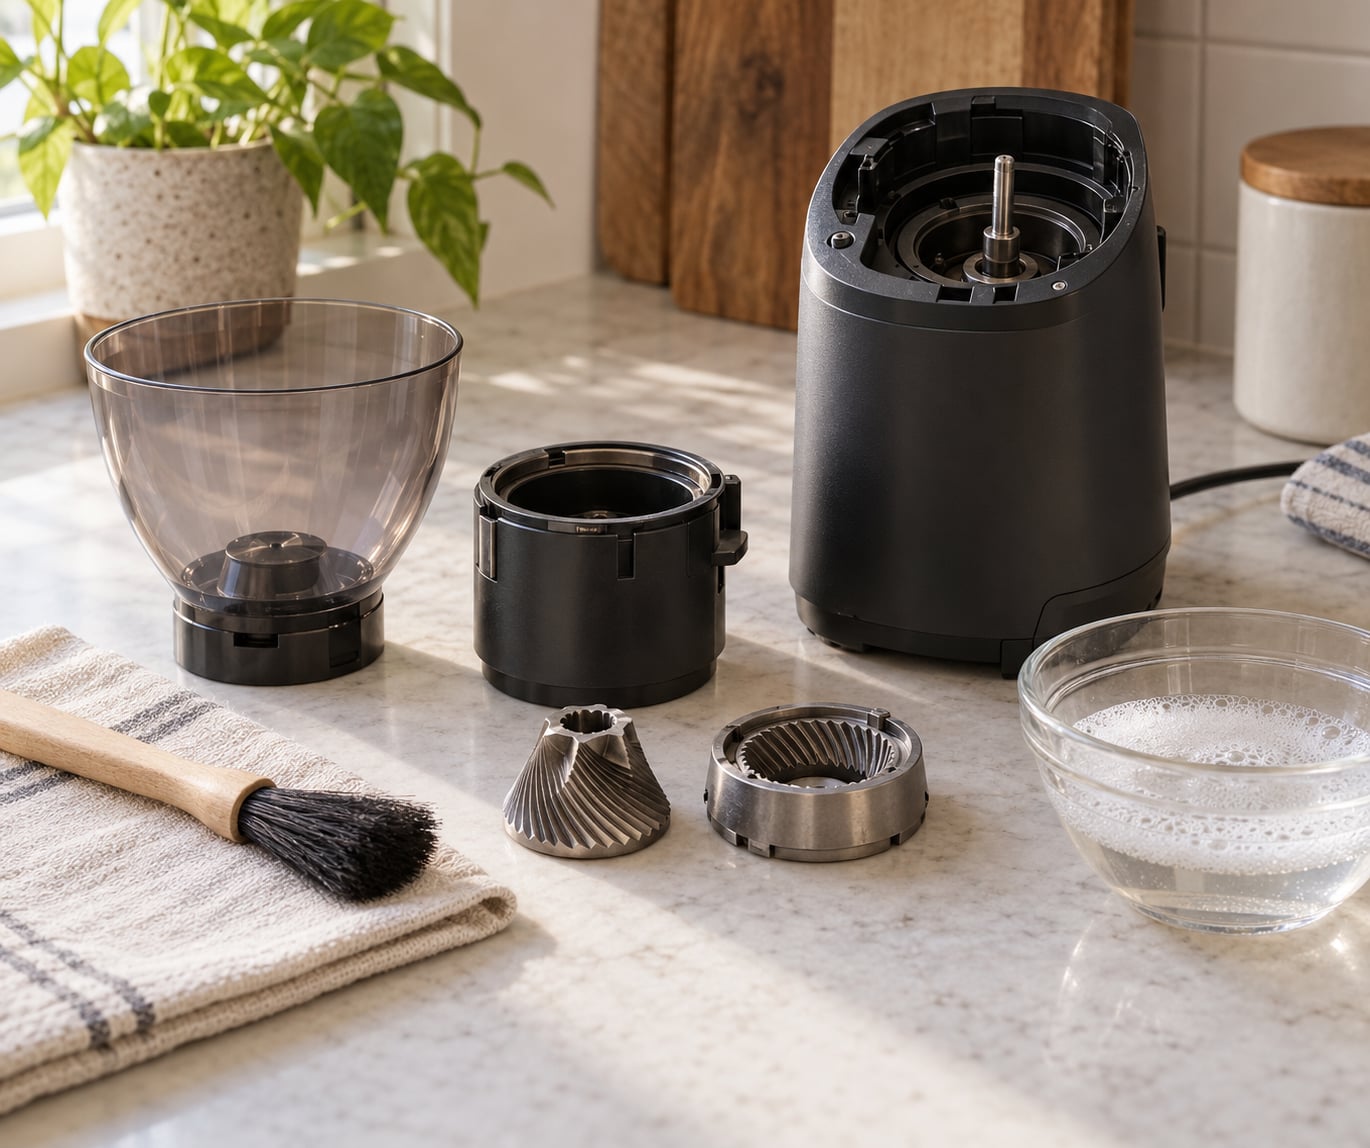
To clean a burr grinder properly, unplug it, empty the hopper, take the parts apart as far as the manual allows, brush out every loose ground, and wash only the pieces the manufacturer marks as washable. Leave the motor and fixed burr ring completely dry, let everything air-dry fully, then run a short purge grind before brewing.
A proper clean takes 15 to 25 minutes on an electric grinder and closer to 30 on a manual one, mostly because disassembly is fiddly rather than dirty. Skipping it is what turns a good bean into a flat, dusty cup.
Here is the full routine, step by step, plus the handful of habits that shorten the job next time.
Table of Contents
- What You Need to Clean a Burr Grinder Properly
- Step-by-Step
- 1. Unplug the Grinder and Empty the Hopper
- 2. Check Whether the Burrs and Top Part Are Removable
- 3. Separate the Grinder’s Parts
- 4. Brush Away Loose Coffee and Chaff
- 5. Wash Only the Manufacturer-Approved Parts
- 6. Clean the Burrs and Narrow Passageways
- 7. Dry and Reassemble the Grinder
- 8. Test a Small Grind and Check the Result
- Common Mistakes
- Frequently Asked Questions
- Can I put a burr grinder in the dishwasher?
- How often should I clean a burr grinder properly?
- Should I remove the inner burr to clean a grinder?
- What is the best way to remove coffee oils from burrs?
- Can I use vinegar or baking soda to clean a coffee grinder?
- What should I do if a burr grinder smells stale after cleaning?
- Conclusion
What You Need to Clean a Burr Grinder Properly
Start with the manual that came with the grinder. It is the only document that knows which parts of your model are sealed, which lift out, and which can touch water.
- The grinder manual, for the disassembly order and washable parts list
- A soft-bristled brush or a dedicated grinder cleaning brush
- An old toothbrush for grooves and threading
- A dry microfiber cloth
- Mild, unscented dish soap and warm water
- A small soft-bristled dish brush, optional but useful for the chamber
- A clean, dry container to keep parts in while you work
One rule governs everything: only designated removable parts get washed. Anything holding the motor, the electronics, or the fixed outer burr ring stays completely dry.
Step-by-Step
1. Unplug the Grinder and Empty the Hopper
Switch the grinder off and pull the plug out of the wall before you touch anything else. Remove the hopper and dump the remaining beans, then brush loose grounds from around the throat into a container.
You should end up with a disconnected grinder holding no trapped coffee and nothing loose enough to spill when you turn it over.
2. Check Whether the Burrs and Top Part Are Removable
Not every grinder opens up. On most electric models the upper burr unscrews or lifts out while the lower burr ring is fixed to the motor shaft, and on many manual grinders the whole burr assembly comes free in one piece.
Read the manual before you assume. A flat-burr machine, a conical-burr machine and a doser all come apart differently, and forcing a fixed component is how people crack a burr carrier.
3. Separate the Grinder’s Parts
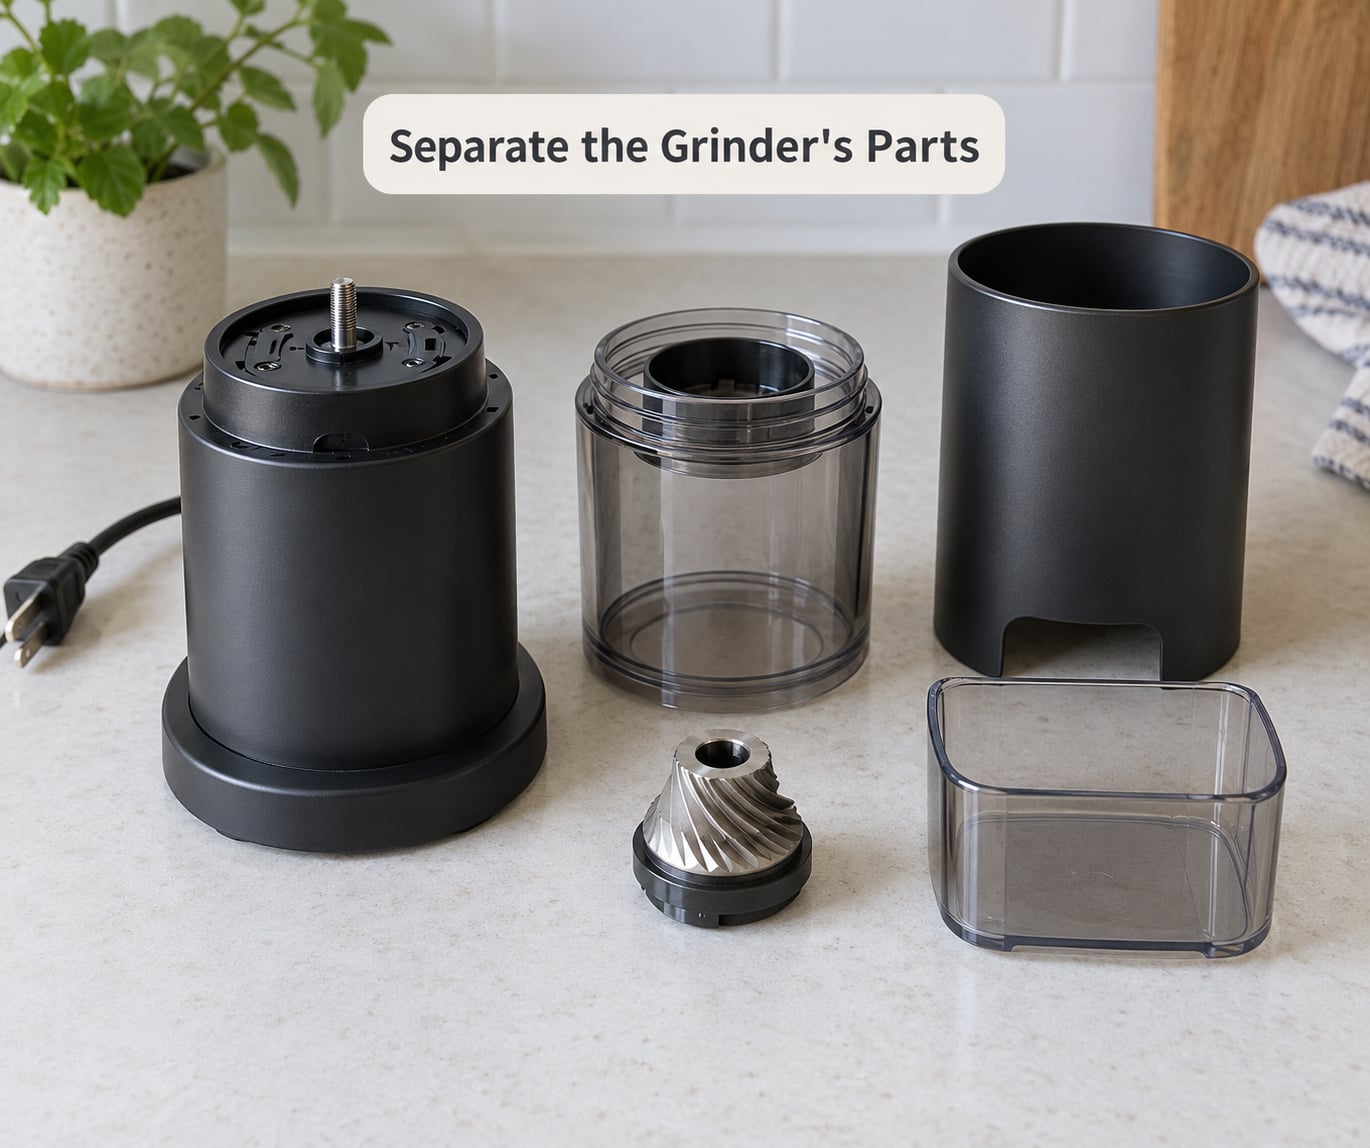
Take the outer cover off, lift out the grinding chamber, then remove the inner burr in the order the manual gives. On a manual grinder, unscrew the handle and slide the burr assembly out of the body.
Keep screws and washers in one small tray so reassembly stays simple, and set the fixed burr ring and motor housing aside where they cannot get splashed. The result is a set of organized parts on a dry towel.
4. Brush Away Loose Coffee and Chaff
With a soft dry brush, sweep the chamber, the cover, the threading and every groove you can see. Most of what comes out is dry dust and chaff, and it takes less than a minute with a brush that is stiff enough to move but soft enough not to scratch.
Skip compressed air here. It drives fine dust deeper into the motor housing where it can never be reached again.
5. Wash Only the Manufacturer-Approved Parts
Removable non-metal parts, such as the chamber, the hopper, the inner burr if your manual allows it and the collection tray, can go into warm water with a small drop of mild dish soap. Wash them by hand, not in a dishwasher, and keep the motor, electronics, fixed burr and any non-washable surface away from water.
Rinse thoroughly. Leftover soap residue tastes bitter in a finished cup, and that is usually the reason people think a clean made the coffee worse.
6. Clean the Burrs and Narrow Passageways
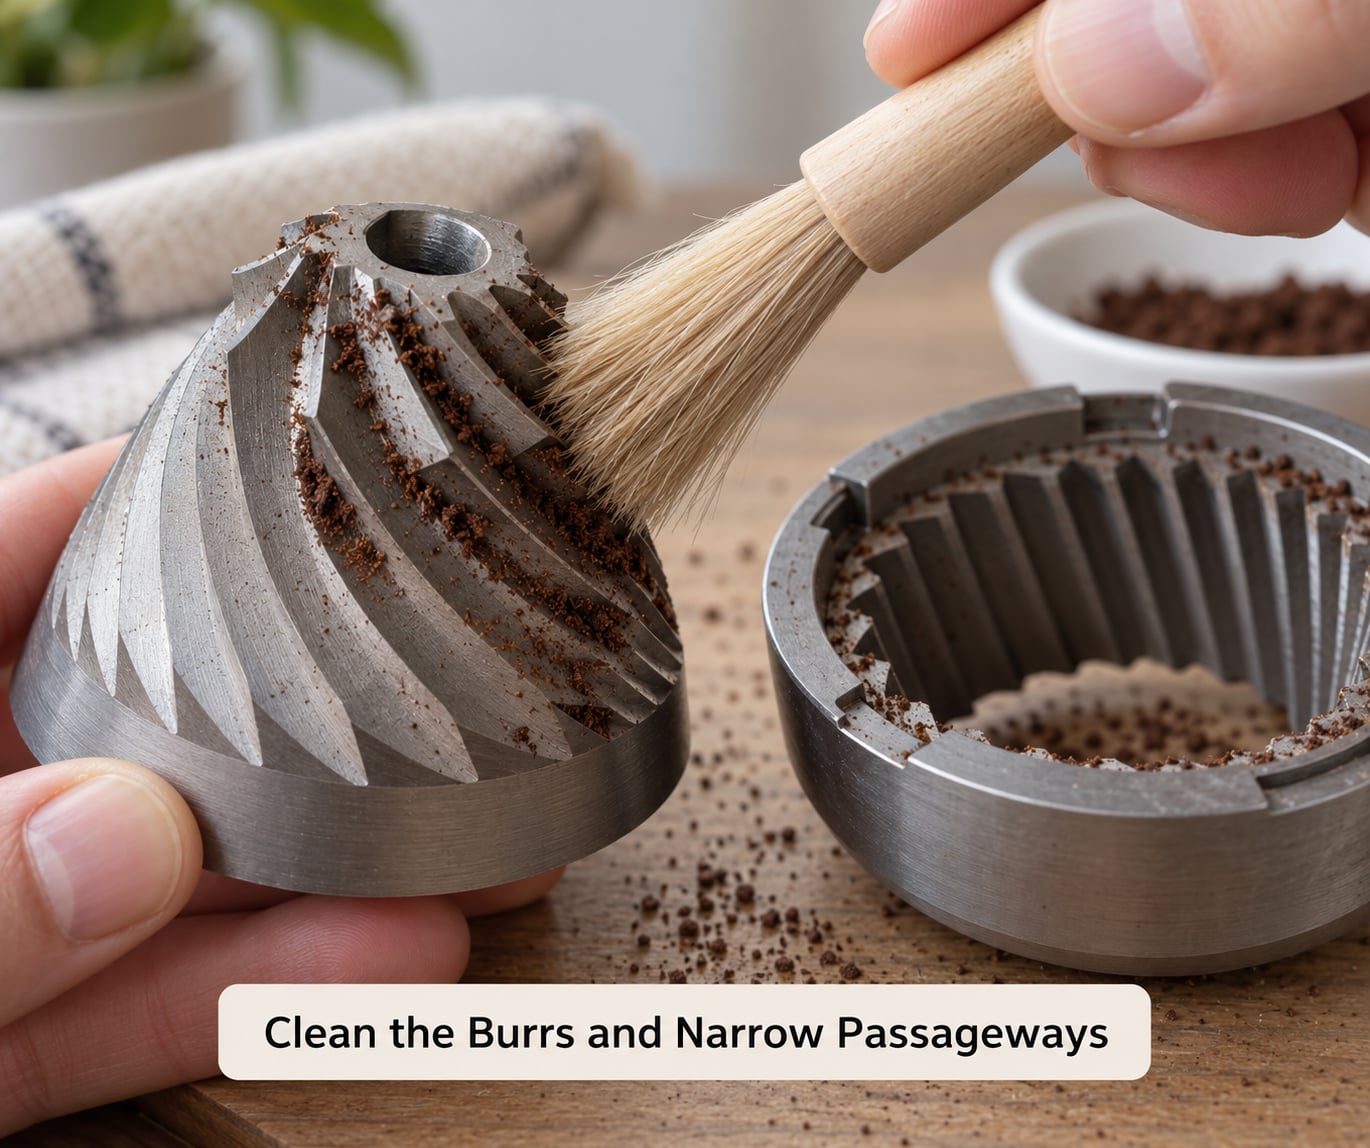
Buildup hides between the teeth and down the chute, not just on the flat top surface you can see. Run the soft brush along the teeth in the direction of rotation, then work a wooden pick or a manufacturer-approved tool through the gap and along the outlet path.
Wood and plastic beat metal here. On r/Coffee, owners of hand grinders repeatedly describe scraping caked coffee off burrs with a bamboo chopstick, and a metal pick leaves marks on softer burr edges that trap more debris next time.
For an oilier build-up, a cotton swab lightly dampened with 99 percent isopropyl alcohol works on metal burrs, though manuals differ on this. Check yours first.
7. Dry and Reassemble the Grinder
Let every part air-dry completely. Wipe the dry parts with the microfiber cloth, look for trapped moisture in the chamber and around the burr seat, and only then put the grinder back together in the reverse of the order you took it apart.
A dry motor and fully seated parts are what keep a reassembled grinder from rattling, grinding unevenly or failing. Rushing this step is the most common reason a clean grinder sounds wrong afterward.
8. Test a Small Grind and Check the Result
Run the grinder for 20 to 30 seconds on a handful of beans. Listen for a normal motor hum and steady burr noise, and watch that grounds fall evenly into the catcher with no rattle, no grounds leaking from the seams and no burnt or chemical smell.
A slightly different color on the first purge grind is normal, since it is the residue of the old coffee coming out. If the smell stays stale, something is still coated in oil.
Common Mistakes
Most grinder damage comes from cleaning methods that sound sensible and are not. Here is what to stop doing, and what to do instead.
- Putting the motor housing or fixed burr in water. Water reaching the motor, the wiring or the shaft seal ruins the machine. Correction: wash only removable parts, and dry the chamber before reassembly.
- Soaking burrs for hours. Long soaks can dull edges and encourage corrosion on steel burrs. Correction: a quick warm soapy wash, a rinse and immediate drying.
- Using rice as a cleaner. Rice is harder than coffee beans, so it wears burrs and the burr carrier, leaves starchy dust behind and, according to manufacturer warnings, voids the warranty. Correction: a brush, a wooden pick, or purpose-made grinder cleaning tablets.
- Using detergent, bleach or scented cleaners. Residue carries into every cup you brew next. Correction: mild, unscented dish soap on washable parts only.
- Forcing a fixed component off. A burr ring that is bolted down will not come free, and prying it can bend the carrier. Correction: clean around fixed parts with a brush rather than removing them.
- Reassembling while parts are still damp. Moisture plus residual oil clumps the grounds and the first few cups taste musty. Correction: full air-dry time, every time.
- Skipping the dry-out after washing. The most common oversight. Water trapped in the chute finds the motor.
Tips for Keeping a Burr Grinder Cleaner
Empty the chamber and wipe the chute after every session, and brush the outlet once a week. Most people who keep up with a weekly brush and a monthly full clean report the deep clean takes a third of the time it used to.
Switch beans gradually where you can, since going from a light Ethiopian to a dark oily roast in one pour dumps a lot of oil into the same chamber. Clean at the first sign of stale flavor, visible chaff buildup, off-color grinds, a slower grind speed or a new noise, rather than waiting for a calendar date.
Follow the cleaning interval in your manual, and if you grind espresso daily or drink dark roast, halve it. A grinder used in a dry winter month also collects static faster, so expect to sweep the counter a little more often.
Frequently Asked Questions
Can I put a burr grinder in the dishwasher?
Almost never. Dishwasher heat warps plastic chambers and can corrode or dull metal burrs, and the detergent residue ends up in your coffee. The only safe rule is to wash the manual’s approved removable parts by hand in warm water with mild dish soap, and never put the motor base, the fixed burr ring or the whole machine in.
How often should I clean a burr grinder properly?
Brush the chamber and chute weekly if you grind daily, and do a full disassembly clean every two to four weeks. Daily espresso drinkers and people using dark or oily roasts should clean more often, often every week. Clean immediately when grinds turn dull or off-color, the motor sounds different, or grounds clump and stick to the burrs.
Should I remove the inner burr to clean a grinder?
On most electric grinders, yes, the upper or inner burr unscrews and lifts out so you can brush the teeth and the gap below. On many manual grinders the whole burr assembly slides straight out. On flat-burr models the inner burr is often fixed to the motor shaft, so check the manual before pulling on it, and never force a fixed part.
What is the best way to remove coffee oils from burrs?
A soft dry brush along the teeth, then a wooden pick through the gap and down the chute, followed by a rinse of any washable burr in warm soapy water. For stubborn oil, a cotton swab lightly dampened with 99 percent isopropyl alcohol works on steel burrs if your manual permits it. A grinder cleaning tablet run for 30 seconds handles oils you cannot reach by hand.
Can I use vinegar or baking soda to clean a coffee grinder?
Skip both. Vinegar is acidic enough to etch and dull metal burrs, and baking soda leaves a fine alkaline powder that settles in the chute and tastes harsh in the next brew. A small amount of mild, unscented dish soap on washable parts, rinsed well, does the job without any of those side effects.
What should I do if a burr grinder smells stale after cleaning?
Repeat the oil-removal step on the teeth, the gap between the burrs and the chute with a soft brush and a wooden pick, since those are where the residue sits. Run 30 seconds of cheap beans as a purge grind and discard the output. If the smell survives a full second clean, check that every part is actually dry and that the burr carrier is seated correctly.
Conclusion
Start every routine clean the same way: unplug the grinder and empty it before you look at the manual. Everything after that follows from what your specific model allows.
Brush out the chamber, teeth and chute, wash only the approved removable parts, and give everything a full dry before reassembly. Do that on a schedule instead of waiting for a bad cup, and the job stays a 20-minute chore rather than a half-day repair.