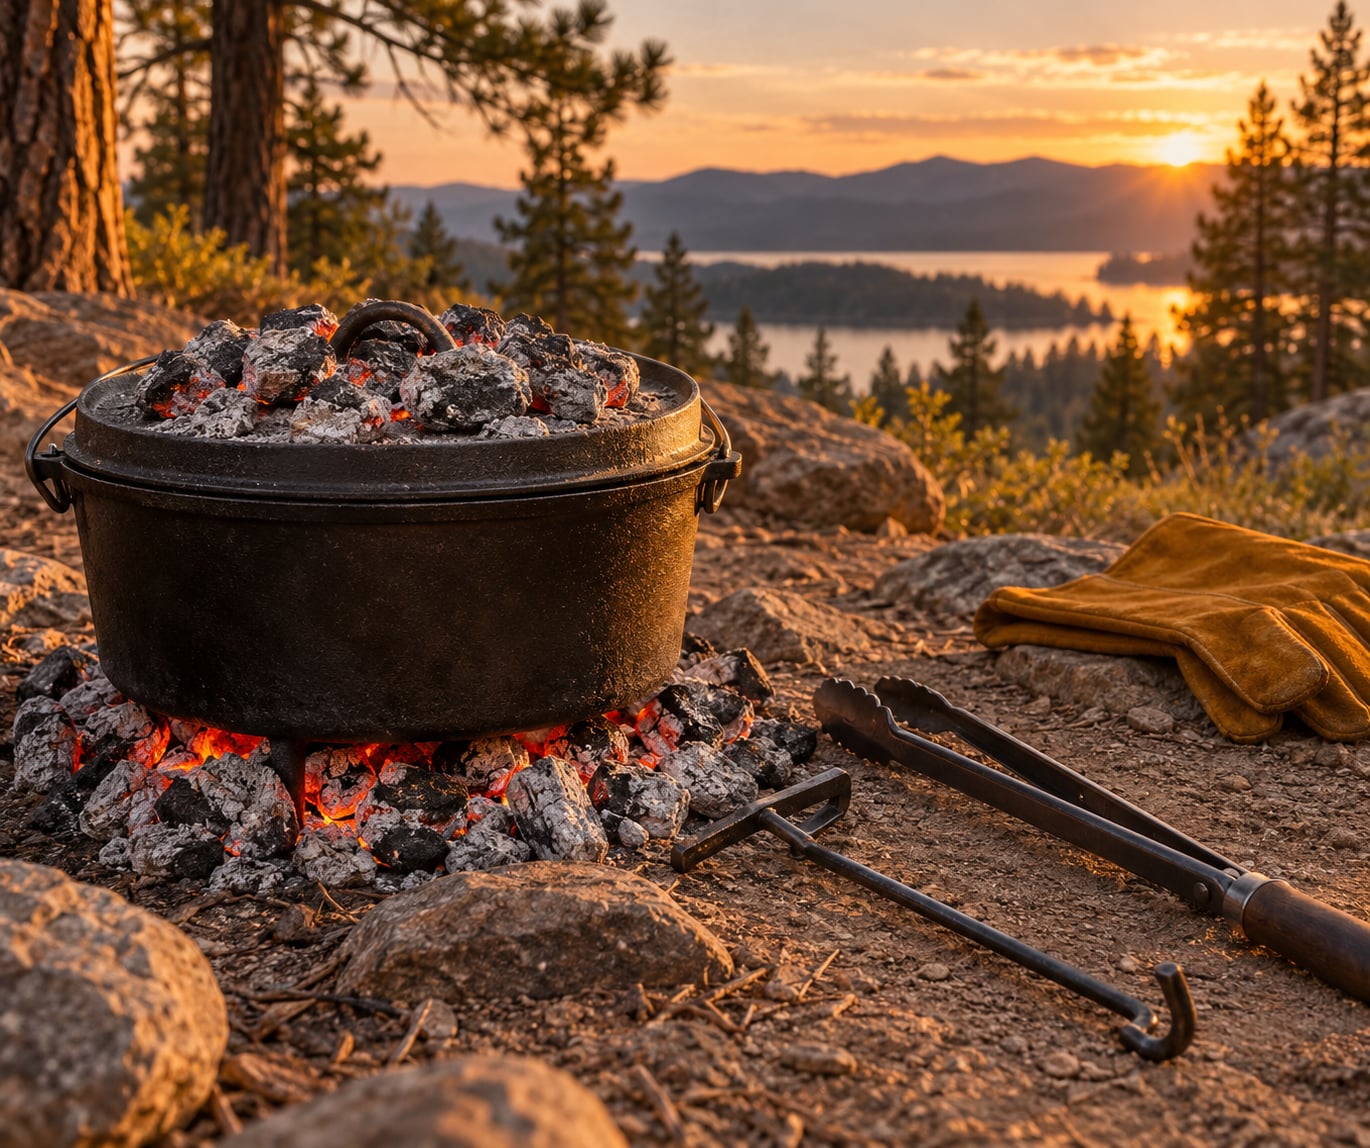
Cooking over a campfire with a Dutch oven is not the same as cooking over a flame. You build a fire, let it burn down to a bed of gray coals, set the pot on those coals, then stack more coals on the rimmed lid. That is how to cook over a campfire with a Dutch oven: the coals do the cooking, and you steer the temperature by counting and moving them.
It is slower than a kitchen and less forgiving, but it is the closest thing to a real oven you can get at a campsite. Most first-timers spend about 30 minutes building coals and preheating, then 45 to 90 minutes on the actual meal.
Table of Contents
- What You Need
- Step-by-Step: How to Cook Over a Campfire With a Dutch oven
- Set Up the Dutch Oven and Campfire
- Choose and Control the Heat
- Brown the Ingredients
- Add Liquid and Finish Cooking
- Check Doneness and Food Safety
- Common Mistakes
- Frequently Asked Questions
- Can I use an enameled Dutch oven over a campfire?
- How many coals do I need for a 350 degree Dutch oven?
- How long does it take to cook in a Dutch oven over a campfire?
- What temperature are campfire coals at?
- How do I keep food from burning on the bottom of a Dutch oven?
- What are common mistakes made when using a Dutch oven at a campfire?
- Conclusion
What You Need
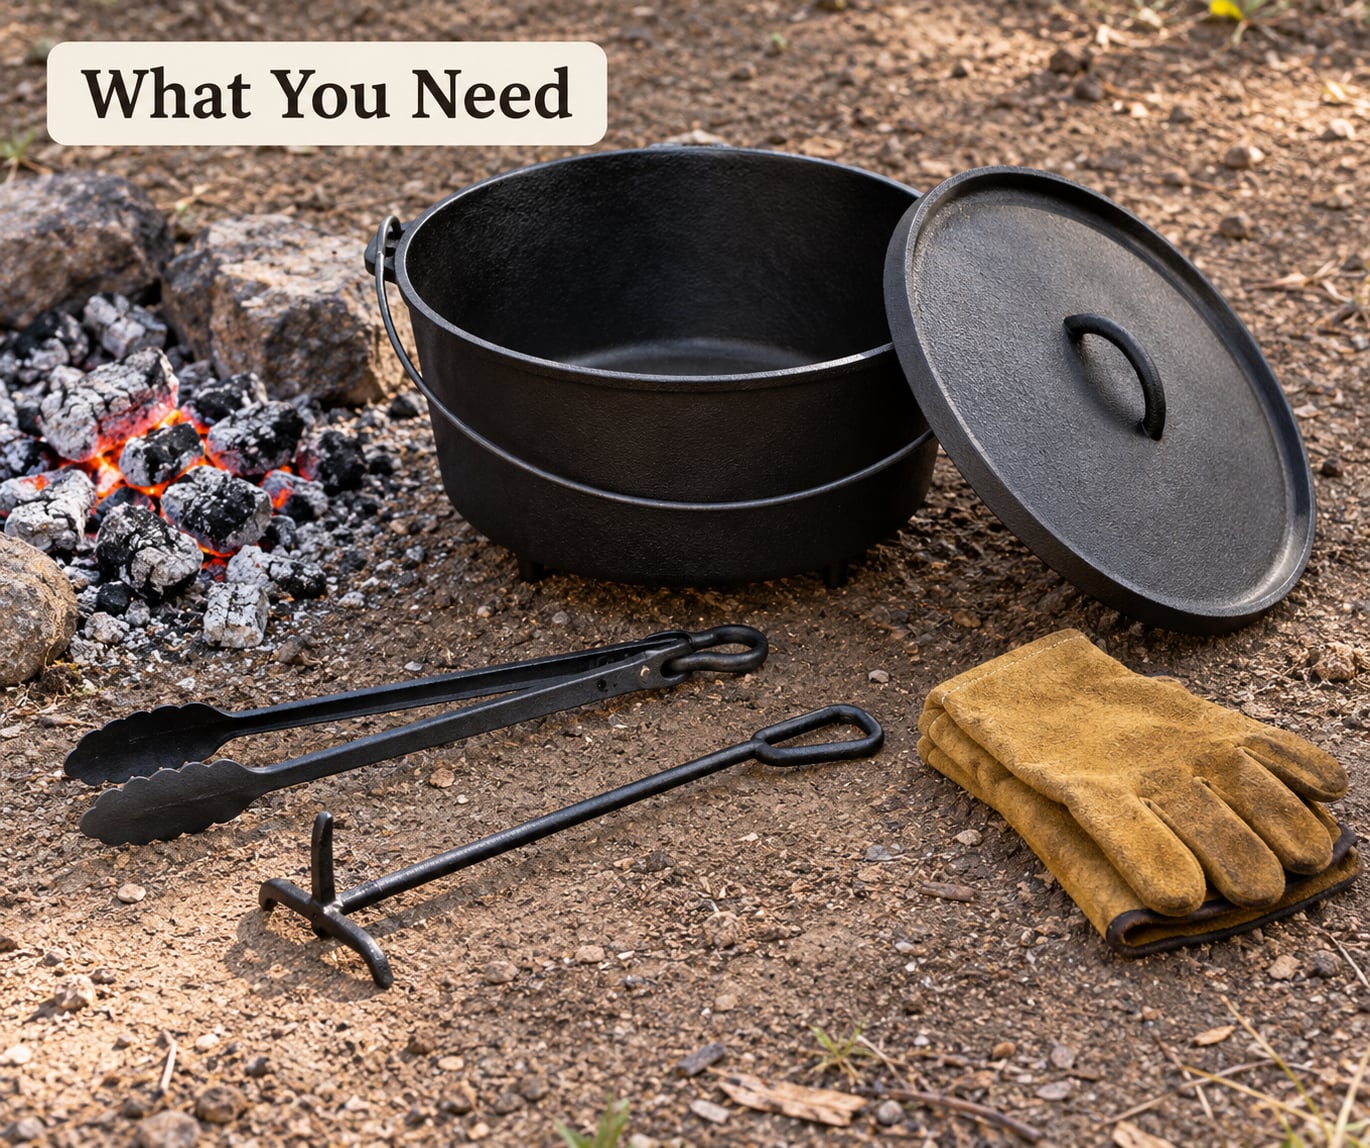
The pot does the important work, and the rest of the kit exists so you do not burn your hands or your dinner. Here is what I pack.
- A Dutch oven, 10 to 12 inch for most people. Bare seasoned cast iron takes direct flame without complaint. Enameled cast iron works too, but only if the pot itself is flame-rated and has no plastic or silicone handle anywhere on it.
- A lid lifter or a long metal hook. The knob on a campfire Dutch oven gets hot enough to blister skin through a glance. Most campsites use a flat lid and put coals on top, so a hook is the piece people forget to bring and then wish they had.
- Heat-resistant gloves. Silicone-coated or leather gloves that cover your forearms. Bare hands, even at the preheat stage, is the most common burn in this hobby.
- Charcoal and a chimney starter. Briquettes are predictable and hold an even temperature, which matters for your first few cooks. Lump charcoal burns hotter and adds smoke flavor, but it burns less evenly.
- An instant-read thermometer. A campfire has no dial, so the thermometer is the only honest way to know when chili or roast is done.
- Liners or foil squares. A Dutch oven liner in the shape of the oven interior saves you from scraping fond at 9pm in the dark.
- A water bucket and a shovel or spade. Water douses a fire that gets away from you. The shovel moves ash and coals you do not need.
- A flat, clear, non-flammable cooking spot. Bare dirt, gravel or rock inside your fire ring. Never set a hot pot on grass, pine needles or a plastic picnic table.
One safety note before anything else. Check the fire restrictions for the campground or forest you are in before you light anything, and never cook in one spot while adding wood to a fire burning somewhere else in the same ring.
Step-by-Step: How to Cook Over a Campfire With a Dutch oven
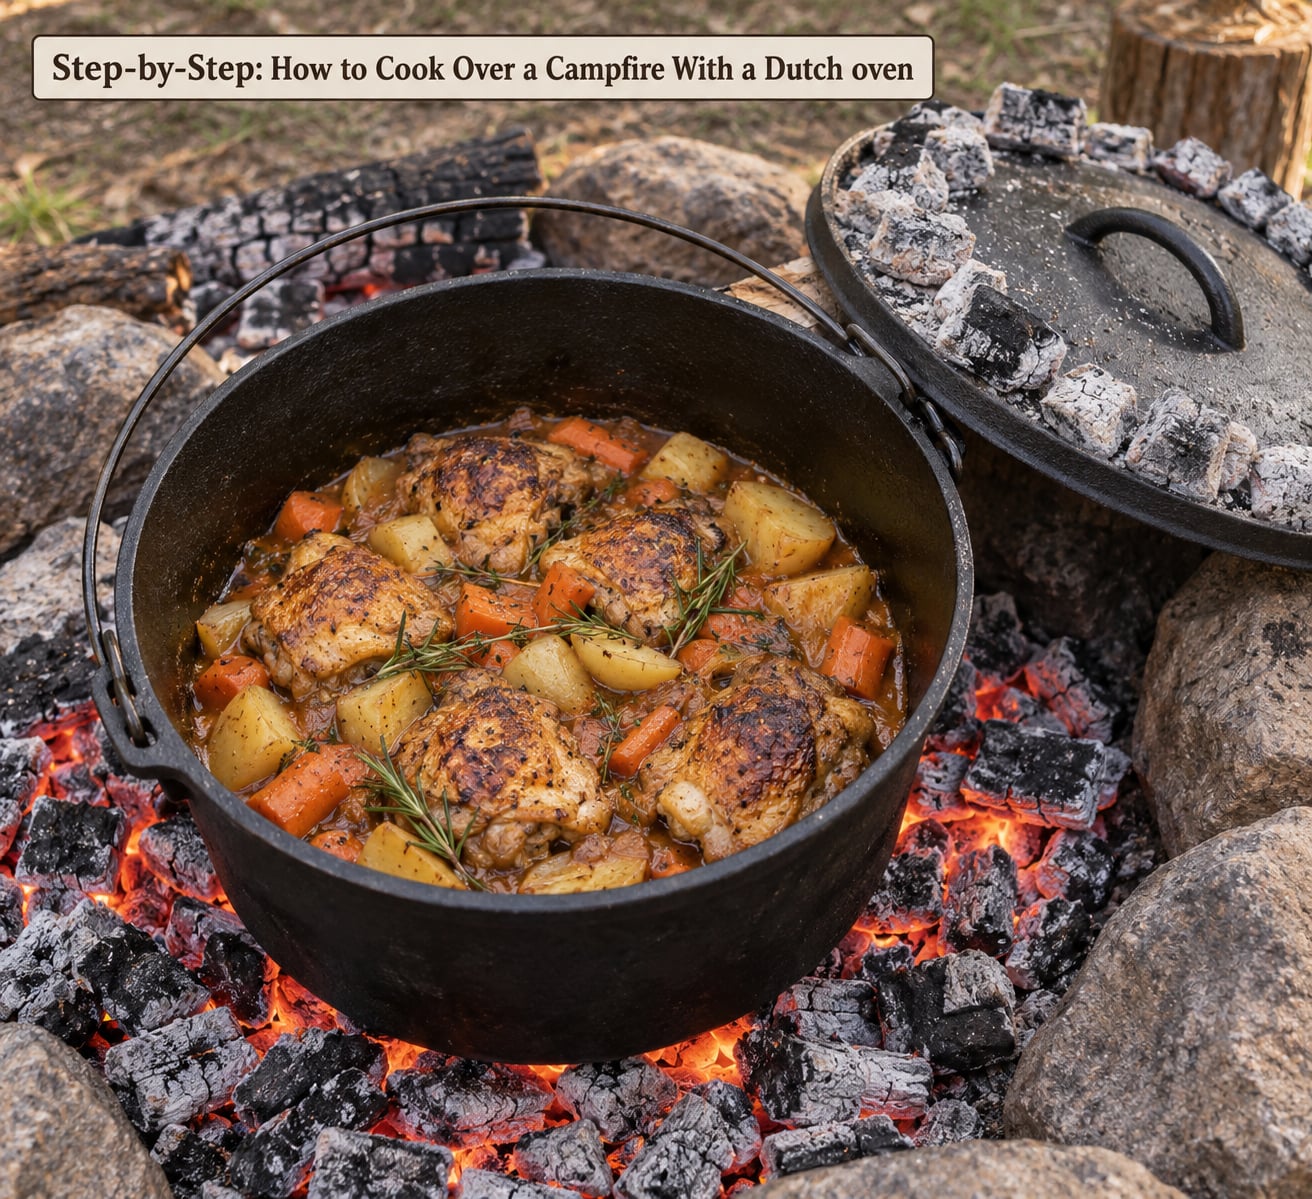
The whole method comes down to five stages, and each one has a visible sign that tells you it worked. Miss the signs and you adjust, not start over.
Set Up the Dutch Oven and Campfire
First, make sure the pot is clean and completely dry. Moisture in a pot sitting on hot coals steams, spits and dulls the seasoning.
Clear a working area inside your fire ring or next to it on bare ground, with your water bucket within arm’s reach. Then build your fire to one side of the ring rather than in the middle. A chimney of about a dozen briquettes, or a teepee of kindling under lump charcoal, lights faster and gives you a flat bed of coals instead of a flame you have to wait out.
Now wait. This is where beginners rush. Lump charcoal can take 30 to 45 minutes to turn into a usable bed, and a fire still showing flames has not got there yet. The coals are ready when they are gray with a thin white ash coating and glowing red underneath. Hold the back of your hand a few inches above them; if the heat makes you pull back quickly, they are close enough.
Choose and Control the Heat
Set the empty Dutch oven into the coals with the lid on for 10 to 15 minutes to preheat. Cooking in a cold pot is the second big reason food burns, because the food hits cold metal and sticks before it colors.
Arrange coals in two places. Underneath, set them in a circle set about half an inch inside the bottom edge so the pot sits level and no coals touch bare metal directly. On top, use a checkerboard pattern across the lid, which spreads heat more evenly than a solid mound.
The ratio depends on what you are making, and this is the part worth memorizing.
- Baking (bread, cornbread, cobbler, cake): about 3 coals on top for every 1 underneath.
- Roasting (steak, chicken, chops, vegetables): about 1 on top for every 1 underneath.
- Simmering, boiling, frying: coals underneath only, and fewer of them.
The other long-standing rule of thumb is that each extra briquette adds roughly 10 to 20 degrees. For a 12-inch oven at 350 degrees, that works out to about 17 coals on the lid and 8 underneath; at 400 degrees, about 19 on top and 10 under. That is the everyday campfire equivalent most recipes are written against, and it is where I start every time.
Three habits keep the temperature steady. Rotate the pot a quarter turn and spin the lid a quarter turn in the opposite direction every 10 to 15 minutes, without opening it. Add coals to the weaker side and remove coals from the hot side rather than moving the pot to a new spot. And lean your coal placement toward the wind: fewer coals on the side the wind hits, more on the sheltered side.
Altitude and sun matter too. Water boils at a lower temperature above 3,000 feet, so add roughly 25 degrees worth of coals if you are cooking at altitude. In direct sun, expect the same. A light rain does very little once the coals are established, but wind is the one that will undo you in minutes.
Brown the Ingredients
Take the lid off the preheated pot, add a tablespoon or two of cooking fat, and let it shimmer before anything goes in. Meat should hiss the moment it touches. If it sits quietly, the pot is not hot enough and the meat will stew instead of brown.
Work in batches. A crowded pot drops its temperature the moment cold food lands in it, and you lose the sear. Brown on all sides, then pull the meat out if you are going to cook it further in liquid later.
Do not rush this stage with the lid on. You want moisture to leave, color to form, and the fond on the bottom to develop. Those browned bits are most of the flavor in a camp chili or stew, so scrape them up rather than washing them out.
Add Liquid and Finish Cooking
Add your broth, water, crushed tomatoes or sauce once the browning is done. On a 12-inch pot, roughly a cup of liquid is usually enough to keep the bottom from burning for the rest of the cook, and too much turns everything into a thin soup.
Lid on, coals back on top, and the pot returns to the coal bed. From here you want a gentle simmer rather than a rolling boil, so watch the edges: small bubbles breaking around the rim mean you are in the right zone. Chilis and stews commonly need the better part of an hour, and a cornbread or biscuit top can finish in 20 to 30 minutes on the same coals.
Do not expect recipe times to transfer cleanly from a kitchen. A campfire runs cooler and less evenly than an oven at the same nominal temperature, so give things extra time and trust the thermometer over the clock.
Check Doneness and Food Safety
Lift the lid away from you so any steam blows forward, not into your face, and probe the thickest part of the largest piece without touching bone. The USDA minimum internal temperatures are 165 degrees F for poultry, 160 degrees F for ground meat, and 145 degrees F for whole cuts of beef, pork and lamb as well as fish.
Check more than one piece. A pot sitting over a bed of coals has a hot side and a cool side, so the chicken thigh on the shaded edge can be finished while the breast nearest the flames is already dry.
For vegetables, cut a knife into the thickest piece. No resistance means done. For the safety margin, keep cooked food at 140 degrees F or above until you eat it, or serve it straight away and refrigerate what is left within two hours.
When you pull the pot out, set it on a ring of dry wood or a flat stone, never back on the coals, and let it rest a few minutes. Resting under a lid keeps the juices in the meat.
Common Mistakes
Almost every problem in campfire Dutch oven cooking traces back to coal placement, moisture or impatience. Here are the ones I see over and over, with the fix.
- The bottom burns before the top cooks. This is the number one failure, because you can see the bottom heat and the top heat is invisible. Pull coals off the underside and double what is on the lid until you are close to a 3-to-1 top-to-bottom ratio.
- Raw in the middle, done on the outside. The opposite problem: too few top coals, or lid coals that went cold while you talked. Restack coals on the lid and check the center of the pot again in 15 minutes.
- The top scorches. Usually too many lid coals for a delicate dish, or a habit of lifting the lid repeatedly and letting the heat escape. Leave it closed.
- Ash in the food. Lifting the lid in a breeze over a sparse coal bed. Set coals in a tight ring, keep the wind at your back, and lift slowly.
- Everything sticks. The pot was not preheated, or it was crowded and dropped temperature. Preheat with the lid on, then add fat and let it shimmer before the first ingredient.
- Food is greasy and pale rather than browned. You cooked with the lid on from the start, so moisture never left. Brown first, uncovered, then cover.
- Uneven cooking across the pot. Nobody rotated. Turn the pot a quarter turn one way and the lid a quarter turn the other every 10 to 15 minutes.
- Enamel cracked or a pot warped. Direct flame on an enameled pot rated only for stovetop use, or cold water poured into a screaming hot pot. Check the manufacturer before you ever put enamel near a campfire.
- You gave up on the recipe time. Campfire cooking is not faster because it is outside. Plan extra time, and start building coals before you want to eat.
One more habit worth building. Moving heat to the lid instead of the bottom fixes more beginner problems than anything else, and it is the first thing I change when a pot runs cold in the middle. A 12-inch oven often settles well near 10 coals below and 11 above, with a liner thrown in for easier cleanup. Those numbers fit that setup, not yours, which is exactly why you start from your own chart and adjust.
Frequently Asked Questions
Can I use an enameled Dutch oven over a campfire?
Yes, if the pot itself is rated for open flame and every handle is metal. Enamel handles direct heat and is easy to clean at camp. Leave it at home if it has plastic, Bakelite or silicone handles, or if the maker says stovetop only. Even flame-rated enamel can crack if you shock it with cold water or set a hot pot on cold rock, so preheat slowly and cool it with the coals underneath before you wash it.
How many coals do I need for a 350 degree Dutch oven?
For a 12-inch oven at 350 degrees F, use about 17 coals on the lid and 8 underneath. Smaller ovens need fewer and larger ovens need more. The rule behind the numbers: each extra briquette adds roughly 10 to 20 degrees, and baking uses about three times as many coals on top as below. Adjust from there for wind, altitude and how long you have been cooking.
How long does it take to cook in a Dutch oven over a campfire?
Plan on 30 to 45 minutes before any food goes in, because you are waiting for a real bed of coals rather than flames. After that, most main dishes take 45 to 90 minutes, and a cornbread or biscuit top finishes in 20 to 30. Campfire heat is less even than a kitchen oven, so give the recipe extra time and use an instant-read thermometer instead of guessing.
What temperature are campfire coals at?
A well-established gray coal bed with red glow underneath sits close to 350 degrees F, which is the practical equivalent most campfire recipes assume. Coals still showing flame or black on the outside are not there yet, and a breeze of ash across the surface usually means the bed has gone cold. Hold the back of your hand a few inches above the bed as a quick check.
How do I keep food from burning on the bottom of a Dutch oven?
Cut the coals underneath and add them to the lid. A 3-to-1 top-to-bottom ratio handles most bakes, and for roasts equal numbers on each side work well. Set the bottom coals in a circle half an inch inside the edge rather than a solid pile, keep a cup of liquid in the pot, and rotate the pot a quarter turn every 10 to 15 minutes so no one spot sits over the hottest coal.
What are common mistakes made when using a Dutch oven at a campfire?
The big four are cooking in a cold pot, putting too many coals underneath, not waiting for a real bed of gray coals before starting, and skipping the rotation. Add cooking in a hot pot, three times as many coals on top as below for baking, and a quarter turn of the pot and lid in opposite directions every 10 to 15 minutes, and most beginner problems disappear.
Conclusion
Learning how to cook over a campfire with a Dutch oven comes down to five habits, and they are worth writing down for your first trip.
Start with a clean, dry pot. Build a real bed of coals and wait for the gray ash, which takes longer than you expect. Preheat with the lid on, then brown your ingredients uncovered. Set about three times as many coals on the lid as underneath for baking, and rotate the pot and lid in opposite directions every 10 to 15 minutes. Check with a thermometer before you serve.
When the food is plated, drown the coals with water and stir the ash until it is cold to the back of your hand. Scrub the pot, dry it on the coals, wipe a very thin layer of oil over it, and put it away dry. That routine is the whole reason a campfire Dutch oven still works for twenty years, and it is still the advice I give anyone in 2026 cooking their first meal over coals.