Learning how to paint a room like a professional comes down to three habits: prepare the surfaces properly, work in the correct order, and keep a wet edge while you roll. Paint the ceiling, then the trim, then the walls. Cut in the edges with a brush, roll the flat fields, and finish with two thin coats rather than one heavy one.
A medium bedroom takes a first-timer most of a weekend. Prep and protection eat the Saturday morning, the first coat goes on Saturday afternoon, and the second coat lands Sunday once the walls have dried properly. Rushing either coat is what separates a professional-looking finish from a patchy one.
Updated for 2026. Nothing here needs a decorator’s setup — just a brush, a roller, a tray, a drop cloth, and the patience to let paint dry when it says so.
Table of Contents
- What You Need
- Step-by-Step: How to Paint a Room Like a Professional
- Plan the Paint Order and Protect the Room
- Prepare Walls, Trim, and Corners
- Choose the Right Paint and Mix It Thoroughly
- Cut In Edges and Roll the Main Areas
- Apply an Even First Coat
- Let the First Coat Dry and Prepare for the Second
- Apply the Final Coat and Finish Neatly
- Common Mistakes and How to Fix Them
- How to Paint a Room Without Roller Marks
- Common Mistakes
- Frequently Asked Questions
- How many coats of paint should I put on a room?
- How long should interior paint dry before recoating?
- Do I need to prime before painting a room?
- What paint sheen is best for walls in a home?
- How long should I wait before moving furniture against painted walls?
- Start With a Clean, Protected Work Area
What You Need
The list is short, and the sizes matter more than the brands. A 2.5 inch angled sash brush and a 3/8 inch nap roller cover a standard room; a cheap all-purpose brush sheds fibres and a short nap roller leaves the wall looking orange-peeled.
| Item | Size or spec | Why it matters |
|---|---|---|
| Angled sash brush | 2.5 inch for walls, 1.5 to 2 inch for trim | The angled tip reaches tight corners and gives you a straight line along trim |
| Roller frame and sleeve | 9 inch frame, 3/8 inch nap sleeve | Covers a wall section quickly; the nap decides how much texture shows |
| Paint tray and liner | Plastic tray with a fitted liner | Even loading, and disposal without washing a metal tray |
| Extension pole | 4 foot, for roller frame and brush | Saves a ladder on the first three feet of wall |
| Drop cloth | Canvas or heavy paper, floor area plus 1 foot | Catches drips and roller wipe-outs; canvas survives a ladder |
| Painter’s tape | 1.5 or 2 inch, green or blue | Holds a straight trim line when the wall gets a roll of paint next to it |
| Stirrer, can opener, putty knife, sanding block | Wooden stirrer, metal opener, 6 inch knife, 120 to 150 grit | Mixing, opening, patching and knocking down bumps |
| Mask or respirator, gloves, glasses | Any N95-type mask | Sanding dust and older coatings are the real health risk in a paint job |
Pick the roller nap by wall texture. A longer nap reaches into texture; a shorter nap leaves a smoother, more even finish on flat drywall.
| Wall finish | Roller nap | Notes |
|---|---|---|
| Fresh smooth drywall | 3/8 inch | The everyday choice for a repaint |
| Popcorn or heavy texture | 3/4 inch | Use a long-nap sleeve and more pressure |
| Glossy or semi-gloss existing paint | 1/4 inch | Short nap resists popping off a slick surface |
| Walls with patched areas | 3/8 inch | Primer on the patch keeps the roller from catching |
Choose sheen by how the room gets used. Higher sheen stands up to scrubbing and reflects light; flat paint hides texture but marks easily.
| Sheen | Best for | Tradeoff |
|---|---|---|
| Flat | Ceilings | Hides texture, will not scrub clean |
| Eggshell | Living rooms, bedrooms, dining rooms | Forgiving to paint and easy to live with |
| Satin | Hallways, kids’ rooms, high-traffic walls | Shows lap marks if you rush the wet edge |
| Semi-gloss | Bathrooms, kitchens, trim and doors | Every flaw shows; brush marks are obvious |
Figure out how much paint to buy before you open a can. Measure the wall area in square feet, add the ceiling and trim allowance, then divide by the coverage rate printed on the label — typically 350 to 400 square feet per gallon per coat. Multiply by two coats, and round up to the next whole gallon. A 12 by 14 foot room with 250 square feet of wall and a 168 square foot ceiling lands near two gallons for two coats, and a third gallon is cheap insurance against a late touch-up.
Step-by-Step: How to Paint a Room Like a Professional
Plan the Paint Order and Protect the Room
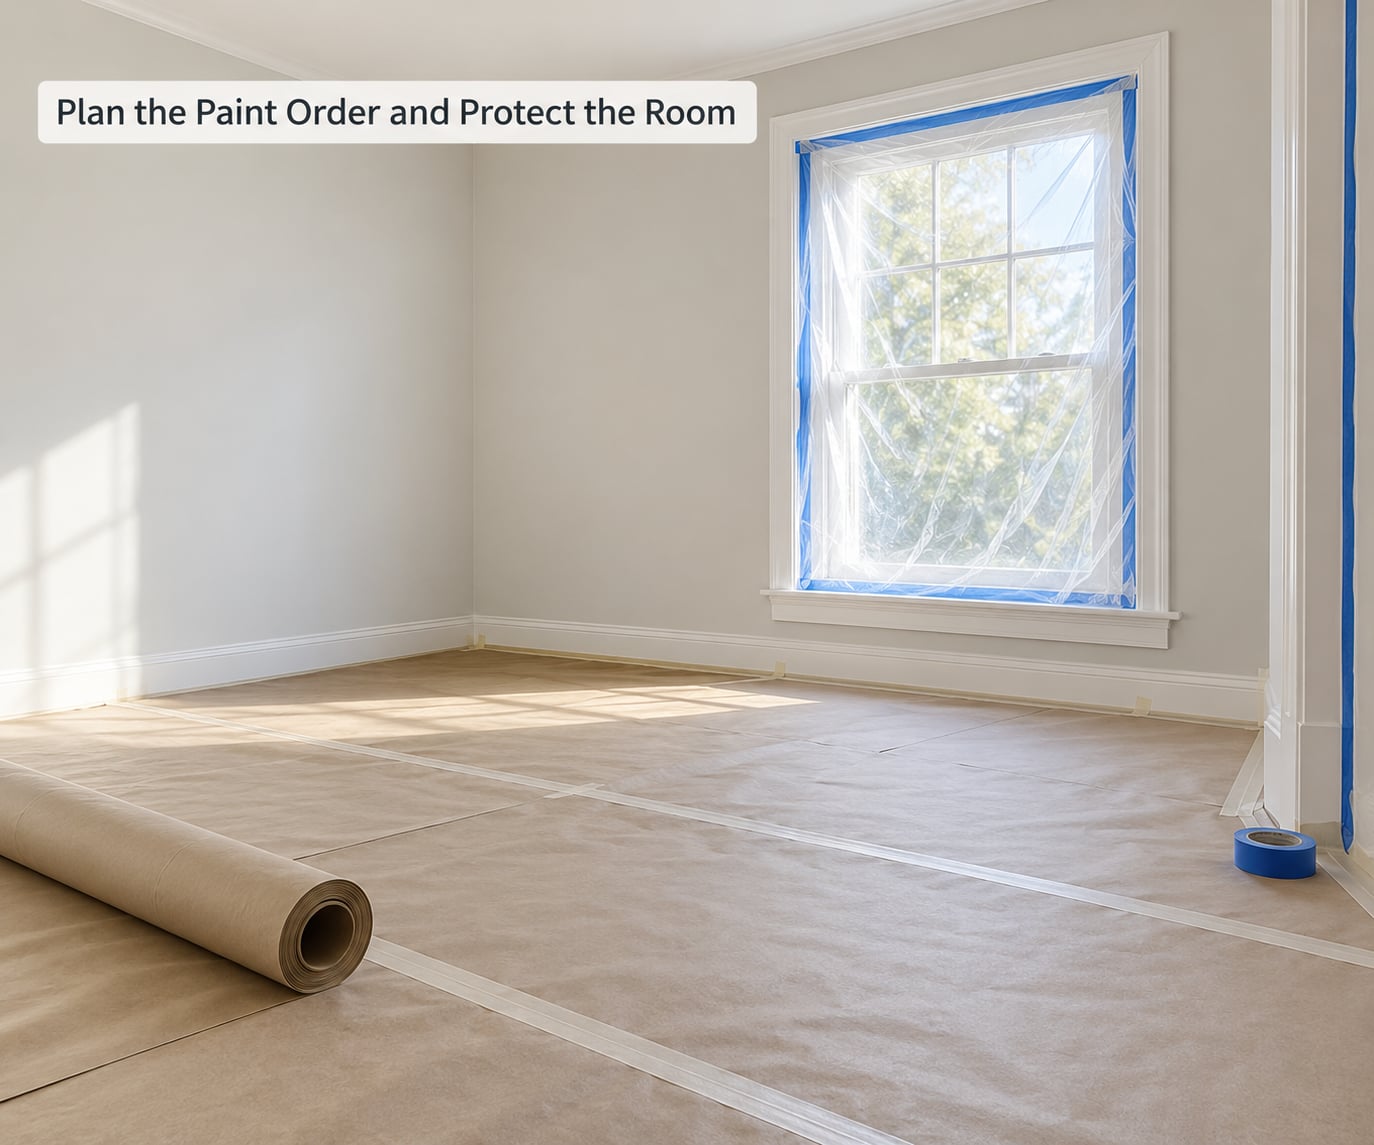
Paint in one direction of travel: ceiling first, then trim, then walls last. Any dust or roller lint falls onto surfaces you have not painted, and the wall cut-in line stays crisp because the roller stops short of the tape rather than smearing into it.
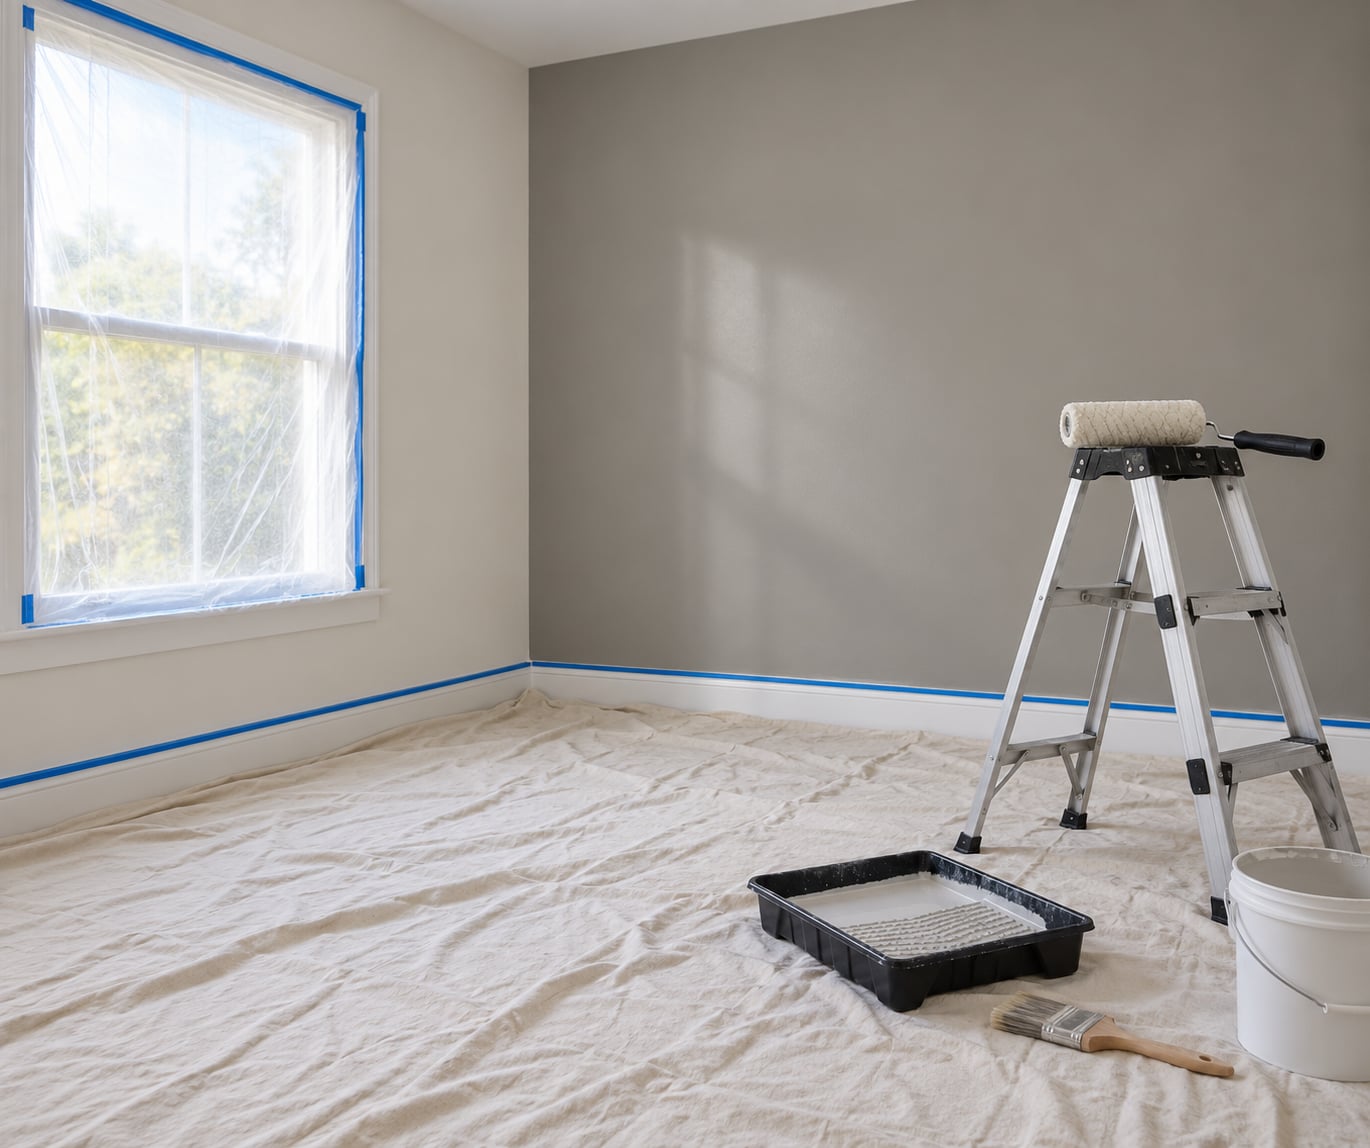
Clear the room as far as you can. Push furniture to the middle, cover it with plastic sheeting, and tape the sheeting to the fixture tops. Drop a canvas or heavy paper drop cloth with an extra foot of overlap beyond the wall base.
| Order | What you paint | When to change it |
|---|---|---|
| 1 | Ceiling | Skip only if you are leaving it untouched and the walls are in good shape |
| 2 | Walls and trim edges | Do this while the drop cloth is still clean and the ladder is out |
| 3 | Ceiling fill-in with a roller | Right after cutting the ceiling line |
| 4 | Baseboards, casing, doors | Last, once the walls are dry enough to tape and touch up against |
Check the room before you start. It should be dry, moving air should be moving through it, and no wet ceiling, leaking window or trip hazard should be nearby. Tape plastic over open windows for dust control and keep a fan running in the doorway.
Prepare Walls, Trim, and Corners
Preparation decides how the finish looks. Wash the walls first — most of what makes a repaint look bad is a thin layer of dust, grease and hand oil that no amount of extra coat will hide.
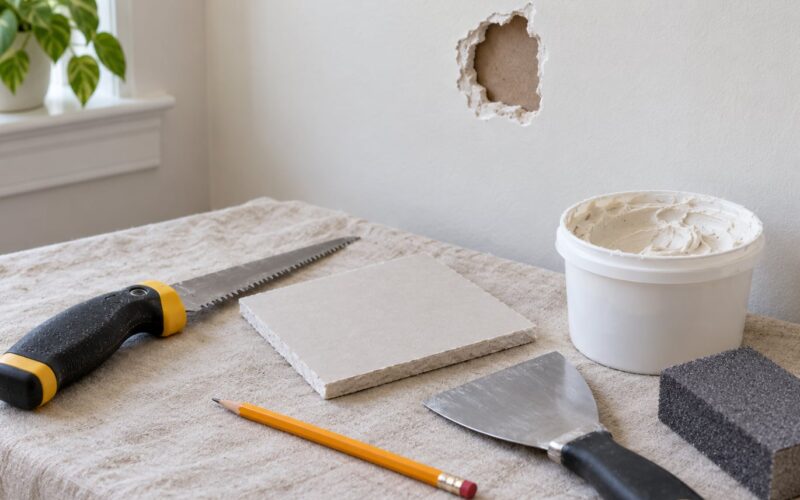
Work in a fixed order. Scrape off loose or peeling paint, wash with a degreaser or sugar soap, rinse with clean water, fill nail holes and cracks with lightweight filler, let it dry, sand the filler flush with a sanding block, then wipe the dust off with a damp cloth and let the wall dry fully.
Some surfaces only need a damp wipe. Sound painted drywall that passes a quick scuff test does not need a full wash — but glossy or greasy areas do, because paint will peel off a slick surface in sheets within a year.
Sand any area with a raised edge: the filler sits slightly proud or slightly recessed until it is level. Feather the repair so the repair edge disappears under the roller, or the wall will show a patch in raking light no matter how many coats go on.
You know the prep is done when you run a clean hand along the wall and feel no grit, no ridges and no soft spots, and the light from a work lamp shows no bumps.
Choose the Right Paint and Mix It Thoroughly
Match the paint to the room and the surface. Bathrooms and kitchens want a scrubbable satin or semi-gloss. Bedrooms take eggshell happily. Drywall patches, bare wood and repairs get a stain-blocking primer first — always check the can and the manufacturer instructions before you start.
Paint over an existing colour and you can usually skip the primer on sound walls. Paint over bare drywall, patched areas, a repaired leak, or a colour much darker than the one underneath, and prime first. If the home predates 1978, test for lead paint before disturbing anything; when in doubt, assume it is there.
Stir every can for two full minutes, bottom to top, and scrape the sides as you go. Pigment settles into a heavy layer at the base and a skin on top; the can will look perfectly even on top and lay down a completely different colour underneath.
Pour a second coat’s worth into a separate bucket and stir that too. If the paint has been sitting, box it by stirring from the bottom rather than shaking it — shaking sends bubbles into the can that show up as craters in the finish.
Cut In Edges and Roll the Main Areas
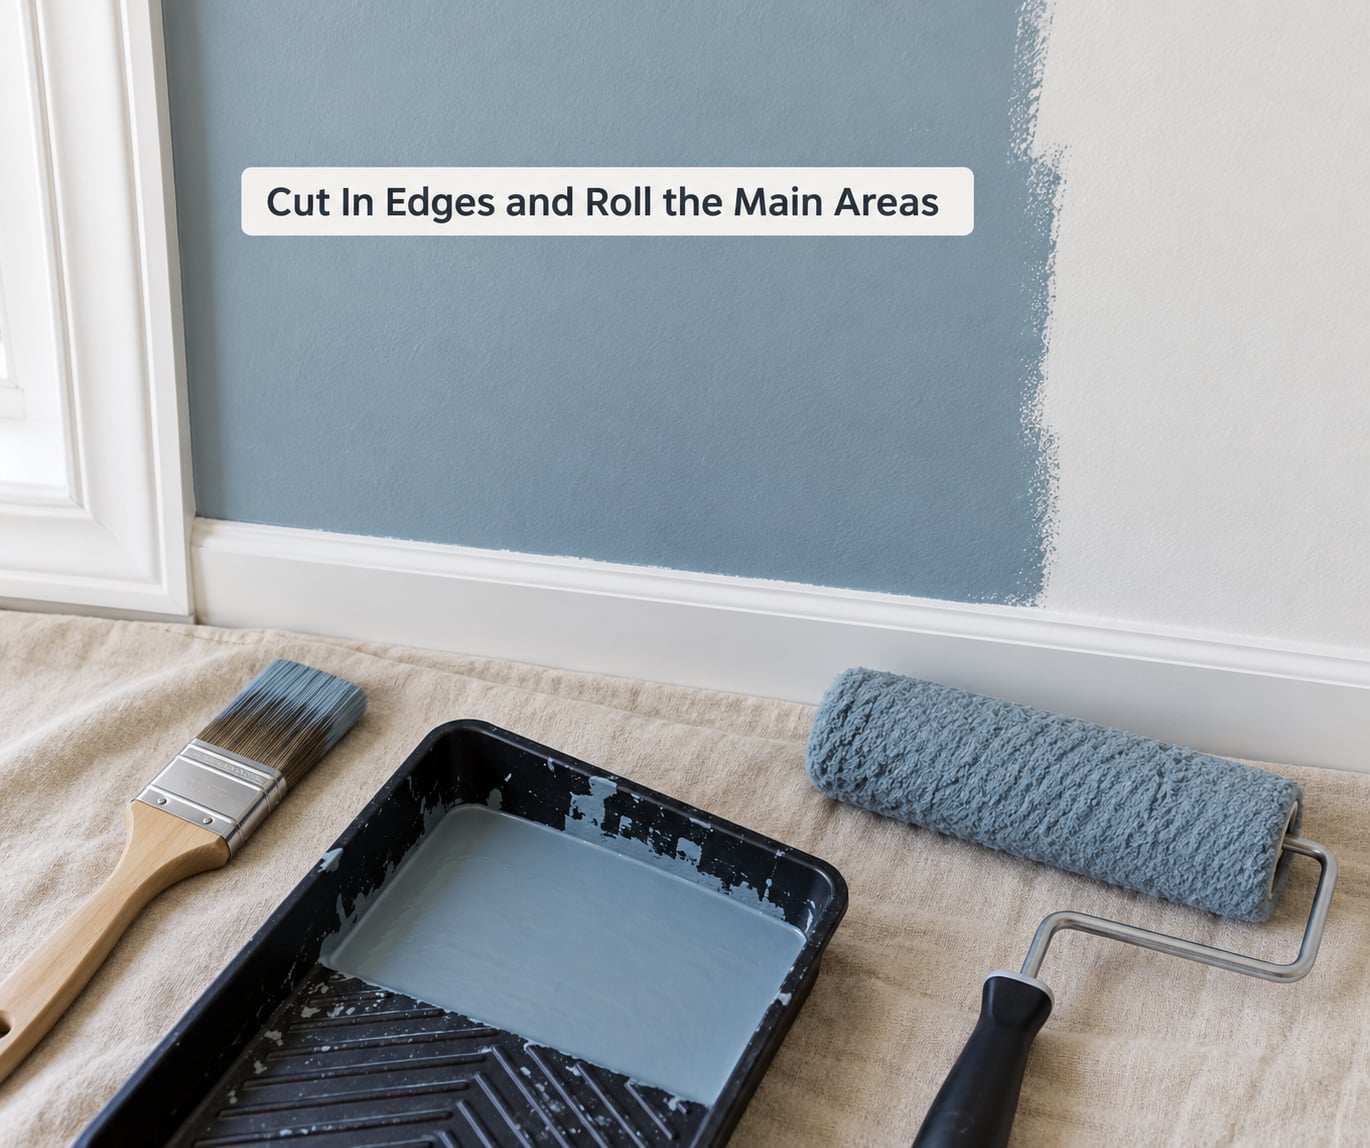
Cutting in is painting a 2 inch border around the edges with a brush, leaving the flat centre for the roller. Load the brush about a third of the way up the bristles, tap off the excess against the side of the tray, and brush a continuous line along the ceiling junction, into corners, and around casings and outlets.
The order within the cut-in matters. Start at the top, work down, then do the corners, then the bottom edge. The first inch down from the ceiling should be slightly thinner than the rest so the roller has room to overlap without pushing a ridge of paint onto the wall.
Paint the edges first and the centre last. That way the roller overlaps a small bead of brush paint rather than leaving a gap between two sections that will show as a dry lap line.
Tape is optional once you have a steady hand. Hold the brush at roughly 45 degrees, keep the bristles square to the trim, and pull the brush in one long stroke rather than scrubbing. Painters on r/paint point out that a beginner can brush the entire edge of a wall and roll straight over it without waiting, which is faster than taping every run in a lived-in house.
Apply an Even First Coat
Roll in a W pattern to spread the paint out, then fill the gaps by crossing back over the same area with straight strokes until no bare drywall shows. Work in sections three to five feet wide, starting at the top of the wall and rolling down to the floor before stepping across.
Always roll from the unpainted area into the wet edge, never the other way. Rolling a dry stroke into wet paint pushes a ridge onto the wall, and that ridge dries into a lap mark — the streaky, slightly darker stripe that gives away a first attempt.
Reload the roller every three or four strokes, roll it against the tray rib to even out the load, and wipe the excess on the tray ramp. An overloaded roller squeezes paint out of the bottom of the sleeve and leaves runs down the wall that will need a full coat to hide.
Use steady, light pressure. Let the sleeve do the work. Before the coat dries, walk the wall from an angle with a work light or in the room’s normal daylight and touch out any missed spots, drips and thin patches while the paint is still workable.
Let the First Coat Dry and Prepare for the Second
Dry to the touch is not the same as ready to recoat. Paint feels dry long before the solvent has left the film, and a second coat applied too early mixes into the first and leaves a tacky, uneven surface that never levels properly.
The label is the authority on timing, and the numbers move with temperature, humidity, airflow, coat thickness and the surface underneath. Cold, damp, poorly ventilated rooms take far longer than a warm dry one.
| Stage | Water-based interior latex | Oil-based enamel |
|---|---|---|
| Dry to the touch | About 1 hour | About 4 to 6 hours |
| Ready to recoat | 2 to 4 hours | 24 hours |
| Safe for light furniture contact | 24 hours | 24 hours |
| Full cure | 2 to 4 weeks | Up to 7 days |
Test a spot in a closet or behind the door: press a fingertip lightly. If it feels tacky or cool, wait. Higher humidity and thicker application both push these times out.
Scuff the dried walls lightly with 150 to 220 grit if the surface feels furry or you are changing colour types, which knocks down bumps and gives coat two something to grip. On a straight repaint in the same product with a clean wall, skip the sanding — it adds dust and risk for no gain.
Apply the Final Coat and Finish Neatly
The second coat goes on lighter than the first. Paint the wall in the same three-to-five-foot sections, keep the same loading rhythm, and stop as soon as the colour evens out. A second coat exists to level the surface, not to build thickness.
Preserve the cut-in line by rolling toward it, not across it. Wipe any drip with the corner of your brush while it is still wet, and step back from a few feet to find missed patches before you put the roller down.
Look for four things when the walls are finished: lap marks, missed spots, sheen variation from patchy application, and a soft or dragging texture where the nap skipped over texture. A moveable work light aimed flat across the wall finds more of these than overhead lighting does.
Let the paint cure before pulling tape. Peel it at roughly 45 degrees while the edge is still slightly firm but not brittle, slowly, and score the line with a utility knife if any of it feels bonded. Do not push furniture against a wall for at least 24 hours, and give heavy pieces a week or more before sliding them.
Common Mistakes and How to Fix Them
Every painter leaves marks. The difference between a pro job and a rushed one is what happens in the ten minutes after you spot one.
The rule of thumb from the Screwfix community: fix what is still wet with more paint, fix what is dry with light sanding and a touch-up. Redo the whole wall only when the failure is structural, such as a coat that has already peeled or blistered.
Watch for the specific patterns below, because each one has a different cause and a different fix. Roller marks, brush lines, bleeding at the tape and sagging all look like a bad result but come from opposite mistakes.
How to Paint a Room Without Roller Marks
Roller marks and lap marks come from three habits: overloading the roller, losing the wet edge, and going back over paint that has started to set.
Cut thin and roll tight. Stir the paint thoroughly, load less than you think, and keep moving at a steady pace without pushing the sleeve hard against the wall. Painters on r/Housepainting101 repeat it constantly: no over-brushing, no over-rolling, and finish the whole section before starting the next one.
Brush lines show up for a different reason — a brush held too far from the surface, or water-based paint starting to skin before you finish your stroke. Painters on Paint Talk sometimes add a small amount of extender such as Floetrol to slow the skinning. Fix dried brush marks by sanding lightly with 180 to 220 grit and touching up with a small roller, sometimes twice.
If a tape line bleeds, the fix is a clean razor-cut along the edge and a repaint of the trim rather than a whole wall. If paint sags or runs, leave it to dry, sand it back level, and roll a fresh coat over it.
Common Mistakes
Most amateur-looking paint jobs trace back to one of six problems. Each has a cause you can name and a fix that takes minutes if you catch it early.
| Symptom | Cause | Fix |
|---|---|---|
| Roller marks and stippling | Overloaded roller, too much pressure, or loose sleeve fibres | Wash and dry a new sleeve first, load less, lighten pressure, use light pressure and even passes |
| Lap marks and streaks | Rolling into paint that has started to dry, or going back over a section | Keep a wet edge, work in 3 to 5 foot sections, roll from dry area into wet paint |
| Uneven colour, patchy walls | Paint not stirred, or the first coat never dried before recoating | Stir every can for two minutes, follow the recoat window on the label, apply a full second coat |
| Drips and runs | Brush or roller overfilled, or excess paint collecting on the sleeve end | Tap off the brush, roll out the excess on the tray rib, wipe drips while wet |
| Peeling or blistering | Paint applied over dust, grease, or an unprimed bare patch | Scrape back to sound material, clean thoroughly, prime bare or patched areas, repaint |
| Sticky or tacky wall | Second coat applied before the first dried, or a cool humid room | Give it 24 to 48 hours more, improve airflow, sand the tacky film and roll a fresh coat |
Tell wet problems from dry ones before you act. While the paint is still workable, a missed spot is simply more paint and a drip is a wipe with the brush corner. Once it is dry, everything means sanding: 150 to 220 grit, feather the edges, dust it off, then roll or brush a fresh coat over the repair.
A few preventions are worth more than any repair. Stir every time you pick the can up. Keep the tray lined so you are not cleaning between coats. Tape or do not tape, but commit to one method for the whole wall rather than switching halfway. And put a fan in the room — moving air levels a wet film and shortens the wait before coat two.
Frequently Asked Questions
How many coats of paint should I put on a room?
Two coats is the standard for interior walls, always. One coat over bare drywall or a dark-to-light colour change will look streaky no matter how good the paint is. If you are repainting in the same colour over sound walls and the surface is clean, one coat can work, but the finish rarely has the same depth.
How long should interior paint dry before recoating?
Water-based interior latex usually needs two to four hours before recoating, and many labels stretch that to four hours for best results. Oil-based enamel needs a full 24 hours. Cold temperatures, high humidity and thick coats all extend the wait, so check the label on your specific can rather than trusting a general rule.
Do I need to prime before painting a room?
Usually not for a straight repaint in the same product over clean, sound walls. Always prime bare drywall, patched areas, repaired water stains and repairs filled with filler, because those surfaces absorb differently and show through. Switching from a water-based paint to oil-based, or going dark over light, is also a case where a primer helps.
What paint sheen is best for walls in a home?
Eggshell suits most living rooms and bedrooms because it is forgiving to apply and easy to scrub. Satin is tougher and better for hallways, kids’ rooms and kitchens. Flat paint belongs on ceilings, and semi-gloss is a sensible choice for bathrooms, trim and doors where washability matters more than hiding imperfections.
How long should I wait before moving furniture against painted walls?
Wait at least 24 hours before pushing anything against a fresh wall, and give heavy pieces a full week if they will touch the surface. Paint continues to cure for weeks, so a scuff or nick in the first couple of days is easy to touch up. Pull tape while the edge is still slightly firm rather than fully cured.
Start With a Clean, Protected Work Area
Everything above comes back to the first hour of the job. Inspect the walls and decide what needs washing, patching or sanding, move and cover the furniture, lay the drop cloth with overlap, and check that the room is dry and ventilated before a single brush goes near it.
Then gather the right tools before opening the can: a 2.5 inch angled brush, a 3/8 inch nap roller on a frame, a lined tray, an extension pole, and tape if you want a guaranteed straight trim line. Measure the room and buy one coat more paint than the label says you need.
The rest is rhythm. Ceiling, trim, walls. Cut in, then roll. Two thin coats with a full recoat window between them, and a walk down the wall with a work light before the paint dries.
Patience is the part beginners skip. Letting coat one dry properly, keeping the wet edge, and leaving the finished walls alone for a day will do more for the result than any tool in the kit.