To read a tape measure, find the last numbered whole inch before your material ends, then see which of the shorter tick marks the edge lines up with. The longer the line, the bigger the fraction: 1/2 inch first, then 1/4, then 1/8, then 1/16. Ten minutes of practice is enough to make it automatic.
A misread fraction is small on its own, usually 1/16 inch, but it repeats across every cut in a job. A door that hangs 1/8 proud, a row of tile that runs out two feet early, a shelf that leans, all of it traces back to one bad read at the blade.
Table of Contents
- What You Need
- Step-by-Step: How to Read a Tape Measure Accurately
- Step 1: Choose the Right Units and Scale
- Step 2: Start at the Correct Measuring Point
- Step 3: Read the Nearest Mark
- Step 4: Check and Record the Measurement
- Common Mistakes
- Frequently Asked Questions
- How do I read the small lines on a tape measure?
- What does the red marking on a tape measure mean?
- How do I read tape measure fractions without guessing?
- Should I measure from the beginning of the hook or from zero?
- How do I convert inches and fractions to decimal inches?
- Why does my tape measure seem to measure one inch short?
What You Need
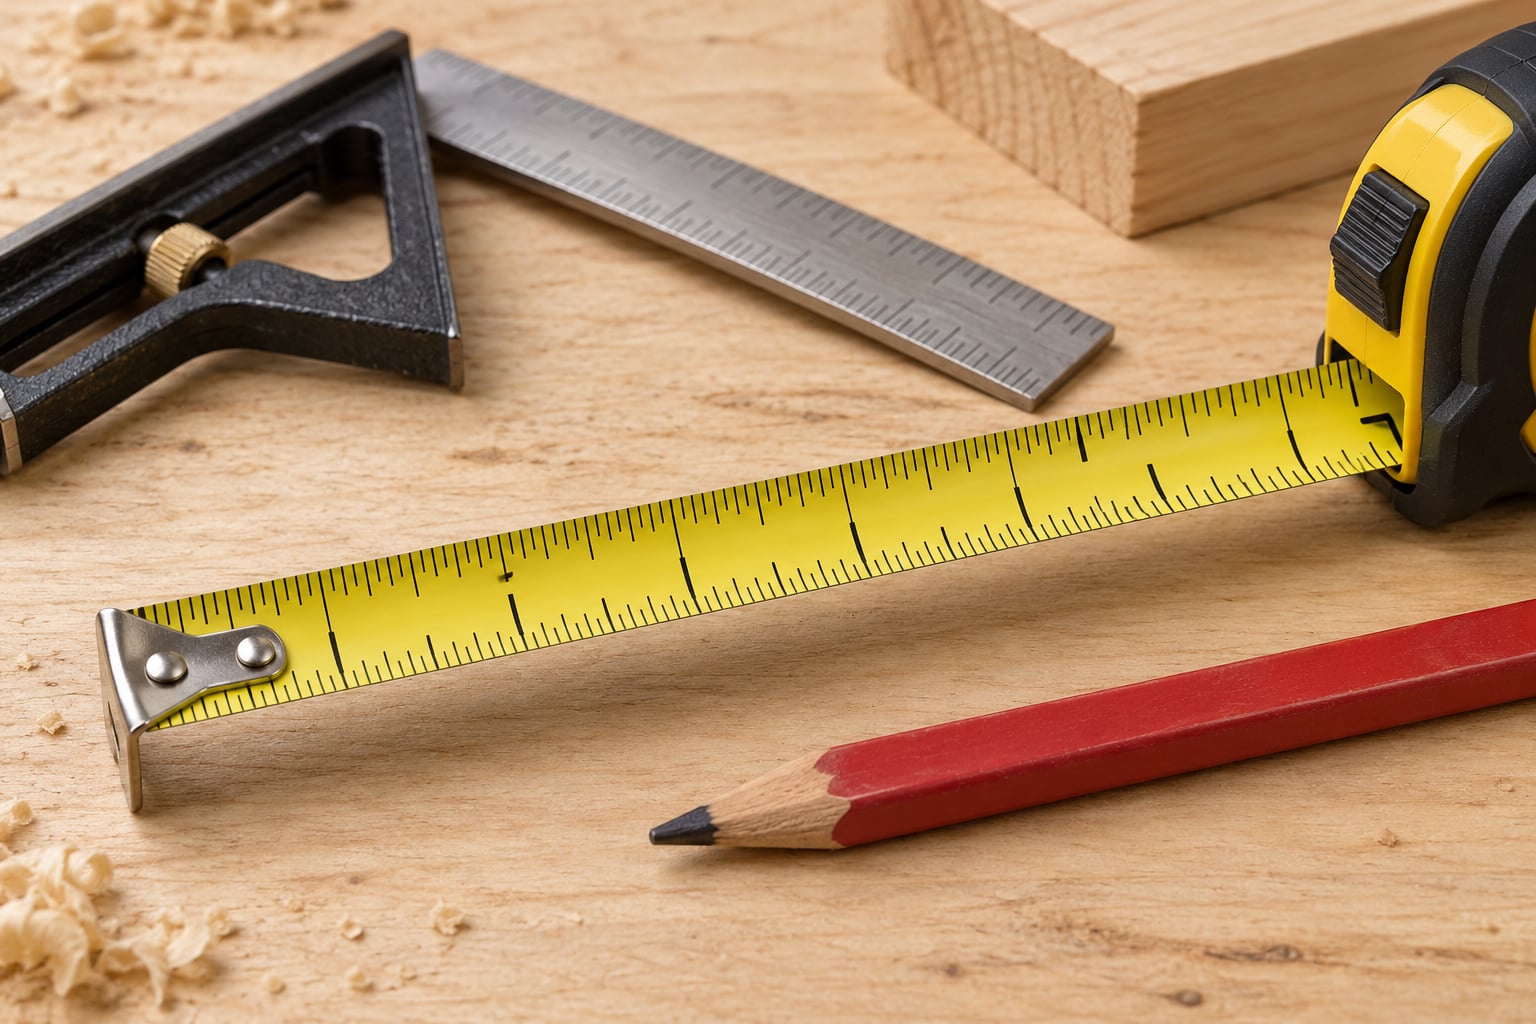
You do not need much. A 25 foot tape with 1/16 inch graduations handles almost every household job, and a longer one only earns its place if you work on floors, roof trusses or long timber.
- A tape measure. Look for 1/16 inch graduations on the imperial edge. Fine 1/32 tapes exist and are useful for trim and cabinetry, but they are harder to read and are not needed to be accurate on most jobs.
- A flat, clear surface. Measuring on a cluttered bench or a pile of offcuts is how you lose an inch.
- A sharp pencil and a flat board. You mark the line on the material, and the flat board keeps the mark straight.
- A straightedge or combination square. It turns a wobbly pencil line into one that runs true.
- Your phone or a pad. Write the number down immediately. Memory is worse than the tape.
Light matters more than people expect. A dim garage is how you end up with 12 5/8 instead of 12 9/16, and you will not find out until the shelf is already cut.
Step-by-Step: How to Read a Tape Measure Accurately
Step 1: Choose the Right Units and Scale
Most tapes are dual scale. One edge is imperial inches with fractions, the other is metric millimetres and centimetres, and they are printed in different colours so you do not confuse them. Work out which scale suits the job before you start: framing, trim and carpentry live in inches, while most of the world builds in millimetres.
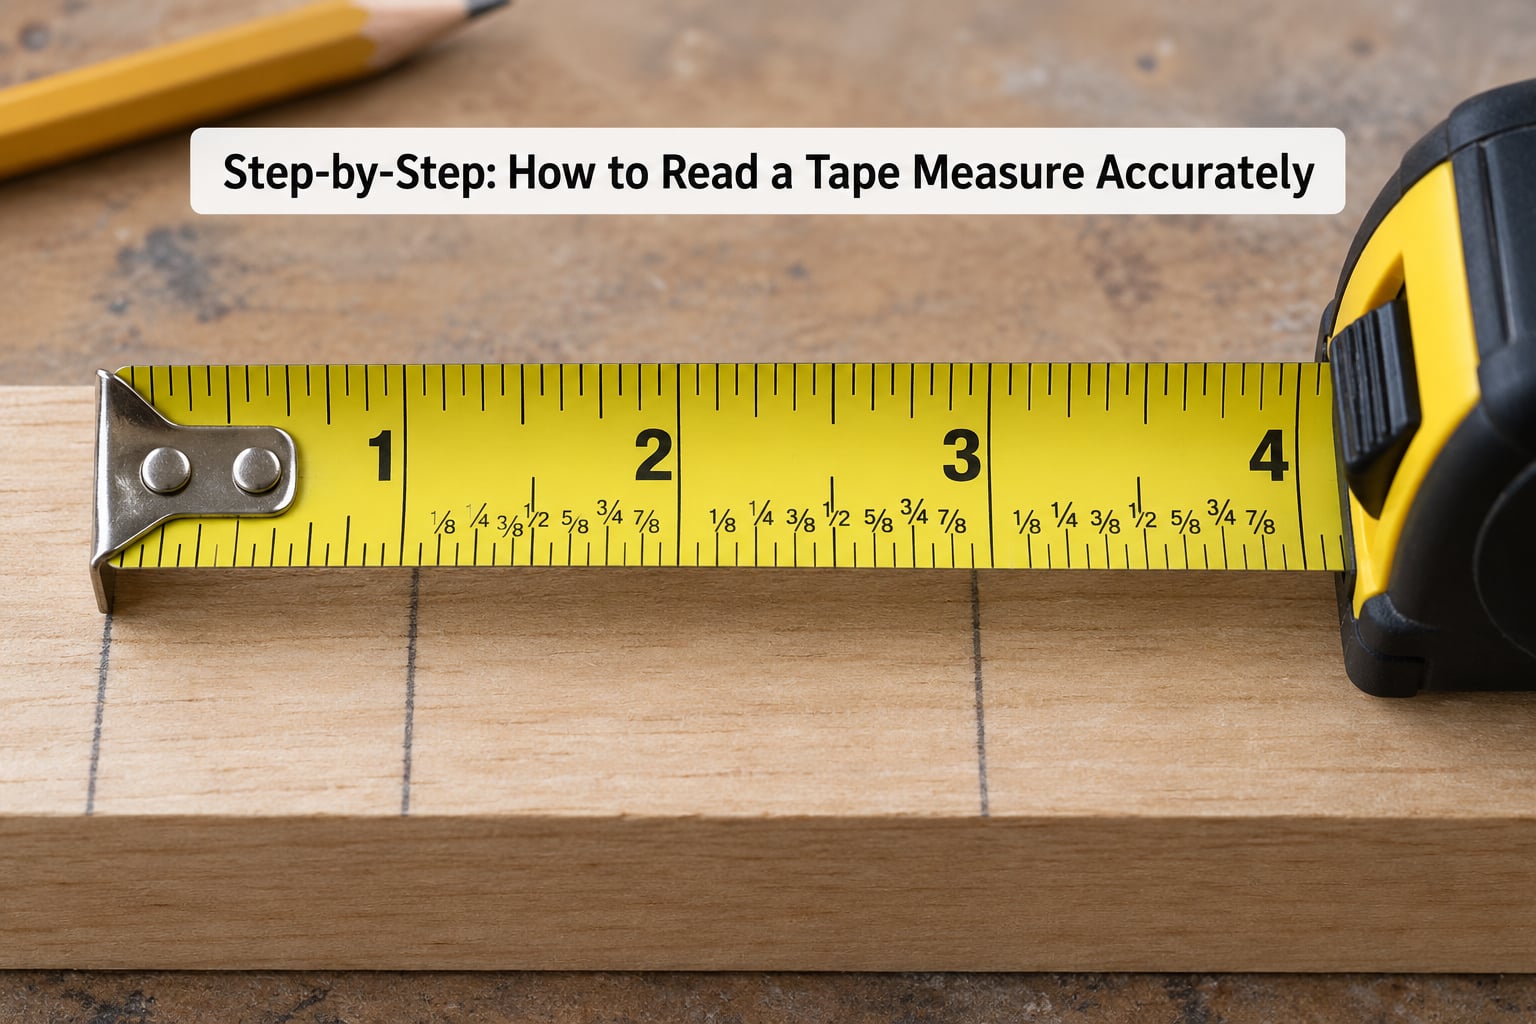
The numbered marks are your anchor points. On the imperial edge those are whole inches, with a longer line at every half inch between them. Everything shorter than that is a fraction, and the ladder runs 1/2, 1/4, 1/8, 1/16 as the lines get shorter. The metric edge is much simpler: numbered centimetres with ten small millimetre lines between them.
Some tapes also carry marks in red and black that are not measurements at all. The red numbers count in 16 inch steps, which is standard US stud spacing on centre. The small black diamonds repeat every 19.2 inches, which is a layout spacing used for roof trusses and some joist layouts. An arrow near the start of the tape marks a full foot, handy when a tape runs long and you need to find where the zero has moved.
Step 2: Start at the Correct Measuring Point
Every measurement has a zero point, and most errors start there. For an outside measurement the hook sits against the near end of the material with the tape running out along it. For an inside measurement, like a window reveal or the gap between studs, you push the case into the corner and read the length of tape sticking out, then add the case width printed on the housing.
The end hook is not fixed, and that is deliberate. It slides by exactly its own thickness so that a measurement taken from the outside of the hook equals one measured from inside the case. That is why the hook appears to shift when you hook it onto something and then pull the tape away. Let it settle until it stops moving before you read anything, or you will add a fraction of an inch that is not real.
For the hook to work, the corner has to be square and the blade has to be pulled straight against it. Hold the case steady with one hand rather than trusting the tape to stay put on its own.
Step 3: Read the Nearest Mark
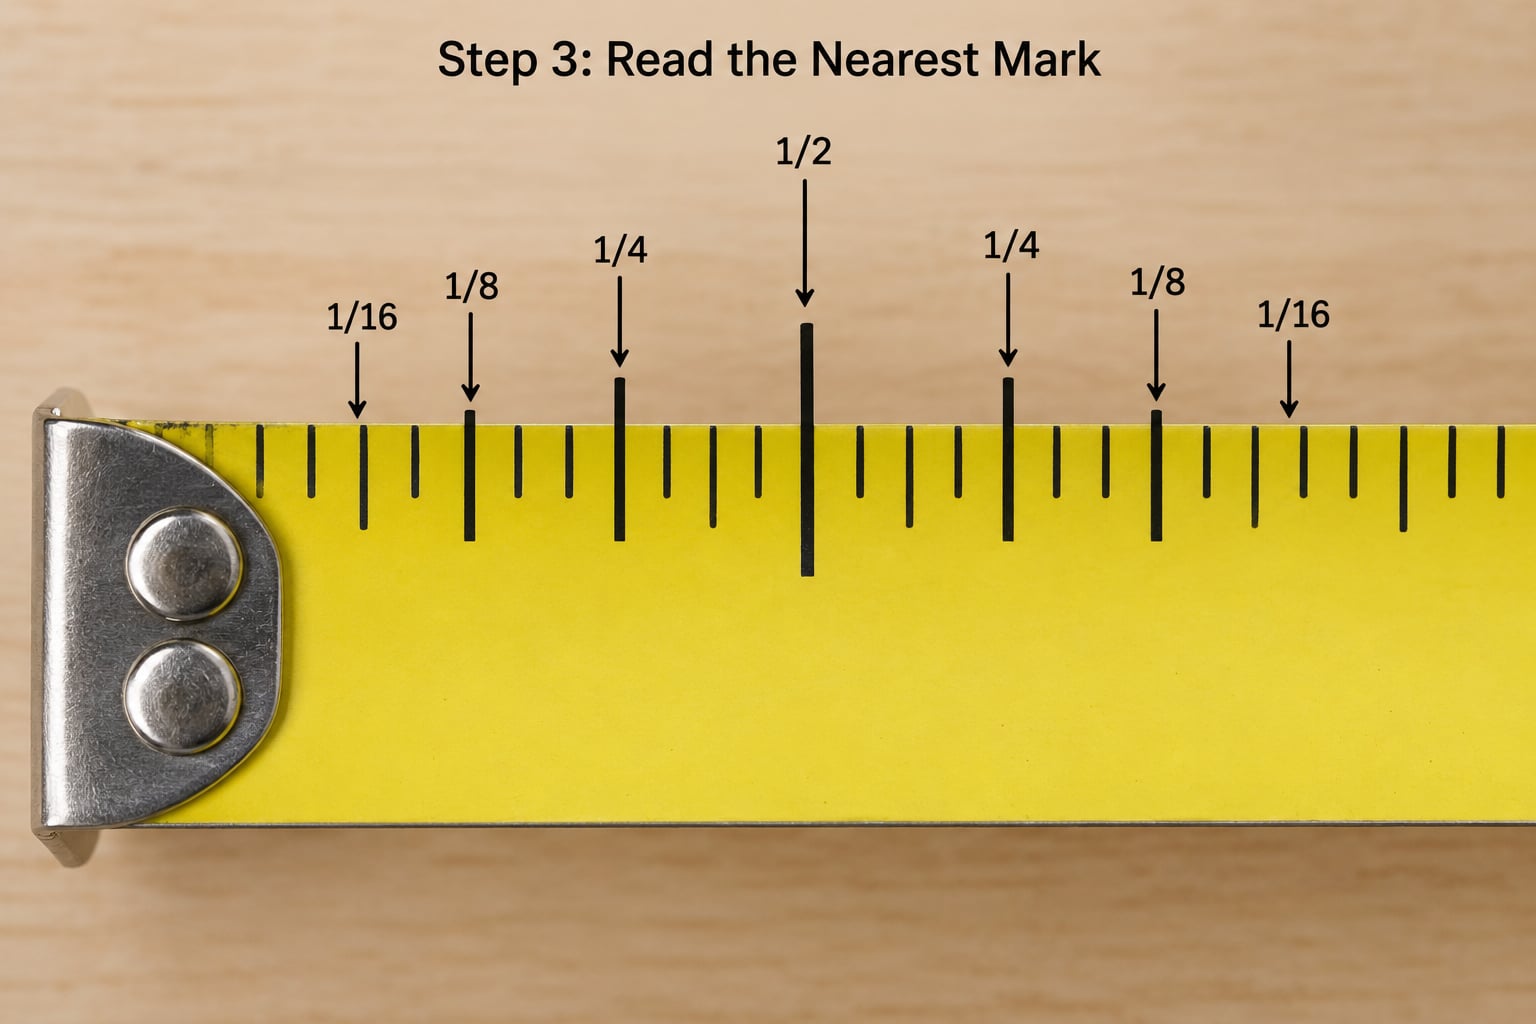
Read from big to small. Find the last whole inch number before the end of the material, then look at the shorter lines between that number and the next. If the edge lines up with the longest short line, it is 1/2. If it sits between the half inch and the next inch, it is some combination of 1/4, 1/8 and 1/16.
The full tick hierarchy in one list:
- Whole inch (1): the long numbered line, one inch apart.
- Half inch (1/2): the longest line between the numbers, exactly halfway.
- Quarter inch (1/4, 3/4): a medium line, halfway between the inch and the half inch.
- Eighth inch (1/8, 3/8): a short line, halfway between the quarter and the half inch.
- Sixteenth inch (1/16, 3/16): the shortest line, filling the gap between eighths.
When two short lines look identical, do not guess. Count from the half inch mark: the tick immediately before it is 7/16, the next one back is 6/16, which is 3/8. Counting outward from a line you already know beats staring at a crowded blade every time.
Here is how a few real readings resolve. The end of a board lands on the fifth short line past 12 inches and a half, so you have 12 plus 1/2 plus 1/8, which is 12 5/8. A trim end stops one line short of 13, giving 12 15/16. If a drawing says 0.625 inches, that is 5/8, and if it says 1.75 inches, that is 1 3/4. Decimals are fractions with the denominator left off.
| Fraction | Decimal inches | Millimetres |
|---|---|---|
| 1/8 | 0.125 | 3.18 |
| 1/4 | 0.25 | 6.35 |
| 3/8 | 0.375 | 9.53 |
| 1/2 | 0.5 | 12.7 |
| 5/8 | 0.625 | 15.88 |
| 3/4 | 0.75 | 19.05 |
| 7/8 | 0.875 | 22.23 |
| 1 | 1.0 | 25.4 |
On the metric side, read the same way. The numbered marks are centimetres, the ten lines between them are millimetres, and a half line between millimetres gives you 0.5 mm on a fine tape. Twenty millimetres is not one inch, it is about 0.79 inches, which is why a metric-only tape is the gentler place to start.
Step 4: Check and Record the Measurement
Write the number down the moment you read it, in full, with the fraction. A carpenter’s pencil stays visible on a dark board and does not punch through finished surfaces the way a pen does.
Mark your line with a firm stroke across the material, then run a straightedge along it so you know the cut line is straight rather than curved. Traditional carpenters mark with a crow’s foot, two short strokes across the line, which is visible from either side of the board and does not disappear into sawdust.
Then measure the same dimension twice, from the other end if you can. For a long board it is worth checking a second time from the far end to catch a miscount. Carpenters say measure twice and cut once, but the reason is duller than the slogan: it is the only cheap insurance against a bad read.
Common Mistakes
Starting from the wrong edge. Measuring a board from a rounded or factory-soft edge gives you a number that drifts. Start from a true squared end, and cut one true end first when you have to start from rough timber.
Confusing eighths with sixteenths. The eighth marks sit close to the quarter marks because they are spaced at a quarter of the gap. Count from the half inch line instead of eyeballing the length of the line.
Letting the blade bend or sag. A curved tape measures along its curve, which is longer than the straight distance. Keep the blade flat against the material or pull it taut.
Reading at an angle. This is parallax error, and it is the sneakiest of all. When your eye is above or below the mark, the line appears to shift. Hold your eye level with the blade, directly over the mark. A couple of millimetres of false reading is enough to hang a door out of square, which is why experienced finish carpenters sight along the blade before they mark.
Trusting a loose hook. Old tapes get dropped and the end hook goes slack. Test yours by measuring a known good distance twice, once hooked on the outside and once inside the case. If the two readings disagree, the hook has moved and the tape is lying to you by a fraction of an inch.
Working from an inherited tape with unfamiliar markings. Engineer’s tapes and some older continental tapes use different graduation and numbering. Spend thirty seconds confirming the zero point and the unit before trusting a number from it.
Two habits fix most of it. Keep the blade clean and dry so marks are visible, and make your pencil mark before you release the tape. Beginners are not expected to know fractions instantly, and the people who read a tape quickly are simply the ones who stopped guessing and started counting from the half inch line.
Frequently Asked Questions
How do I read the small lines on a tape measure?
Start at the numbered inch mark and work toward the edge of your material. The longest line between two numbers is 1/2 inch, the next longest marks quarters, then eighths, and the shortest lines are sixteenths. When lines look identical, count the ticks left or right from the half inch mark instead of guessing by line length.
What does the red marking on a tape measure mean?
Red numbers are stud spacing, not length. They appear at 16 inch intervals, which is the standard on-centre distance between wall studs in North American framing. Small black diamonds repeat every 19.2 inches for roof truss and joist layout. If your studs are not spaced at 16 inches, ignore the red marks and measure each one.
How do I read tape measure fractions without guessing?
Count from a mark you already know instead of judging tick length. One tick to the left of the half inch line is 7/16, two ticks left is 6/16 which equals 3/8, and one tick right of the half inch is 9/16. Memorise the eighth-inch positions on both sides of the half inch and the rest follows quickly.
Should I measure from the beginning of the hook or from zero?
Always measure from zero, which is the very tip of the end hook. The hook slides by its own thickness so that outside and inside measurements agree, so it will drift a fraction of an inch before it settles. Push it against the material and wait until it stops moving, then take the reading.
How do I convert inches and fractions to decimal inches?
Divide the numerator by the denominator, then add it to the whole inches. Three quarters is 3 divided by 4, which is 0.75, and 13/16 is 0.8125. One inch is exactly 25.4 millimetres, and 20 millimetres is about 0.79 inches, so metric and imperial scales never quite line up.
Why does my tape measure seem to measure one inch short?
A tape that uses a centimetre scale is probably not short, it is just being read on the wrong edge, or the hook has come loose and is eating a fraction of an inch every time. Measure a known length, such as a table edge, in both units and compare. If the hook feels loose or the case is cracked, replace the tape rather than adjusting for it.
Start with the simplest possible habit: find the last whole inch, then count from the half inch line rather than guessing which short line you are looking at. Everything else, including feet and inches together and metric readings, follows from that one move.