To clean a garbage disposal, switch off the power first, pull out what you can reach with tongs, scrub the blades and the rubber splash guard with dish soap and a long-handled brush, then deodorize with half a cup of baking soda and one cup of distilled white vinegar. Allow about 30 minutes for a full clean, and 10 if all you want is the smell gone.
The reason most people struggle is that they try to kill odor with chemistry alone. Baking soda and vinegar work well on the smell, but they do nothing for the hardened grease coating the blades, and that grease is what holds the smell in the first place.
A note on scope: this guide covers routine cleaning and odor removal on a working unit. If the disposal will not drain or will not run at all, stop after Step 1 and read the troubleshooting note near the end.
Table of Contents
- What You Need
- Step-by-Step
- Step 1: Turn Off the Power and Check for a Jam
- Step 2: Clean the Splash Guard and Drain Opening
- Step 3: Scrub the Inside Without Reaching Into the Blades
- Step 4: Flush and Deodorize the Disposal
- Step 5: Restore Power and Test the Unit
- What the black gunk actually is
- Clearing a jam with an Allen wrench
- When cleaning is not enough
- Common Mistakes
- Frequently Asked Questions
- Do I need to remove the blades to clean a garbage disposal?
- Is vinegar safe for cleaning a garbage disposal?
- How do I get a bad smell out of my garbage disposal?
- What should I do if my garbage disposal hums but does not spin?
- How often should I clean a garbage disposal?
- Can I use bleach or drain cleaner in a garbage disposal?
- Conclusion
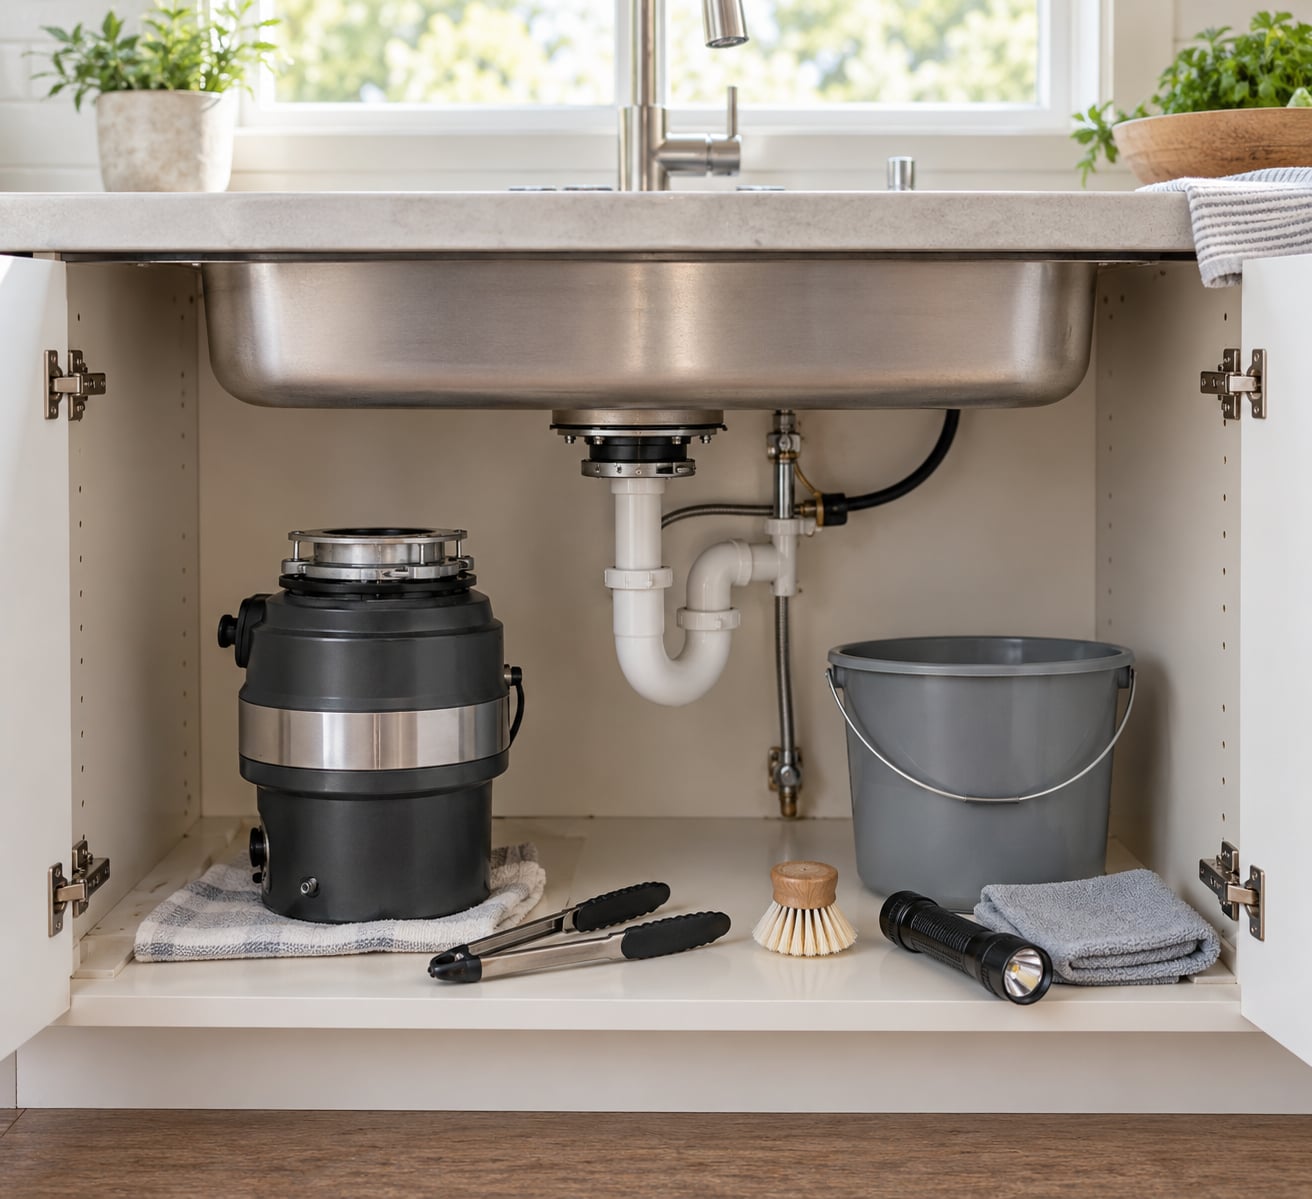
What You Need
None of this is exotic, and most of it is already in a kitchen drawer.
- Cut-resistant or rubber gloves
- A flashlight, so you can see past the splash guard
- Long-handled tongs, plus a pair of pliers for stubborn bits
- A soft nylon brush or an old toothbrush that has seen better days
- Warm water and a few drops of mild dish soap
- Baking soda and distilled white vinegar
- A soft cloth or paper towel for the sink flange
- A small bucket for drips under the sink
- An Allen wrench or hex key, the same one that likely came with the unit
Before anything else, find out how your disposal is powered. Most sit on a wall switch under the sink, but plenty run off a breaker panel, and some plug into an outlet behind the sink cabinet. Knowing which one you have decides whether Step 1 takes ten seconds or a flashlight hunt.
The rule that matters more than any other: nothing goes into the chamber that could become a projectile. No hands, no knives, no wooden spoons, no bottle caps. If you cannot see it, you do not poke at it.
Step-by-Step
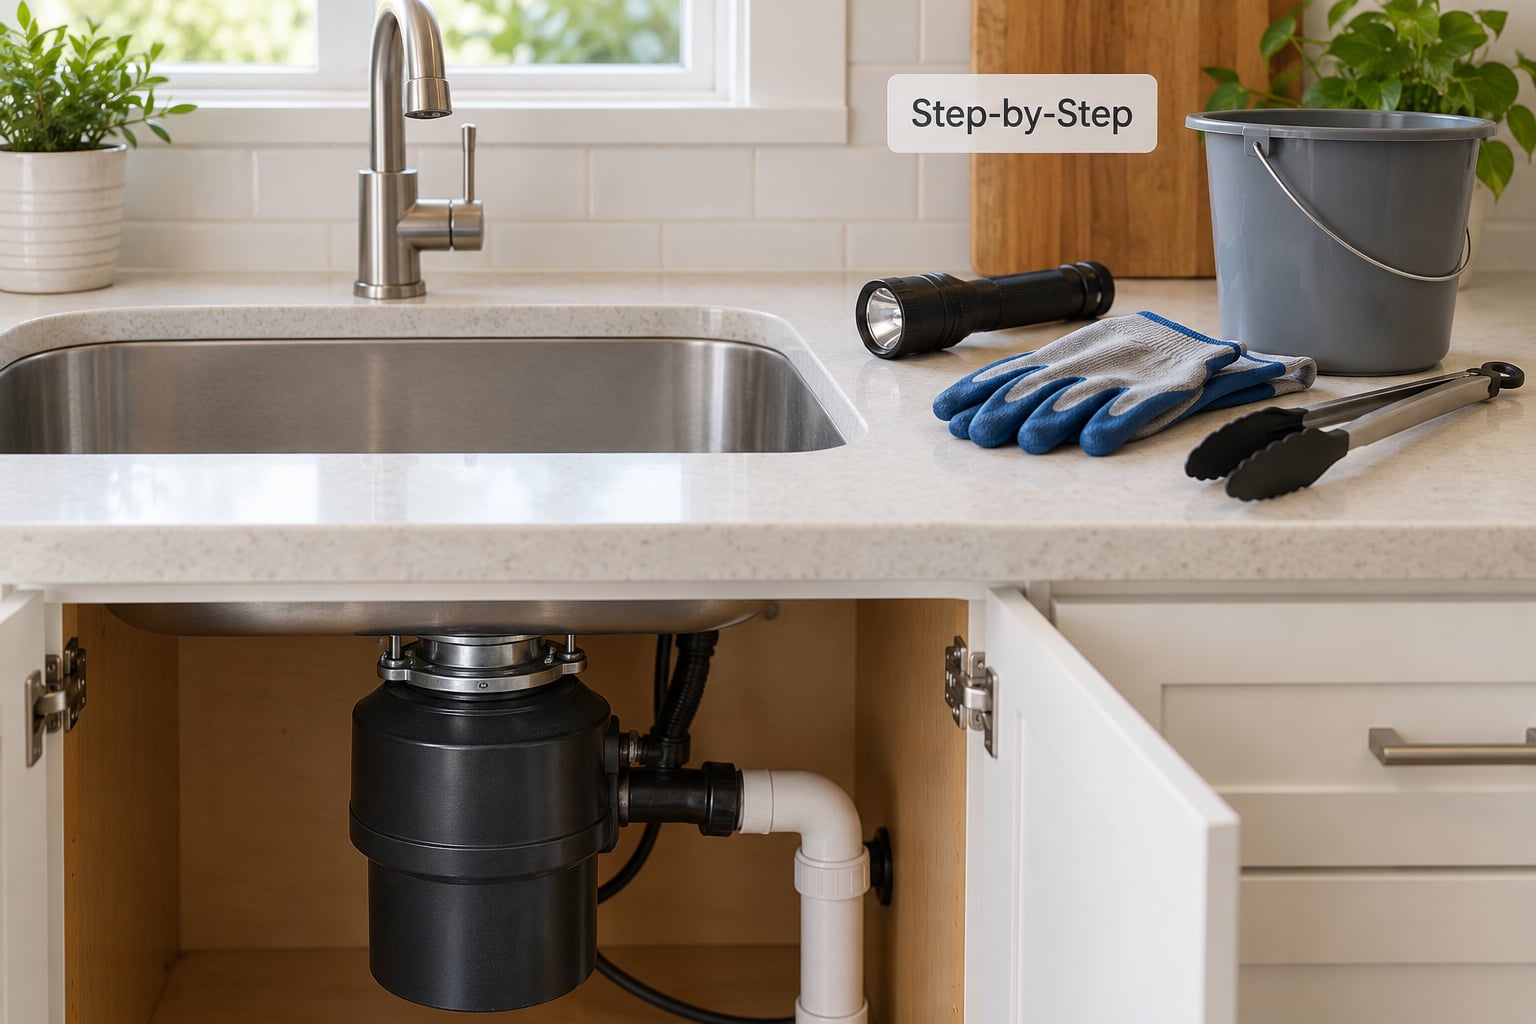
Work in this order. Each stage depends on the one before it, so skipping ahead leaves you deodorizing a chamber that is still coated in grease.
Step 1: Turn Off the Power and Check for a Jam
Flip the wall switch to off, or shut off the breaker that serves the sink. Then try the disposal from the switch once more just to feel that nothing responds.
Shine the flashlight down the drain. If you see an object sitting on the blades, pull it out with tongs. If the blades sit at an angle instead of level, the motor probably jammed trying to chew that angle, and it worked itself into a bind.
A hum with no spin, a repeated click, or a shaking housing all mean stop. Do not press the reset button yet. Resetting a motor that is still loaded just heats the windings, and the second failure is harder on the unit than the first.
Step 2: Clean the Splash Guard and Drain Opening
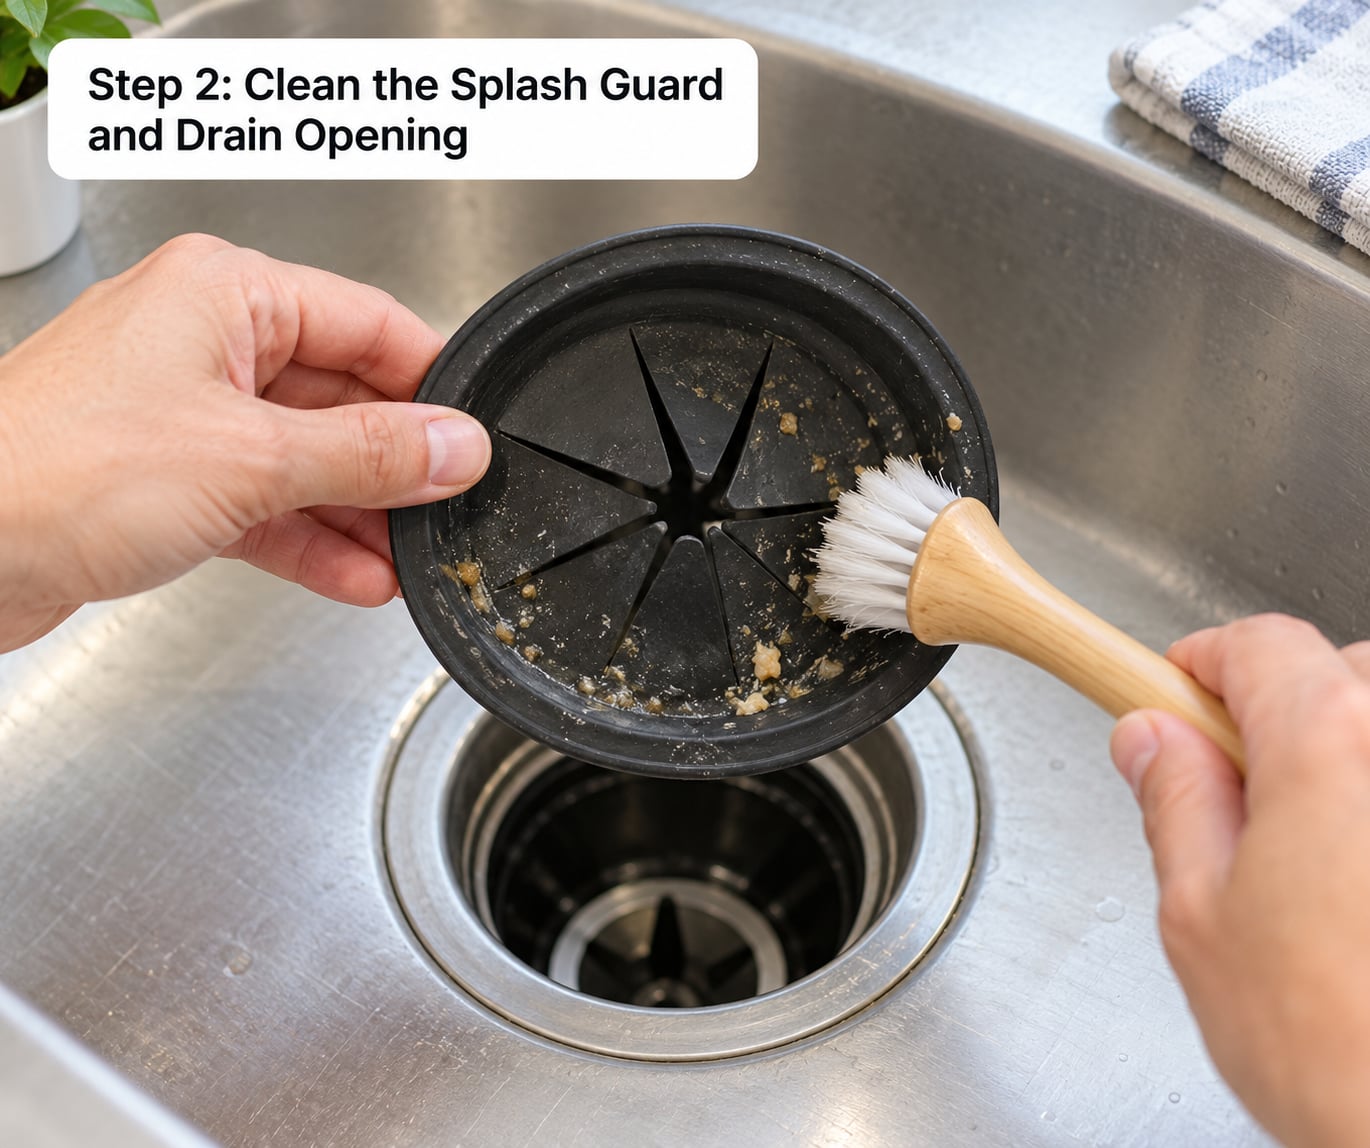
The black rubber flap assembly is the dirtiest part of the whole appliance and the top hiding place for the bacteria producing your kitchen smell. On most units you lift it straight out of the drain opening, though some clip into the throat plate, so follow whatever your owner’s manual shows.
Hold it under warm running water and work a soft brush into the folds and along the rubber lip where it seals. Dried paste collects there in a ring, and it rinses off easily once it is loosened.
Wipe the sink flange and the visible rim of the drain opening with the same soapy cloth. You will see more film than you expected.
Pour a slow stream of warm water down the drain to rinse the loosened residue. Keep every cleaner and tool out of the motor housing at the bottom of the chamber. Nothing you use here should travel past the throat plate.
Step 3: Scrub the Inside Without Reaching Into the Blades
Dab dish soap into the bristles of the long-handled brush and scrub the inside walls of the chamber with the motor off. Reach under and behind the splash guard flap, where a thin layer of grease hides from view and traps food particles.
For the blades, use a brush stiff enough to move grease but soft enough that it cannot scratch. Many manufacturers sell a purpose-made disposer cleaning tool, a short handle with a brush on the end, and that tool reaches where a dish brush will not.
Work around the blades rather than between them. With the tongs, pull out anything the brush has loosened. Never insert a knife to pry, never use a screwdriver to free a stuck blade, and never put a hand in the chamber even with the motor off.
Rinse with warm water while you scrub so the soap carries away instead of forming a new layer. You will know the scrub worked when the chamber walls look like the rest of your sink instead of a dull gray film.
Step 4: Flush and Deodorize the Disposal
Run cold water for about 15 seconds to clear the chamber. Cold water keeps grease solid so it moves toward the drain rather than re-coagulating where it sits, which is what happens if you use hot water while the motor is about to run.
Pour in a small squeeze of mild dish soap and let it sit for a minute. Then add half a cup of baking soda, followed by one cup of distilled white vinegar. It will foam hard, which is normal.
Let it sit for 10 minutes with the power still off. The baking soda is mildly abrasive and deodorizing, and the vinegar loosens mineral film and grease. Together they neutralize odor better than either one alone.
Flush with cold water for 30 to 60 seconds, then run the disposal for 15 to 20 seconds with the water still flowing. The drain below the sink carries odor through the same pipe, and a long flush clears it.
Keep bleach, ammonia-based household cleaners, and liquid drain acid out of the chamber. The first two together release toxic chlorine gas, and all of them can reach the motor windings through the drain path.
Step 5: Restore Power and Test the Unit
Put the splash guard back so it seals flat against the flange. If your unit has a red reset button on the bottom of the motor housing, and you did find a jam earlier, press it now. Many units also have a small black thermal protector button next to it.
Restore power, then run cold water and switch the disposal on. A healthy unit spins up with a low hum and a steady whirr, with no rattling and no repeated clicking. Let it run 15 seconds before you turn it off.
Turn on the cold water and check the drain flow. If the sink backs up, stops draining, or the hum returns without grinding, stop using it and deal with the cause before it burns out the motor.
What the black gunk actually is
That dark slime on the blades and chamber walls is a biofilm: rendered grease with food particles trapped in it, colonized by bacteria that thrive in the warm damp layer. It builds up on the impellers where the blades meet the wall, in the gap between the blades, and under the rubber flap lip.
Scrubbing matters here more than any cleaning product. A deodorizer makes it smell better for a day; a stiff brush and dish soap remove the film that keeps regenerating it.
Clearing a jam with an Allen wrench
If the blades are stuck and the motor is off, insert the Allen wrench into the socket on the underside of the motor housing and turn it back and forth a few degrees at a time. Keep the power off the whole time. Rotate until the wrench moves freely, then run cold water and test the unit.
If the wrench will not move at all, something is wedged hard against the blades. Get it out with tongs before resetting anything.
When cleaning is not enough
Some smell causes are not in the chamber. The dishwasher connection hose behind the disposal traps residue and biofilm and can odor up the same sink. If a clean chamber still smells, wipe that hose where it enters the disposal and check the drain pipe under the sink for a dry sludge ring.
Fruit flies mean organic matter is sitting in standing water somewhere you cannot reach by scrubbing. Clean the chamber and the drain, then seal the disposal when it is not in use. If a unit will not drain or will not run, that is a plumbing or motor problem, not a cleaning problem.
Common Mistakes
Almost every mess I have cleaned came from one of these.
- Cleaning with bare hands. The blades can be motionless and still sharp enough to take a fingertip off. Gloves and tongs, every time.
- Mixing bleach with vinegar or ammonia cleaners. The combination releases chlorine gas. Clean with one product at a time, and pick a bottle for what is in the chamber, not for the cabinet.
- Using liquid drain cleaner. The strong acid that clears a stubborn clog can eat rubber gaskets and dull metal parts, and it reaches the motor through the drain.
- Pouring grease or oil down the drain. It congeals in the trap, and no amount of cleaning gets it back out. Pour oil into a container and trash it.
- Overloading the disposal. A sink full of food in one run binds the blades. Small amounts, one at a time, with the water running.
- Skipping the splash guard. It is the part that gets removed, so it is the part that never gets cleaned. Take it out and scrub it properly.
- Resetting a jammed motor without finding the obstruction. The overload trips again, or it does not and the windings cook. Clear it first.
Vinegar is worth a word of caution. Its acidity will slowly wear out a rubber gasket, so the baking soda and vinegar flush is a monthly deep clean, not a nightly habit. More people over-clean their disposals with vinegar than under-clean them.
A routine that works: run cold water 10 to 20 seconds after every use, scrub the blades and flap every two weeks, and do the baking soda and vinegar flush once a month. Grind a handful of ice cubes with a spoonful of coarse salt when the blades feel blunt. The ice is a mild abrasive and the salt helps clear the drain, though neither will rescue blades that have genuinely dulled.
Frequently Asked Questions
Do I need to remove the blades to clean a garbage disposal?
No. On most units the blades are fixed to the motor housing and are not meant to be removed. Scrub around them and under them with a long-handled brush and dish soap, keeping your hands out of the chamber. If a blade is loose, cracked, or no longer spins freely, that is a repair job for a technician, not a cleaning job.
Is vinegar safe for cleaning a garbage disposal?
Yes, in moderation. Distilled white vinegar loosens grease and mineral film, but its acidity slowly degrades the rubber gasket and seals. Use it as part of a monthly deep clean rather than every week, and always rinse with cold water afterward. If your splash guard is cracked or brittle, skip vinegar and use dish soap and a brush instead.
How do I get a bad smell out of my garbage disposal?
Scrub first, then deodorize. Take out the splash guard and scrub it, scrub the blades and chamber walls with dish soap and a brush, then add half a cup of baking soda and one cup of distilled white vinegar and let it foam for 10 minutes. Flush with cold water for a full minute. If the smell returns within days, the source is likely the dishwasher hose or drain pipe under the sink.
What should I do if my garbage disposal hums but does not spin?
Turn the power off at the switch or breaker immediately and stop using it. A hum means the motor is energized and loaded against something it cannot move. With the power off, check for an obvious obstruction and pull it out with tongs, then turn the Allen wrench in the socket on the underside of the motor housing to free the blades. If it still hums after a reset, call a technician.
How often should I clean a garbage disposal?
Run cold water for 10 to 20 seconds after every use so nothing sits in the trap. Scrub the blades and splash guard about every two weeks if you use the disposal daily. Do a full clean with baking soda and vinegar about once a month, and more often in summer when odors return faster. If you notice a smell or slow drainage, clean it now rather than waiting for the schedule.
Can I use bleach or drain cleaner in a garbage disposal?
Skip both. Liquid drain cleaner can corrode metal parts and reach the motor windings through the drain. Bleach works but is often used alongside vinegar or ammonia products by mistake, and that mix releases toxic chlorine gas. Dish soap for cleaning, baking soda and vinegar for deodorizing, and cold water for flushing will cover almost every cleaning job safely.
Conclusion
Start with the power off. Everything after that depends on it, and it is the one step that cannot be undone quickly.
Pull debris out with tongs, take out the splash guard and scrub it, scrub the blades and chamber walls with a brush and dish soap, then deodorize with half a cup of baking soda and one cup of distilled white vinegar. Flush with cold water, restore power, and run it briefly to confirm a normal hum and steady drainage.
Follow the owner’s manual for how your particular unit powers down and how the splash guard comes out. Once you know the order of operations, a ten-minute routine every couple of weeks is enough to keep odors and jams from ever starting.