What to do if a pipe bursts comes down to one valve and about ten minutes of work: find the main water shutoff, close it, make sure nothing electrical is in the water, and stop what you can before it soaks into drywall, cabinetry and carpet. Most of it needs no tools and no plumbing experience. The part people regret is not the burst pipe itself, it’s the hour of dripping water they spent looking for the shutoff that was hiding behind a toolbox in the garage.
Here’s the whole sequence on one screen, in case you need it right now.
- Shut off the main water supply valve. If the room is unsafe to enter, cut the power first and come back to it.
- Open several faucets and flush every toilet to relieve the pressure still trapped in the lines.
- Get everyone and every possession that matters out of the water.
- Contain what is coming out with towels, a wet vac, buckets and the door.
- Photograph everything before you start moving furniture.
- Call a licensed plumber, then start drying the space the same day.
Mold starts in wet drywall and carpet in 24 to 48 hours, so the drying is not optional cleanup. It is the second emergency.
Table of Contents
- What You Need
- What to Do If a Pipe Bursts: Shut Off the Water and Limit Damage
- 1. Confirm the Burst Pipe and Find the Main Shutoff Valve
- 2. Turn Off the Main Water Supply
- 3. Check for Electrical Hazards: What to Do If a Pipe Bursts Near Power
- 4. Drain the Affected Area and Protect What You Can
- 5. Decide Whether the Pipe Needs an Immediate Repair
- 6. Make a Safe Temporary Repair if the Leak Is Small
- 7. Dry, Inspect, and Arrange the Permanent Fix
- Common Mistakes to Skip in a Burst Pipe Emergency
- Quick Tips to Prevent Another Burst Pipe
- Frequently Asked Questions
- Where is the main water shutoff valve?
- Can I turn water back on after a pipe is repaired?
- Should I call a plumber immediately for a burst pipe?
- Is a leaking pipe an emergency?
- Will insurance cover damage from a burst pipe?
- Can a burst pipe cause mold after the water is turned off?
- Conclusion
What You Need
You need far less than people buy before an emergency. Most of it is stuff already sitting in a closet.
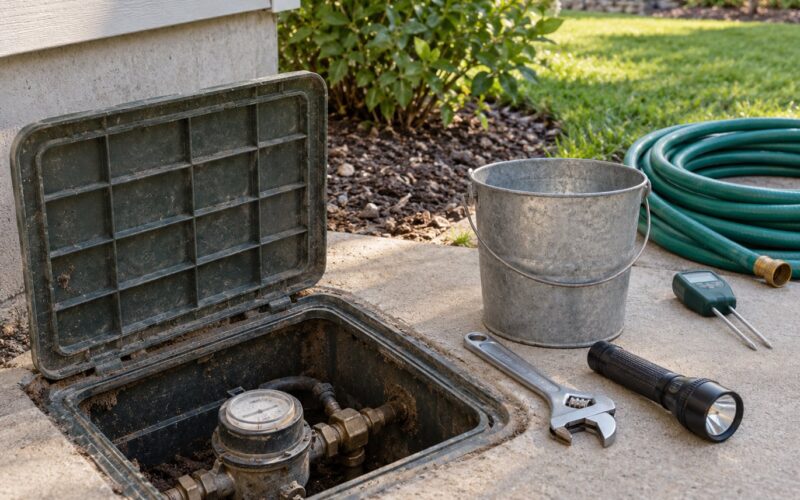
- A meter key or adjustable pliers. Some curb stop and older gate valves need a specialty key. Pliers work on most residential shutoffs.
- A flashlight. Crawlspaces, garages and the wall behind the water heater are all badly lit.
- Gloves and eye protection. A split copper line sprays. The water coming out of a burst pipe is not clean.
- Buckets, towels and rags. Towels you can twist and reuse beat ones you throw away.
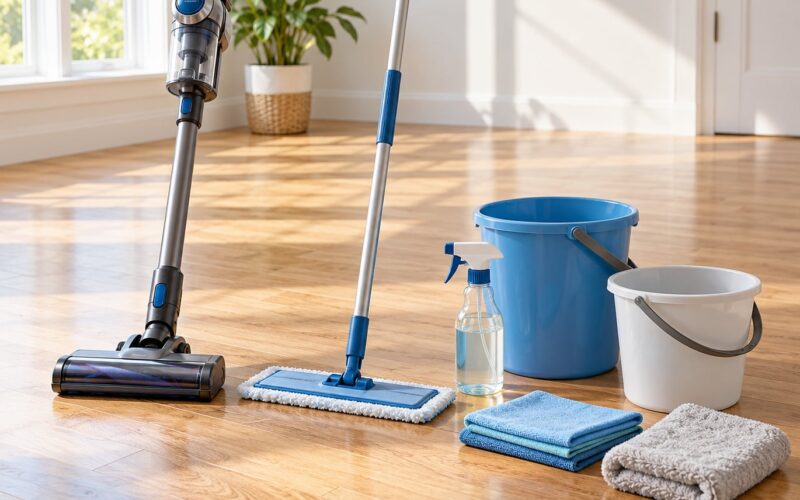
- A wet/dry vacuum and a mop. This is the single tool that actually removes water instead of pushing it around.
- A dehumidifier and a box fan. For anything past a small closet, moving air is what gets the space dry.
Optional, and only useful for a small temporary patch: an adjustable wrench, a repair clamp or rubber hose clamp, and pipe thread tape. If the damage is a split length of pipe rather than a loose fitting, none of these will save you, and a plumber becomes the answer faster.
Keep a small kit together in the basement or garage, and photograph the shutoff valve while you are at it. When the power is out and the phone flashlight is dead, that photo is worth more than the tools.
What to Do If a Pipe Bursts: Shut Off the Water and Limit Damage
Seven steps, and they fall into three different jobs people blur together: stopping the supply, making the space safe and keeping the damage contained, and arranging the repair. The first job takes minutes. The second takes an hour. The third takes days. Shutting the water off is the only one that gets harder the longer you wait.
1. Confirm the Burst Pipe and Find the Main Shutoff Valve
A burst pipe sounds like a hiss, a roar or water moving inside a wall you cannot see. It sprays or gushes under pressure rather than dripping, and the spray follows the path of least resistance, so it often shows up in a completely different room from the actual break. A slow leak, by contrast, drips steadily from a joint and can usually be caught with a bucket.
Before you go hunting for the main, look for the closest isolation valve to the break. Every sink, toilet, washing machine, dishwasher and water heater has one, usually a small oval handle on a chrome or plastic stub under the fixture or behind an appliance. Closing the washing machine valve stops a supply-line failure without touching the whole house.
Then locate the main. Nobody knows where theirs is, which is the most repeated question in every plumbing forum I have read. It is almost always within a few feet of where the water enters the building, and the plumbing runs from there. Look for the water meter and the largest pipe leaving it.
| Home type | Where the main shutoff usually is |
|---|---|
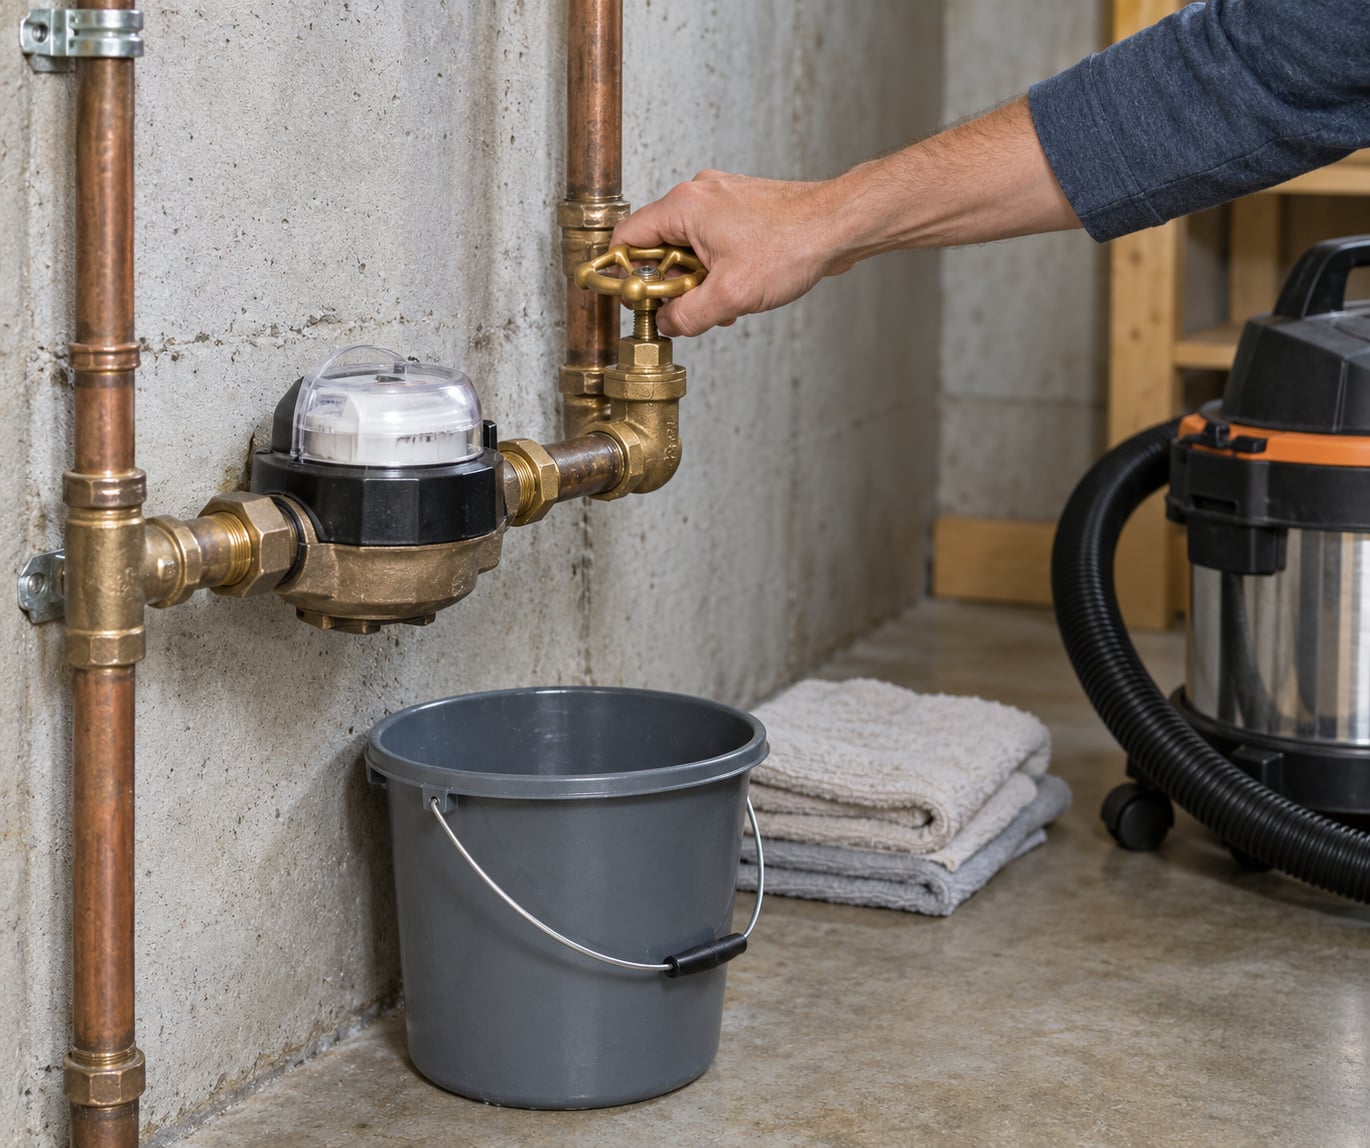
| Basement | On the basement wall where the water service pipe enters, often next to the water heater or meter |
| Crawlspace | On the main line running beneath the floor near the front wall, sometimes in a small insulated box |
| Slab on grade | In a garage, utility closet, or in a boxed-in cabinet on an exterior wall near the meter |
| Exterior wall | In a small recessed box outside near the hose bib or in a basement-less home, sometimes behind a plastic cover marked “water” |
| Older home | Anywhere on the first floor or in the cellar near the incoming service; original galvanized lines are often routed oddly |
| Apartment | Under the kitchen or bathroom sink for fixtures; the building main sits in a shared mechanical room, controlled by management |
If you cannot find the valve, the meter itself is a fallback. Most meters have a curb stop valve on the utility side, and turning that requires a meter key. On some systems the utility owns that valve and only the water department can turn it, so the emergency number on your water bill matters more here than anywhere else.
2. Turn Off the Main Water Supply
A gate valve has a round handwheel. Turn it clockwise, slowly, until it stops. Never force it past the stop; old gate valves are notorious for snapping the stem halfway through and leaving you with a valve that neither opens nor closes.
A ball valve has a lever. Turn the lever so it sits perpendicular to the pipe and the water is off. Lever parallel to the pipe means open. Ball valves are far more reliable, and if you have a choice, that is the one you want to be turning in a crisis.
With the main closed, open several cold faucets, then flush every toilet in the house. That drains the water still sitting under pressure in the lines, which stops a lot of dripping that would otherwise continue for hours and lowers the pressure enough that a plumber can work on the line more safely. If the water heater has a drain valve, close the cold supply to it and open the drain while you are there, because a pressurized tank with a leak in the drain line is its own problem.
You will know the main is off when the faucets run dry within a minute or two. A slow drip at the break may continue for a while as the upstairs lines drain down. That is normal.
3. Check for Electrical Hazards: What to Do If a Pipe Bursts Near Power
This is the safety fork most guides get wrong by listing the same two steps in the same order for everyone. If the water has reached an outlet, an appliance, a power strip, a space heater, or the breaker panel itself, kill the power before you touch the water valve if you can do so without wading through standing water. If the room is dry and walkable, shut off the water first, because water volume causes more damage in the next hour than electricity does in the next minute.
Do not walk through standing water to reach the breaker panel. That is the single piece of advice people argue about in forums and it never changes: water is a conductor, and if the water is deep enough to slow you down, it is deep enough to hurt you. Flip the breaker from a dry location, or call your utility’s emergency line and have them cut power from outside the property.
Leave the area and call emergency services if you see sparking, smell burning plastic or gas, see arcing near water, or cannot tell whether an outlet is live. Standing water near energized wiring is the one situation in this whole guide where you stop working and call 911. Money is replaceable in a way that electrical contact is not.
4. Drain the Affected Area and Protect What You Can
Get people out of the room first, then pets, then things that absorb water. Furniture legs, cardboard boxes, rugs, paper, books and electronics go on top of a dry surface or out of the house entirely. Lift furniture rather than push it, and put foil or plastic under the legs if it has to stay in the wet zone.
Then take the water out. Wet vac the low spots, mop what is left, and open a floor drain if the space has one and it will not back up. Open cabinet doors and drawers so trapped air can escape and the wood can dry from both sides.
Be careful with what you do not reach for. Do not push water toward a wall, a baseboard, or an electrical outlet, and do not pull up wet drywall or carpet yourself. Water is almost always still moving inside the wall cavity long after the main valve is closed, and opening a surface just gives it a new exit into the room. Wall cavity drying is a job for later, with a professional reading the moisture behind the surface.
5. Decide Whether the Pipe Needs an Immediate Repair
Here is the decision rule, and it is mostly about pressure and pipe condition rather than how much water is on the floor.
- Call a plumber now if the pipe is split, cracked or flattened; if it is copper with a pinhole more than about an eighth of an inch; if it is galvanized steel, which rusts through from the inside; if the break is inside a wall, ceiling or floor you cannot reach; if the shutoff valve itself is what failed; or if you cannot find a valve at all and water is still moving.
- A plumber can likely handle it today if the leak is at a fixture supply line or a compression fitting, which are the two most common indoor failures and both are quick to replace.
- You can hold it until morning only if the main is off, the water has stopped, nothing is near anything electrical, and the affected area is dry enough to leave alone.
A repair clamp is worth understanding for what it is: a temporary restraint for a small pinhole in a metal line, used under low pressure, while you wait. It is not a fix. It is a way to keep a drip from becoming a flood overnight. It does nothing for a split line, a loose fitting under pressure, or a plastic pipe, and it will not save drywall that is already wet.
6. Make a Safe Temporary Repair if the Leak Is Small
Every temporary option that works has the same requirement: the pipe must already be depressurized. That means the main is off, the faucets are open, and the water at the leak is not flowing.
With pressure off, the reasonable moves are a hand-tightening of a loose fitting one quarter turn with an adjustable wrench, or fitting a correctly sized repair clamp around a small hole in a metal pipe. A supply hose with a shutoff valve at each end can be swapped in the same way as the original. That is where most homeowner repairs end, and it is a legitimate place to end if the pipe itself is sound.
What fails, reliably: duct tape or electrical tape over a split line, glue of any kind on a wet pipe, a rubber band with a hose clamp over a crack, and anything at all attempted on a pressurized line. Those last with just enough time to create a false sense that the problem is handled, then let go at the worst moment. A pipe under pressure with any kind of patch on it is a repair that is still happening, just later.
Never use an open flame or a torch to thaw a frozen section. Inside a wall, next to framing and insulation, that is a house fire, and it is the reason a supposedly frozen pipe gets replaced rather than thawed.
7. Dry, Inspect, and Arrange the Permanent Fix
Before you move anything else, document. Wide photos of each affected area, close photos of the break, and a written timeline of when you found it, when you shut the water off, when you called the plumber. Insurers care about the sequence, and homeowners report that a timestamped log is often the difference between a smooth claim and a fight.
Then start the dry-out clock. Remove wet porous material when it is safe to do so: carpet, padding, wet insulation, and saturated drywall that is clearly compromised. Run a dehumidifier with doors and windows closed, add a box fan moving air across the area, and run both for days rather than hours. A thermostat reads nothing about the inside of a wall, so plan on a moisture reading after the surfaces look dry.
Get three things in writing from the plumber: the scope of the repair, a line-item invoice, and confirmation the line was pressure tested before the walls closed back up. Also ask them to look at the joints on either side of the failure. If one pipe in a run has gone, its neighbors are usually close behind, and a plumber on site is the cheapest chance to catch that.
For restoration work, get the written scope before anyone starts knocking out baseboards or opening walls. Homeowners in the forums describe being pressured into demolition they did not need, and the protection is simple: no destructive work until the insurer or you have approved the scope in writing.
Common Mistakes to Skip in a Burst Pipe Emergency
These are the errors that turn a plumbing problem into a house problem. Each one shows up repeatedly in homeowner and renter threads.
- Looking around for the shutoff valve instead of shutting off the local valve first. If there is an isolation valve right at the leak, close it and stop bleeding time. The main is the fallback, not the first move.
- Wading through standing water to reach the breaker panel. Flip it from a dry spot or have the utility cut power from outside.
- Assuming water first, always. If the flooded space is unsafe, cut power first. The order is a safety decision, not a fixed rule.
- Using a torch on a frozen pipe. Open flame near framing and insulation causes fires. Heat slowly and gently, or replace the section.
- Patching a split line with tape or glue. That holds for a while and then fails without warning.
- Turning the water back on to check. A repaired line gets pressure tested by the plumber. Repressurizing early is how a good repair becomes a new flood.
- Moving furniture first and photographing never. You will not be able to prove what was wet and when. Photos take ninety seconds.
- Leaving wet drywall and carpet in place because they feel dry on top. They are saturated underneath, and the mold window is already running.
- Assuming the noise stopped the problem. Water keeps moving inside walls long after the main is closed, and that sound is the moment people panic.
- Leaving the main valve off and forgetting. After the repair, reopen the main slowly and check the pressure hasn’t dropped, which is the sign of another leak somewhere in the run.
Quick Tips to Prevent Another Burst Pipe
Almost every burst pipe is preventable or at least forecastable, and the prevention work is a weekend, not a project.
- Insulate the exposed runs. Foam sleeves on supply lines in a crawlspace, garage, attic, exterior walls and unheated spaces. Heat tape on sections that have frozen before. Insulate the pipes coming out of a water heater and the drain lines on a roof that overhang an unheated space.
- Keep heat steady, not just warm. A thermostat sitting at 50°F in a deep freeze is the number insurance adjusters and utilities repeat. A house that stays warm does not have a cold spot for a pipe to freeze in.
- Drip before a freeze, not during it. A slow drip from faucets served by the exposed lines, open cabinet doors on the cabinet that hugs exterior walls, and close the door to the crawlspace.
- Disconnect and drain outdoor hoses. A hose left connected through winter freezes back into the sillcock. Disconnect, drain the line, and cover the spigot.
- Shut off the washing machine and dishwasher valves when you travel. This is the quiet failure. A braided supply line on a vacation week can go unnoticed for days, and it is one of the most common calls plumbers get. Replacing those lines with stainless steel braided ones is a small, sensible upgrade.
- Know your pressure. Household pressure above roughly 80 psi is high for residential plumbing. If the water bill jumps, pressure drops when a tap runs, or you hear hammering in the walls, have it checked. A pressure reducing valve at the main protects everything downstream of it.
- Seal what the trades left open. Pipe penetrations through exterior walls, uninsulated holes in the rim joist and gaps around plumbing chases are cold-air highways. Caulk and gasket them before winter.
- Get an annual walk-through. A plumber checking the visible plumbing, valve operation and pressure once a year finds a corroding line while it is still a slow drip rather than a rupture.
- Know your shutoff before you need it. Go find it now, feel the handle, take a photo, and tell everyone in the household where it is. In every forum thread about this, the people who got fast found it in under a minute.
Frequently Asked Questions
Where is the main water shutoff valve?
It is almost always within a few feet of where the water enters the building, next to the water meter and the largest incoming pipe. In a basement it is on the wall near the meter or water heater. In a crawlspace it runs under the floor near the front wall. In a slab home it is usually in a garage, utility closet, or a boxed cabinet on an exterior wall. Older homes route it oddly, so trace the pipe rather than guessing.
Can I turn water back on after a pipe is repaired?
Only after the plumber pressure tests the repaired section and tells you it is safe. Repressurizing too early is one of the most common ways a completed repair fails. When you do reopen the main, do it slowly and watch faucet pressure for several minutes. If pressure drops or a faucet starts sputtering, shut the main back off, because that means another leak is somewhere in the run.
Should I call a plumber immediately for a burst pipe?
Yes, call as soon as the water is off and the space is safe. Even small leaks mean a plumber, because the pipe itself is usually compromised. You can absolutely shut off the main, open the faucets, contain the water and document the damage yourself while you wait. What you should not do is attempt a permanent repair on a pressurized or split line.
Is a leaking pipe an emergency?
A slow drip caught early is not an emergency, but it is a same-week job. A pipe that sprays, gushes, or is hissing inside a wall is an emergency because water is moving into structure. The test is simple: if you cannot stop it by closing the fixture valve, or if you do not know where that valve is, treat it as an emergency and shut the main. Standing water near anything electrical makes it an emergency every time.
Will insurance cover damage from a burst pipe?
Most homeowners policies cover sudden and accidental water damage, including the water itself and the resulting drywall and structural damage. They generally do not cover damage traced to gradual leaks, deferred maintenance, or a failure the insurer considers foreseeable. Coverage also depends on whether you mitigated promptly. That is why the documentation and the drying work in the first 48 hours matter as much as the policy itself.
Can a burst pipe cause mold after the water is turned off?
Yes, and this surprises people. Mold can begin growing within 24 to 48 hours of water reaching drywall, carpet, padding or insulation. Turning off the valve stops new water, it does not remove what soaked in. Pull wet porous material out when it is safe, run a dehumidifier with the space closed, and keep air moving. If more than about 48 hours passed before drying started, have a professional assess it.
Conclusion
Three priorities, in order. Get people away from any water that is touching electricity, and if you cannot tell whether a space is safe, call emergency services instead of finding out. Then shut off the main water, or the closest valve to the break, because that one action decides how much damage you are looking at an hour from now.
After that, contain it, photograph it, and get a licensed plumber to the split line before the drywall dries. Everything else on this list, including the mistakes and the prevention work, exists to make sure you get to that third step in time.