Resistance band tension is the pulling force a band produces at a given stretch, and you measure it in pounds or newtons with a force gauge, a luggage scale, or a bathroom scale with your bodyweight subtracted from the reading. Stretch length alone cannot give you a number, because the same stretch produces different force in different bands.
Most home exercisers need this for one of two reasons: sizing a band for assisted pull-ups or a loaded bench press, or tracking whether a band is still delivering what it delivered three months ago. Both need a repeatable reading taken the same way each time.
The whole process takes about five minutes per band. Difficulty is low, though the accuracy depends almost entirely on how consistently you repeat the test rather than on the tool you choose.
Table of Contents
- What You Need
- How to Measure Resistance Band Tension Step by Step
- Prepare the Band and Workspace
- Measure Tension With a Force Gauge
- How to Measure Resistance Band Tension Without a Scale
- How Far to Stretch: Find the Right Measurement Point
- Compare the Reading With the Intended Exercise
- Record and Repeat the Measurement
- Common Mistakes
- Tips for Consistent Results
- Frequently Asked Questions
- Can you measure resistance band tension just by stretching it?
- What is the easiest way to measure resistance band tension at home?
- Are phone apps accurate for measuring resistance band tension?
- How many pounds of tension should a resistance band provide?
- Why does the same resistance band feel harder at different angles?
- When should I replace a resistance band instead of measuring it?
- Conclusion
What You Need
You need a way to read force, and you need a fixed point to pull against. That is the entire list. Everything below is one of those two things or a way of holding the setup steady.
- A force gauge. A luggage scale, crane scale, or fish scale are the usual home options. A cheap fish scale handles light bands; a crane scale reads the heavier multi-band setups without fuss.
- A bathroom scale for the bodyweight-subtraction method, where the scale sits on the floor and you stand on it while holding the band ends.
- A known hanging weight such as a weight plate or a filled bucket if you want to test a band with no scale at all.
- A measuring tape and a fixed anchor — a door anchor, a wall hook, a squat rack upright, or a footplate you stand on.
- The manufacturer specification for your band, if you have it. The colour on the sleeve tells you the nominal resistance range.
One point worth stating plainly: stretch alone is not a measurement. Two bands of the same length and width can feel completely different at the same extension because the rubber compounds, the layer count and the manufacturing tolerances all differ. If you have ever stretched a band to a matching colour and it still felt off, that is the reason.
How to Measure Resistance Band Tension Step by Step
Prepare the Band and Workspace
Start by inspecting the band. Look along its full length for cracks, flat spots, thinning, fraying or nicks, and check the clips, sleeves and carabiners if it has them. A damaged band can fail without warning, so do not test one that shows any of those signs — retire it instead.
Set up on a dry surface with no sharp edges nearby, and anchor the band to something that will not move. A door anchor on an unbraced door swings; a rack upright or a wall hook holds. Note the labelled resistance or the manufacturer’s stated range before you start, since that is what you will compare against later.
Measure Tension With a Force Gauge
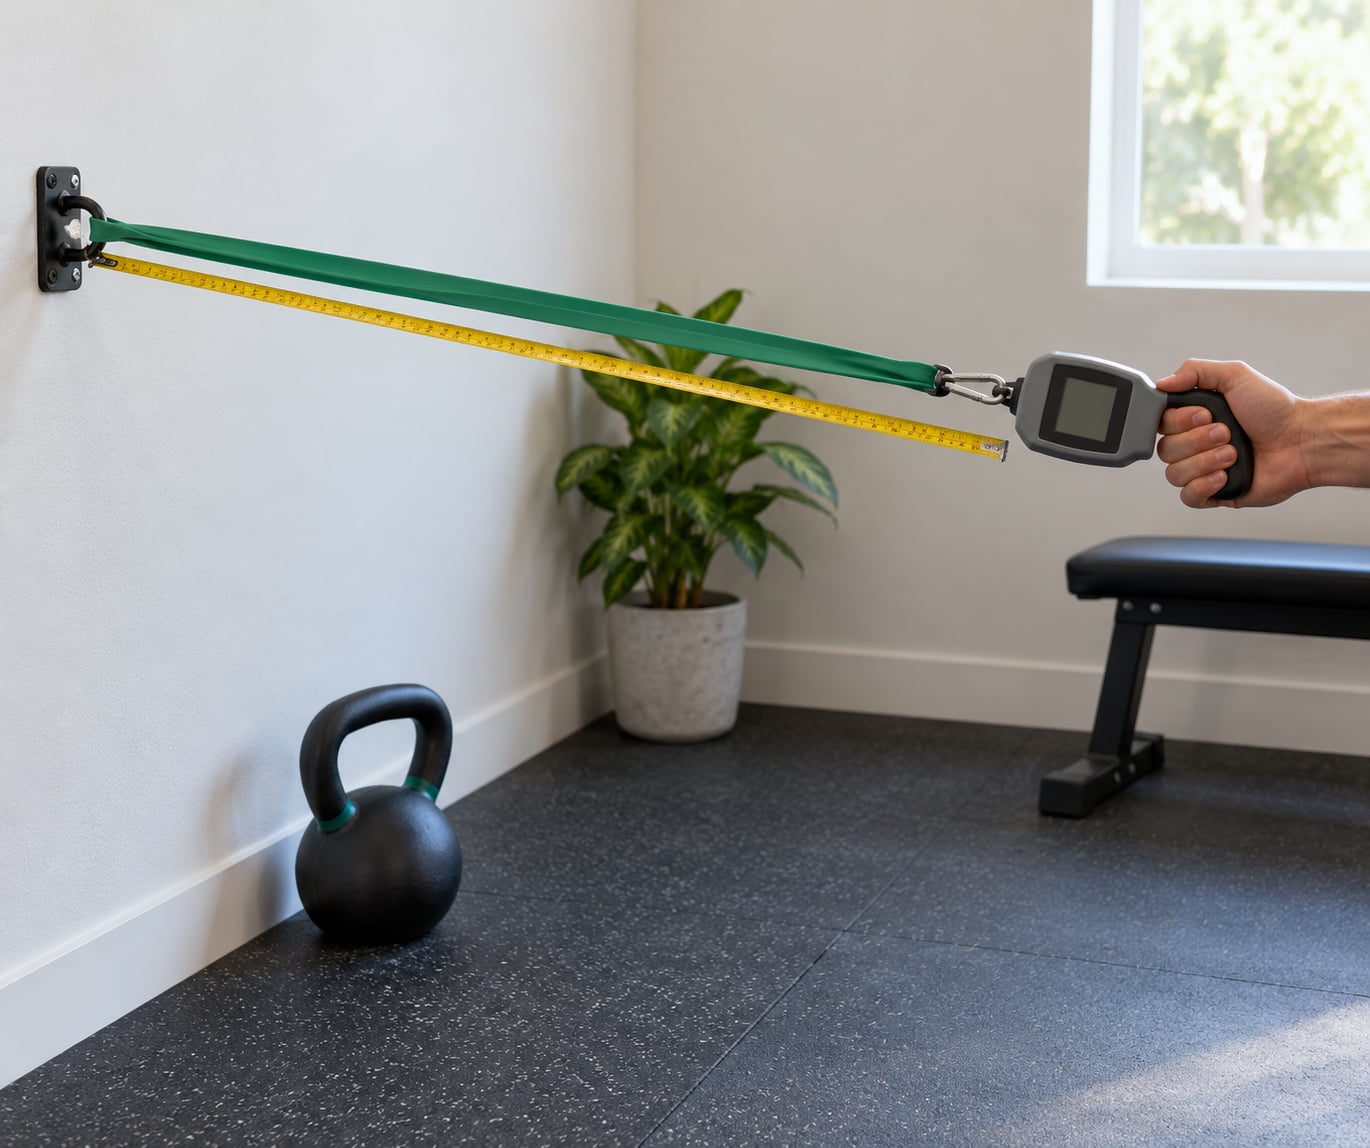
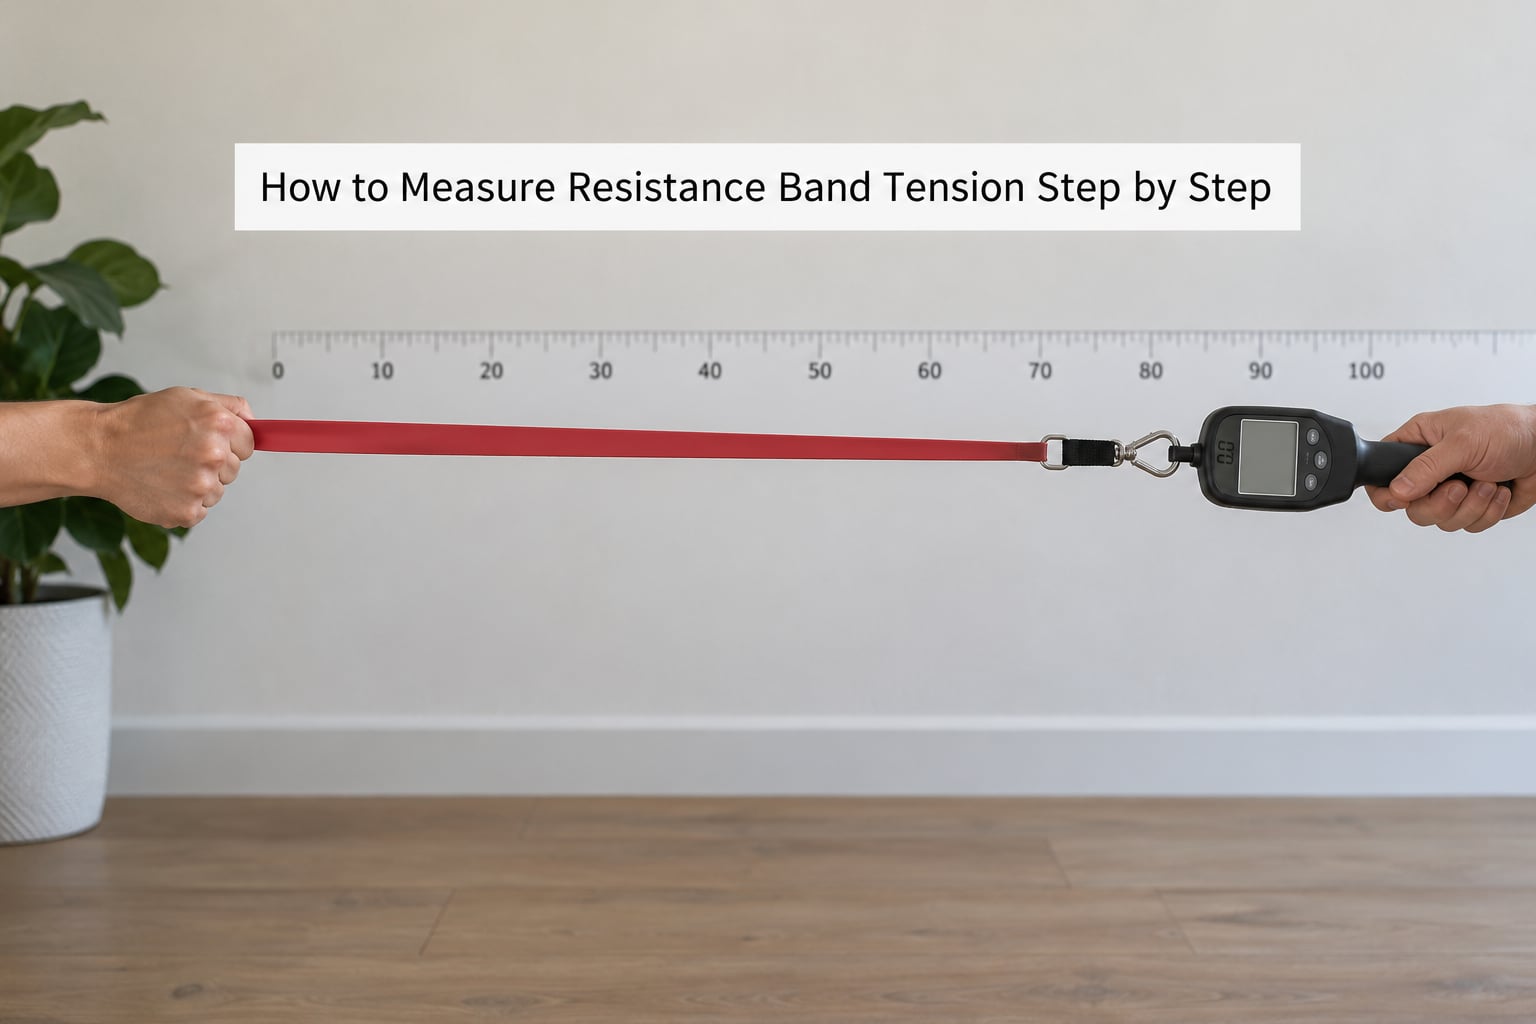
Attach the gauge to the free end of the band using a clip, carabiner or a looped sleeve, then anchor the other end. Hold the gauge so the band pulls straight along its length with no rubbing against the floor, the anchor, or your clothing.
Pull slowly through the range you care about, about a second per foot of stretch. When the gauge settles at your chosen measurement point, hold still and read it. Write down the force in pounds or newtons, then release and repeat at least three times. A spread above roughly 5 percent between repeats means your pull speed or hand position is drifting, so reset and go again.
How to Measure Resistance Band Tension Without a Scale
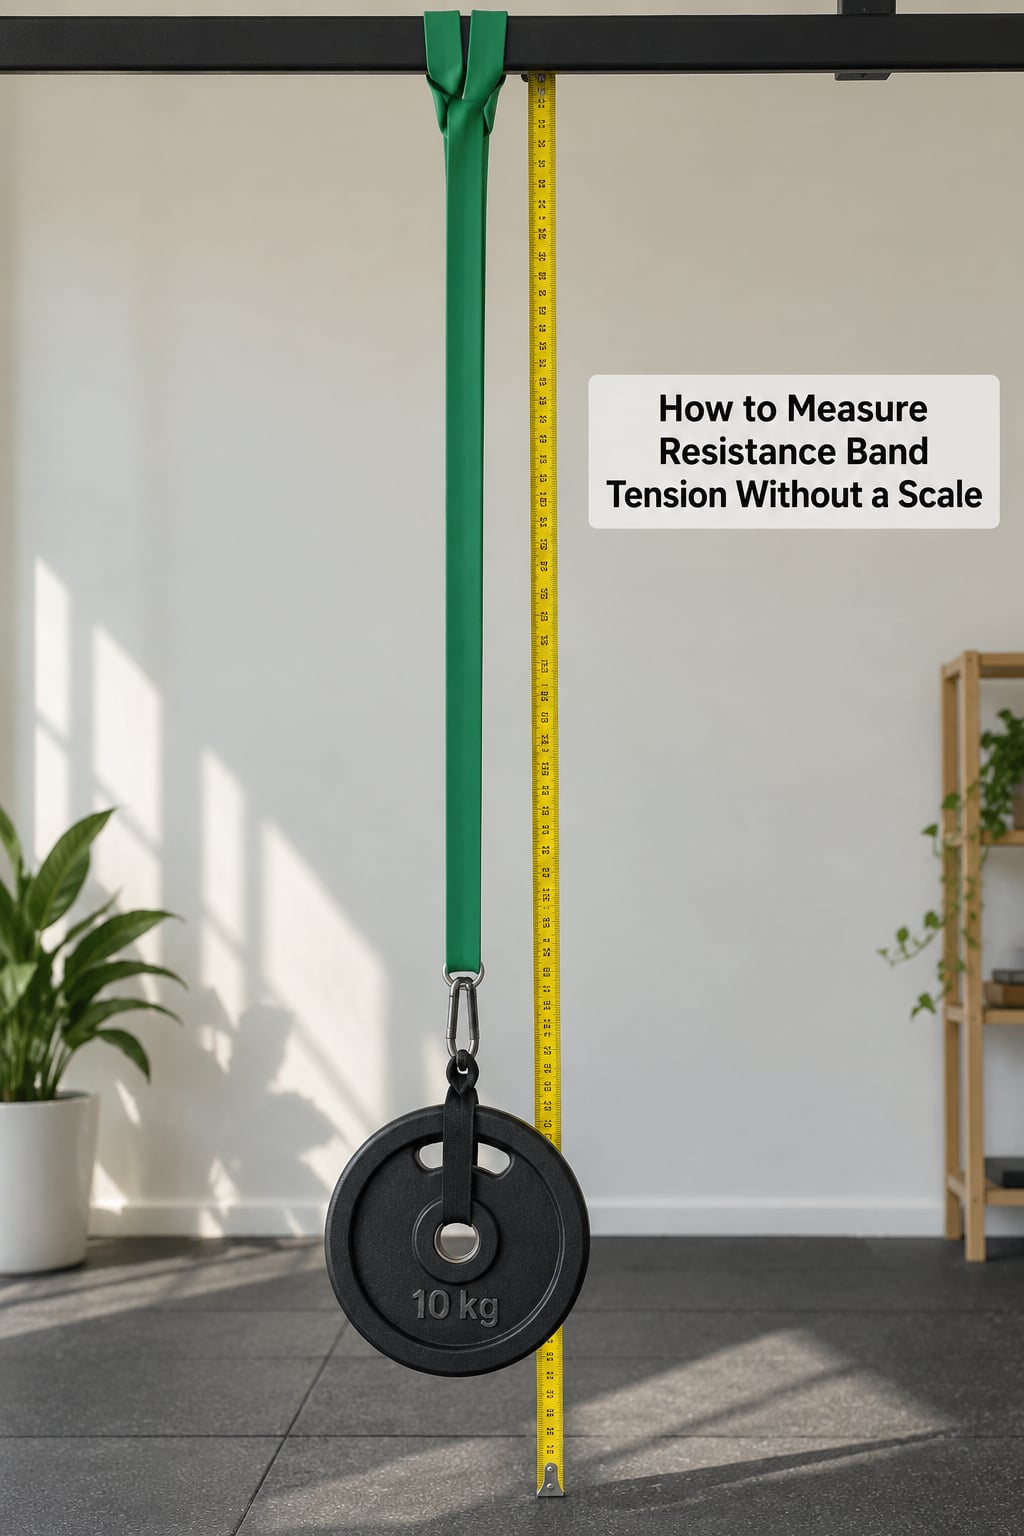
Hang a known weight from the bottom of a vertically suspended band, then measure how far it stretches with the tape. Keep the setup still for a few seconds before reading, since a moving weight gives an unreliable figure. Note both the resting length and the stretched length.
This method is genuinely useful for comparing one band against another, and for spotting a band that has gone slack since your last test. It is not a force measurement unless the weight is calibrated for that purpose, so do not treat the stretch figure as pounds.
How Far to Stretch: Find the Right Measurement Point
Measure only the distance the band travels after it stops being slack. That is the first point of tension, the moment the rubber actually starts pulling rather than uncoiling. Measuring from the band’s resting length to the end position overstates the stretch, because the first part of that travel contributes almost no force.
For a lift, measure at the hardest position of the movement — the top of a bench press, the lockout of a row, the bottom of an assisted pull-up. Band force rises throughout the range rather than staying constant, so the reading from the start position tells you almost nothing about the hardest part.
Compare the Reading With the Intended Exercise
Now judge the number against three things: the band’s labelled range, the movement you plan to use it in, and your own experience with it. If you measure 35 pounds per side at lockout and the sleeve says 30 to 40, you are inside spec.
Measured force and felt resistance are not the same quantity. Your grip position, how your body is angled, the band’s direction relative to the anchor, and friction where the band touches a sleeve all change what the movement feels like. Use the gauge reading as the baseline and your perception as a check on it, not the other way round.
Record and Repeat the Measurement
Log the tool you used, the measurement position, how fast you pulled, the force reading, the stretch length, and the date. That is a six-field note and it takes under a minute.
Repeat the test under identical conditions — same anchor, same height, same layer count, same time of day if you care about temperature effects. A series of consistent readings is far more useful than one precise-looking number, because it shows you whether the band is changing. Re-testing every six to twelve months is enough to catch fatigue.
Common Mistakes
Estimating tension from stretch length is the most common error, and there is no fix other than using a force-reading tool. Pulling too fast inflates readings because the gauge registers the jerk rather than the steady force; slow down and hold.
Measuring at different positions each time produces numbers that cannot be compared. Move the anchor between tests and you have changed the experiment. Ignoring the anchor angle gives you a skewed reading, since a band pulling downward at an angle carries only part of its force along your line of pull.
Testing a band with visible damage is unsafe, and so is measuring by stretching a band to its break point. You will destroy the band and it may let go without warning. Never pull a band to failure to find its maximum.
Comparing readings across bands without checking their specs is the last trap. Colour codes are not standardised across brands, so a red band from one manufacturer may not match a red band from another. Compare like with like, or compare measurements rather than labels.
Tips for Consistent Results
Keep the anchor fixed and mark it with tape so you return to the same spot. Align the band with the gauge so it pulls straight, keep the band clear of clothing and floor, and flex the band a few times before the first read — a cold band gives a slightly different figure than a warmed one.
Replace any band whose reading drifts far from its labelled specification, and any band that shows nicks or hardening. A simple comparison setup is enough when you are tracking one band over time or comparing two bands to each other. Calibrated equipment earns its keep when you are dosing rehab work precisely or publishing numbers other people will rely on.
Frequently Asked Questions
Can you measure resistance band tension just by stretching it?
No. Stretch length tells you how far a band has extended, not how hard it pulls, and the two do not map cleanly onto each other. Bands of the same length and width built from different rubber compounds resist differently at the same extension, so two bands stretched to 40 percent elongation can differ substantially. Use stretch for consistency checks between identical setups, and use a force reading when you need a number in pounds or newtons.
What is the easiest way to measure resistance band tension at home?
A luggage scale or crane scale is the easiest option for most people. Loop the band through the scale, anchor the far end, pull slowly to the point in the movement where tension peaks, and read the value while holding still. Repeat three times. If you have no scale at all, a bathroom scale works: stand on it holding both ends of a band anchored in front of you, then subtract your bodyweight and double the remainder for the total across both sides.
Are phone apps accurate for measuring resistance band tension?
Apps that use your phone as a spring measure the stiffness of your phone and its case, not the band, so they cannot give you usable pounds. Apps that rely on a camera or a pressure sensor need external hardware to work at all, and phone sensors vary too much between devices for the results to be comparable. Spend the money on a physical force gauge instead. It is inexpensive, it calibrates against a known weight, and it gives you a repeatable figure.
How many pounds of tension should a resistance band provide?
There is no single right number, because useful tension depends on the movement and the person. For assisted pull-ups, a common starting point leaves roughly half your bodyweight on the bar at the top of the rep. For a bench press top set, bands are often set to unload the bar by a modest amount at lockout rather than at the start of the lift. Measure at the hardest position of your specific movement, then compare that figure to how the movement actually feels.
Why does the same resistance band feel harder at different angles?
Two things are happening at once. Band force rises as the band stretches, so any position that shortens the path between anchor and load changes the tension. And the part of the force acting along your line of pull is what your muscles actually resist, which changes with the angle. A band pulling straight up at your chest and one pulling diagonally from a low anchor can carry the same gauge reading and still feel like different loads on the same exercise.
When should I replace a resistance band instead of measuring it?
Measurement is pointless for a band that has already failed a safety check. Retire any band with cuts, nicks, cracks, flat spots, visible hardening, thinning, fraying or a damaged sleeve or clip. Bands stored for years in a hot garage degrade even if they look fine. As a general rule, re-test a band every six to twelve months and replace it if the reading has moved noticeably from its original value or from its labelled range.
Conclusion
Start by picking one method: a force gauge if you want pounds or newtons, a bathroom scale if you have none, or a hanging weight if you only need to compare two bands. Anchor it properly, pull slowly to the hardest point of the movement, and read the gauge while it is steady.
Then write the number down before you look at the colour on the sleeve. That way you know what you measured rather than what someone claimed the band should deliver. Repeat the same test on the same anchor every six to twelve months and you will know whether your bands are still doing their job — without ever stretching one to failure to find out.