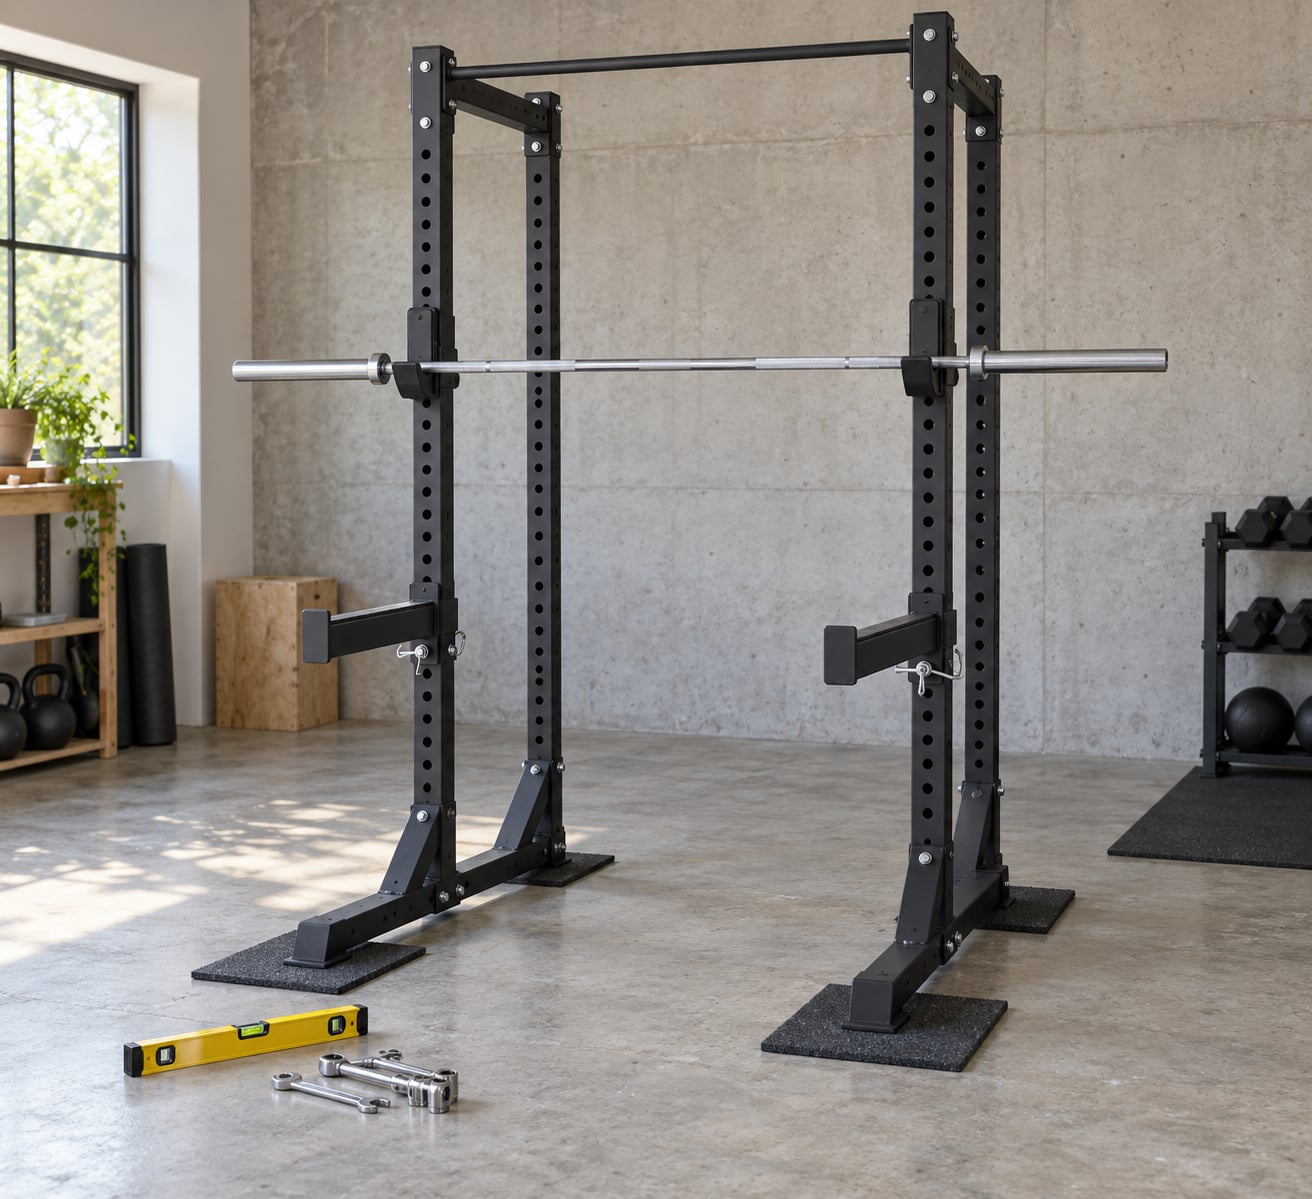
A squat rack only protects you if it is assembled correctly, seated on solid ground, and loaded the way the manufacturer intended. Setting up a squat rack safely takes about an hour: lay out and count every part, build the frame on a level floor, tighten every fastener to spec, engage all safety locks, then test the empty rack before a single plate goes on.
I have seen more gym injuries come from sloppy setup than from bad programming. A bolt left finger-tight, a safety arm mounted upside down, a rack sitting on carpet with a slope you cannot see — these fail quietly and only show up on your heaviest day.
Below is the order I work in every time. It follows the manufacturer’s instructions for your specific model, and where this guide and your manual disagree, the manual wins.
Table of Contents
- What You Need
- Step-by-Step: How to Set Up a Squat Rack Safely
- 1. Check the Manual and Inspect Every Part
- 2. Choose a Clear, Level Location
- 3. Assemble the Base and Uprights
- 4. Attach Crossmembers and Optional Attachments
- 5. Tighten Fasteners and Engage Safety Locks
- 6. Stabilize the Rack According to the Manufacturer
- 7. Test the Finished Setup Before Loading It
- Common Mistakes
- Frequently Asked Questions
- Do I need to anchor a squat rack to the wall?
- Can I set up a squat rack on carpet or an uneven basement floor?
- How much weight can a squat rack safely hold?
- What should I do if hardware is missing or damaged?
- Should I hire a professional to assemble a squat rack?
- Conclusion
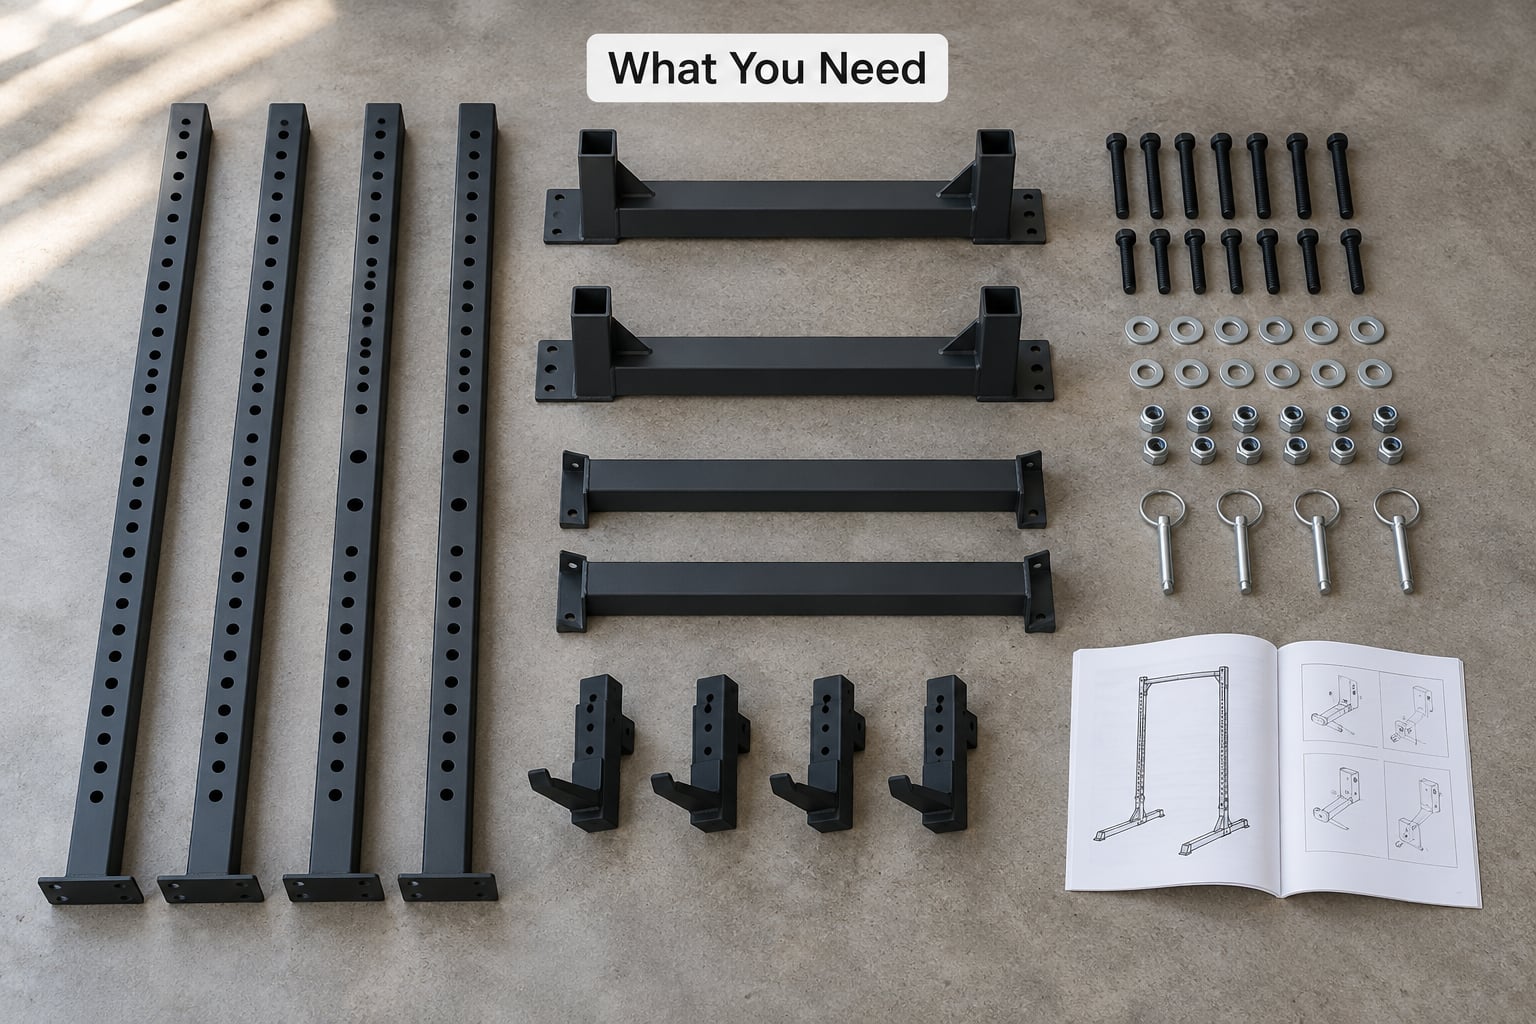
What You Need
Start by finding the paper manual. It tells you the load rating of your rack, the bolt torque, the order of assembly, and the manufacturer’s clearance requirements — four things no generic guide can know for your unit.
Then inventory the components. A typical squat cage or power rack arrives with uprights, base supports or depth members, crossmembers, a top pull-up bar section, J-hooks, safety arms or safety bars, weight storage pegs, bolts, washers, locking pins, and spring clips.
Lay every piece on the floor and group it by assembly step rather than by type. Bolts and washers in one tray, pins and clips in another, frame pieces along the wall.
You will also need basic tools:
- A socket wrench set or open-end wrenches, sized to the bolts supplied
- Allen keys if your rack uses hex hardware
- A carpenter’s level, ideally a long one you can lay across the base
- A rubber mallet for seating uprights without denting the finish
- A tape measure and a pencil for marking floor positions
- Work gloves for handling unpainted steel edges
- The supplied hardware only — no substitute bolts
On space, plan on the rack’s own footprint plus working room behind and around it. Experienced lifters consistently recommend unloading backwards, which means you need roughly a foot of clear floor behind the rack and a full standing space in front of it. If your garage has a sloped floor or a low ceiling, measure both before the rack arrives.
For flooring, level concrete is the best case. Rubber stall mats on top protect both your floor and the base of the rack from scuffing, and they take up the shock of re-racking a loaded bar. Carpet over concrete can work if you lay a rigid board under the feet so the rack does not settle into the pile.
Step-by-Step: How to Set Up a Squat Rack Safely
1. Check the Manual and Inspect Every Part
Confirm the model number and the stated load rating before you touch a bolt. That rating is the ceiling for how much you load the rack, and it assumes the rack is assembled and anchored the way the manual describes.
Compare the parts on the floor against the manual’s parts list one by one. Missing hardware is the single most common reason a half-finished rack sits in a corner for months.
Run your hand along every weld seam and look at each bolt, washer and pin. You are checking for cracks in welds, bent hardware, stripped threads, and paint-free rust pits.
Success check: the count on the floor matches the count in the manual, and nothing shows damage. If a part is damaged or missing, stop and contact the seller or manufacturer before you build anything.
2. Choose a Clear, Level Location
Set the level directly on the floor where the rack will stand and check in both directions. A rack that is out of level by even a small amount will rock under load, which is what most wobble complaints come from.
Keep the manufacturer’s stated clearance on every side. That means room to load plates, to walk around the rack, and to get the bar off the safeties if a rep goes wrong.
Clear the area first. Cardboard boxes, a bicycle on the wall, a weight bench that blocks the bail-out path, and loose cords are all trip hazards at the exact moment you most need to move.
Avoid placing the rack in a doorway, a hallway, or anywhere people walk past it while you are unracking. Success check: the floor is level, the clearance matches the manual, and the approach and exit routes are open.
3. Assemble the Base and Uprights
Build the frame flat on the floor first. Most racks are far easier to assemble lying down, and you can square everything before you ever lift it upright.
Join the base supports to the uprights in the order the manual gives. The holes should line up without force. If a bolt will not pass through a hole, stop and check that the correct part is in that position — the frame is mirrored left and right on some models, so a part can fit physically but sit backwards.
Hand-thread every bolt before using a wrench. Cross-threading happens when you start turning a bolt that is not seated straight, and a stripped hole in a steel upright cannot be fixed.
Success check: the bolts finger-tight, the frame rectangular, and every hole aligned with no forcing.
4. Attach Crossmembers and Optional Attachments
Crossmembers — the top pull-up bar section and any depth or width members — go on in the order specified. Add the manufacturer-approved attachments, which usually means J-hooks, safety arms, weight pegs and band pegs.
Match each attachment to the hole pattern the manufacturer intends. Hole spacing is often non-uniform, and a J-hook set into a hole meant for a safety bar arm can sit low enough that you cannot clear it during a failed rep.
Do not add third-party components the manufacturer has not cleared, and never drill or clamp onto an upright. Success check: every attachment moves freely, and nothing is resting against a bolt head that will be tightened later.
5. Tighten Fasteners and Engage Safety Locks
Work through the frame methodically and tighten each bolt to the specification in the manual, in the order given. If your rack does not state a torque figure, tighten bolts snugly rather than crushing the joint, and follow any torque marking stamped into the hardware.
Uniformity matters more than raw force. A frame where one joint is torqued to destruction and another is barely snug will rock, so work in a pattern rather than tightening whatever is nearest.
Seat every locking pin fully. A pin that sits halfway in is the difference between a safety arm that catches a bar and one that does not. Where the rack supplies safety collars, spring clips or retaining rings, install them now.
Success check: run your hand along the frame and no bolt turns. Push and pull each J-hook and safety arm — each should be firm with no play beyond the pin hole.
6. Stabilize the Rack According to the Manufacturer
There are three ways a rack gets stabilized, and only one of them applies to your setup.
A freestanding full rack is braced by its own base depth and crossmembers. It does not need anchoring in most cases, though extra care helps if your ceiling height or floor slope makes it feel tippy.
A half rack or squat stand depends entirely on the plates you load it with. Lifters generally place heavier plates at the bottom and toward the back for stability, and this is the arrangement most people get wrong by filling pegs in random order.
An anchored rack is bolted into floor anchors or into studs. This is the method for heavy single-person lifting, and it must use the manufacturer’s anchor points and hardware. Improvised anchors — angle brackets from the hardware aisle, lag screws into a slab that was never rated for it — can shift under load.
Success check: the rack sits flat, and your stabilization method matches what the manual describes for that model.
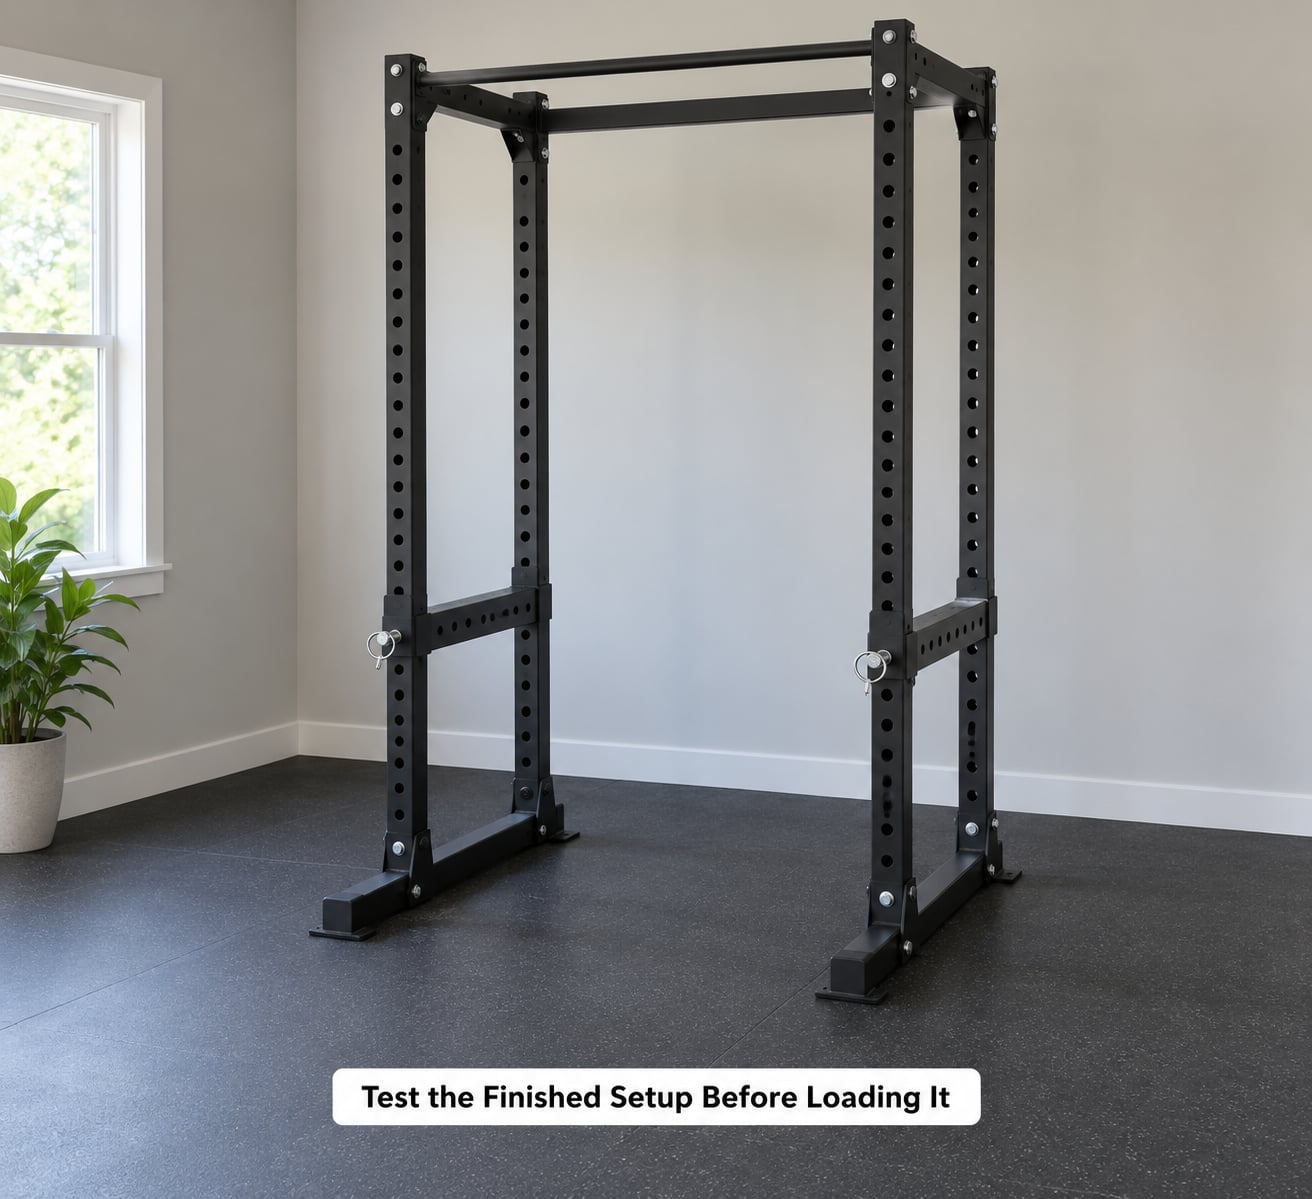
7. Test the Finished Setup Before Loading It
Push the top of the rack firmly from several directions and watch the base. Any movement at the joint rather than at the floor means a fastener needs another pass.
Load an empty bar onto the J-hooks and test the full unrack and re-rack motion. The bar should rest at roughly armpit height so you can clear the hooks by walking backwards, and it should re-rack without a scramble. Set the safety arms a couple of inches below the bar at the bottom of your squat, then verify with an empty bar that the safeties catch it.
Then add weight gradually, staying under the stated capacity. If the rack still feels unstable after all of this, stop using it and get a qualified third party to look at it.
Success check: no wobble at the joints, pins fully seated, empty bar catches on the safeties, and clearance around the rack confirmed.
Two habits are worth adding once the rack is stable. Unrack backwards — walk the bar out of the rack instead of stepping forward into it, which is why experienced lifters recommend keeping that rear footpath clear. And write your working heights in your training log or phone; lifters who track them report saving several minutes of fiddling at the start of every session.
Common Mistakes
Using damaged or mismatched hardware. A stripped bolt, a bent washer or a bolt from a different rack can shear under load. The correction is simple: return damaged hardware to the manufacturer and never substitute a bolt that was not supplied for that joint.
Standing the rack on an uneven floor. This is the number one source of wobble and it hides well on carpet. Use a long level, and shim or re-site the rack rather than working around it.
Over-tightening. Crushing the threads or deforming a joint weakens the connection. Tighten to the manual’s specification, and no further.
Skipping the safety pins or collars. A half-seated pin fails exactly when you need the safeties. Push every pin home and fit every retainer clip supplied.
Exceeding the stated capacity. The load rating assumes the rack is assembled and stabilized as described. Plates beyond the rating, or a rack you assembled differently, put the frame outside its tested conditions.
Improvising anchors. Fixings the manufacturer never specified can pull loose. If you want the rack anchored, use the anchor points and hardware in the manual.
Forgetting to re-check after the first hard session. Bolts can loosen as the frame flexes under repeated loading. Re-run the wobble check and the pin check every few weeks and after moving the rack.
Frequently Asked Questions
Do I need to anchor a squat rack to the wall?
Usually not. A full power rack is designed to stand on its own base depth and crossmembers, and most manufacturers do not require wall anchoring. A half rack or squat stand is different: its stability comes entirely from the plates you load it with, so plate placement matters. If you plan to squat heavy alone, check whether your model offers floor anchor points and use the supplied hardware only. Wall fixing into studs is a different job and can pull out of plasterboard if you get it wrong.
Can I set up a squat rack on carpet or an uneven basement floor?
Carpet over a level slab can work if you lay rigid board or rubber stall mats under the base feet so the rack cannot settle into the pile. An uneven basement floor is a problem, because a rack that is out of level rocks under load and puts stress on every joint. Check with a long level in both directions before you build, and re-site the rack rather than shimming one foot. Never place the rack on a slope to save moving it.
How much weight can a squat rack safely hold?
Use the load rating printed in your manual for your exact model, and treat it as a hard ceiling. That number assumes the rack is assembled with the specified hardware, on the specified footing, and stabilized the way the manufacturer describes. Real-world safe capacity is lower for beginners because depth, leverage and a sudden bail matter as much as the static number. If your manual is missing, find the model number and contact the manufacturer rather than guessing.
What should I do if hardware is missing or damaged?
Stop the build. A half-assembled rack sitting in a corner is safer than one built with substitute bolts, so contact the seller or manufacturer with the model number and the list of what is missing or damaged. Do not mix hardware between racks, and do not drill or clamp onto an upright. If the original manual is lost, request a replacement copy — the bolt order, torque figure and clearance requirements are all in it.
Should I hire a professional to assemble a squat rack?
For most bolt-together racks, no. The manufacturer supplies the tools, and the assembly is one or two hours at most if you lay out the parts in order. Hire help if the rack must be anchored into concrete or into load-bearing studs, if you are dealing with a very heavy welded frame that cannot be moved safely by one person, or if you keep feeling movement at a joint after assembly. That last case is a fitting problem, not a tightening problem.
Conclusion
Before your first loaded rep, do four things: find the manual and read the load rating and clearance requirements, count and inspect every part, build and stabilize the rack on level footing, then test it empty.
Push the frame, seat every pin, and check the safeties with an unloaded bar. If something moves at a joint or the bar does not catch where it should, fix it before you load plates — and where this guide and your manual disagree, follow the manual.