To start a compost pile at home you need only four things: carbon-rich browns, nitrogen-rich greens, moisture and air, plus time. A pile built from roughly three buckets of browns for every one bucket of greens, kept as damp as a wrung-out sponge, will break down on its own in about two to three months if you turn it, or in six to twelve months if you mostly leave it alone.
My own first pile was a heap of grass clippings in a corner of the yard that turned into a black mat of nothing. I had far too many greens and no leaves or cardboard to balance them. The fix took twenty minutes of digging and a stack of flattened cereal boxes, and the second pile behaved properly.
That is the whole secret, and this guide walks through it step by step. No tumbler, no special bin, no additives required.
Last updated: October 2026
Table of Contents
- What You Need to Start a Compost Pile at Home
- Materials and tools to gather first
- Choosing your setup: pile, bin, tumbler, trench or worm bin
- What time of year to start
- Step-by-Step
- 1. Choose a Convenient Location
- 2. Gather Carbon-Rich and Nitrogen-Rich Materials
- 3. Build the Base Layer
- 4. Alternate Layers of Materials
- 5. Keep the Pile Moist but Not Saturated
- 6. Turn and Check the Pile
- Common Mistakes
- Frequently Asked Questions
- How long does it take to make a compost pile at home?
- Can I compost in a container without a yard?
- What materials should I avoid putting in a compost pile?
- Why does my compost pile smell bad?
- Do I need to turn a compost pile?
- Can I start composting in winter?
- Start With a Small, Balanced Pile
What You Need to Start a Compost Pile at Home
Materials and tools to gather first
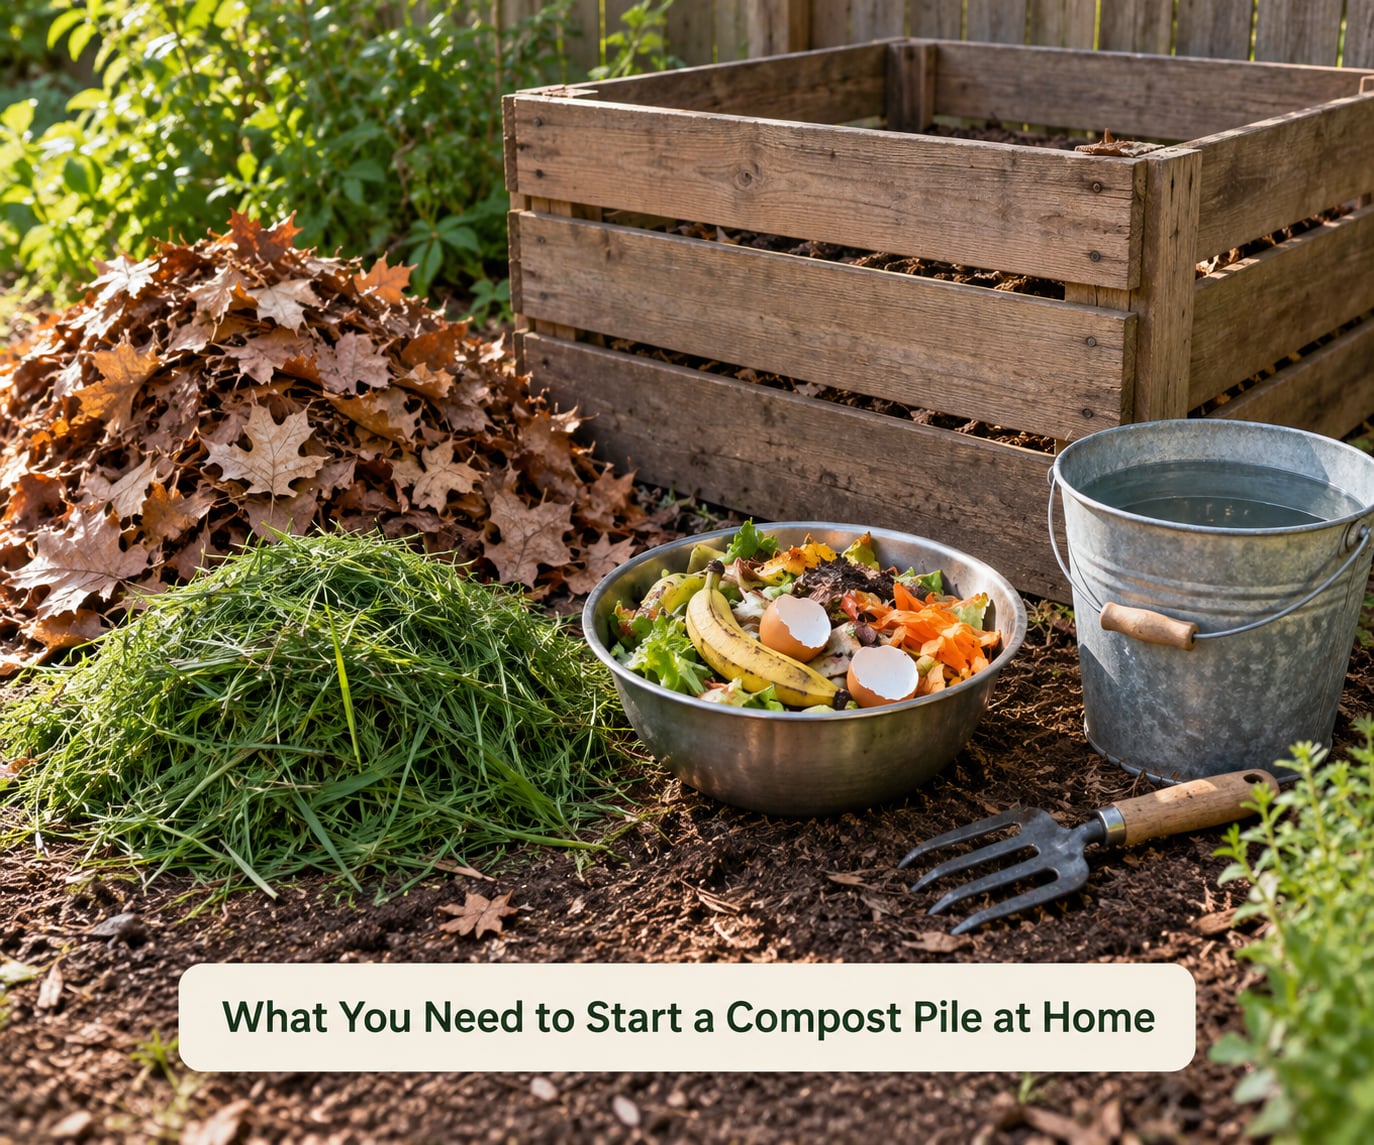
You can start with whatever you already have. The core list is short: dry leaves or shredded cardboard for carbon, fresh grass clippings or kitchen scraps for nitrogen, a bucket of water, and a fork or spade for turning.
Useful extras, in rough order of how often you reach for them: a wheelbarrow, a hose or watering can, a compost thermometer if you want to know whether the pile is actually hot, and a tarp for rainy months.
For most beginners the hardest part is sourcing enough browns, not greens. Grass clippings, coffee grounds and vegetable peelings are abundant and need no planning ahead. Dry leaves, plain cardboard, shredded paper and sawdust usually need saving ahead of time. Keep a paper bag of leaves by the back door through autumn and the problem disappears.
Choosing your setup: pile, bin, tumbler, trench or worm bin
A container is optional. Many experienced composters simply heap material on bare soil, which lets worms and beetles enter from underneath and keeps the pile naturally aerated. Others want a bin to hold a smaller volume, contain the smell or keep dogs out.
| Setup | Space needed | Effort | Odour and pest control | Best for |
|---|---|---|---|---|
| Bare-ground pile | About 3 ft x 3 ft minimum | Low | Weak, but a loose pile rarely smells | Anyone with an open yard |
| Pallet or wire-mesh bin | 3 x 3 ft footprint | Low | Good airflow, moderate control | Homes where tidiness matters |
| Plastic storage bin with holes | Under 3 x 3 ft | Low | Best containment, can trap moisture | Small yards, patio composting |
| Tumbler | About 4 x 4 ft | Regular turning | Very good | People who want speed and no mess |
| Trench or keyhole hole | 2 x 2 ft of ground | Low, seasonal | Excellent, buried scraps | Small yards, no-bin composting |
| Countertop worm bin | Bench space indoors | Moderate | Very good, enclosed | Apartments and winter composting |
If you rent or live under an HOA, check local rules first. A surprising number of municipalities restrict outdoor food-waste composting or the keeping of vermiculture worms, and a worm bin indoors can be a lease issue in some buildings.
What time of year to start
Spring and early summer are the easiest start, because the soil is warm and greens are plentiful. Autumn works well too if leaves are your main brown source, and it suits people who would rather let a pile sit through the cold months than manage it. Whatever the season, you can keep adding; a pile started in winter simply runs slowly until the soil warms up.
Step-by-Step
1. Choose a Convenient Location
Pick a level, well-drained patch of bare soil near where you’ll use the finished compost, ideally close to the kitchen so you’ll actually carry scraps out. Avoid low spots where water pools, and check that runoff from the pile won’t wash down your neighbour’s bed.
Some shade slows the pile down; light shade is usually the sweet spot in hot climates. Leave enough room to insert a fork on all sides, and keep the pile away from wooden fences and dry timber, which is where the fire risk comes from.
2. Gather Carbon-Rich and Nitrogen-Rich Materials
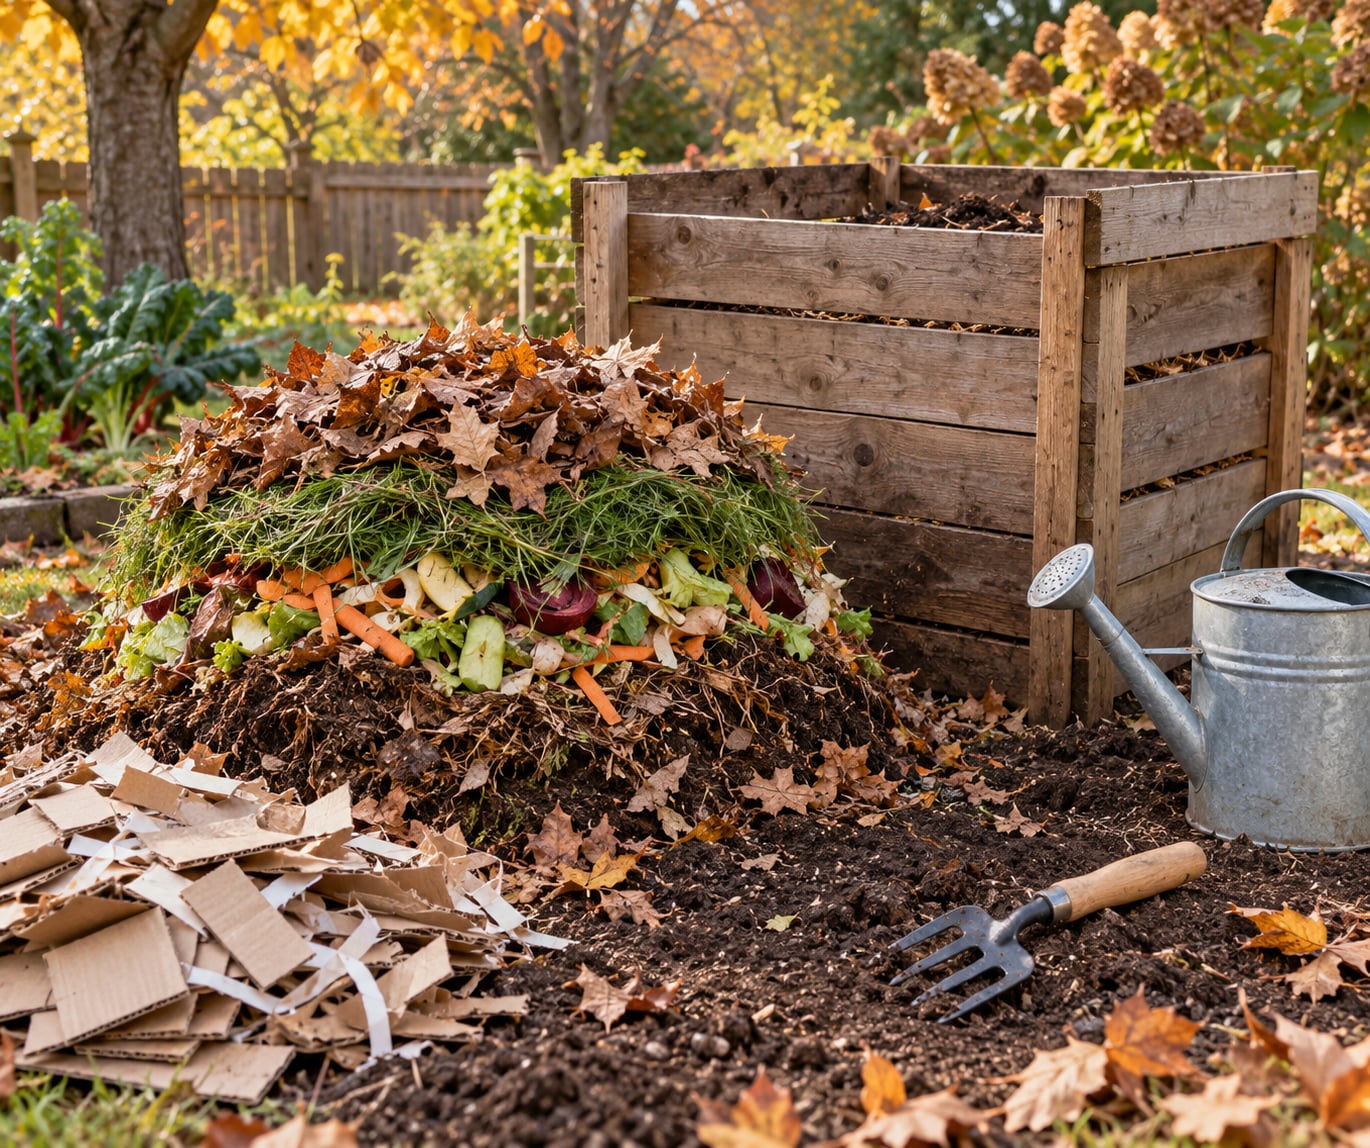
Browns are the dry, carbon-heavy side: shredded cardboard, plain paper, straw, dry leaves, small twigs, sawdust, wood chips and corn husks. Shred anything bigger than a fist, because unbroken cardboard and branches are the usual reason a pile sits still for months.
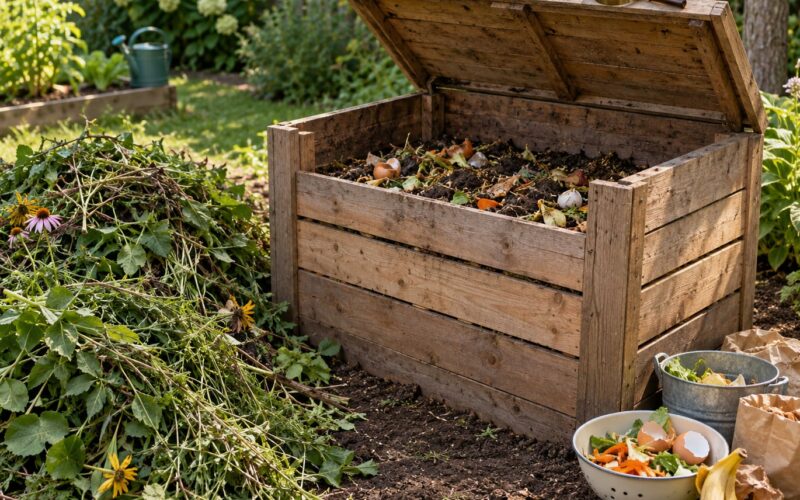
Greens are the wet, nitrogen-heavy side: vegetable and fruit scraps, coffee grounds and filters, tea leaves, fresh grass clippings, fresh garden prunings, eggshells and herb trimmings. Avoid lawn clippings from lawns treated with persistent herbicides, and skip weed plants that have gone to seed.
The practical home ratio is about three buckets of browns to one bucket of greens, measured loosely by volume. Published carbon-to-nitrogen figures such as 25:1 describe the chemistry, not an obligation to measure. Judge by feel: if the pile is wet and slimy, add browns; if it is dry and stalled, add greens and water.
3. Build the Base Layer
Start with a loose 4 to 6 inch layer of coarse material: small branches, twigs, or a few handfuls of dry leaves. This gives air a way in from underneath and stops the bottom of the pile from turning into a wet anaerobic mat that smells like a swamp.
Compost built directly on the ground works better than compost built on concrete or a solid plastic lid, because soil organisms migrate upward into the pile. If your only flat surface is a patio slab, set the bin on bare soil wherever you can, or expect to add air by hand more often.
4. Alternate Layers of Materials
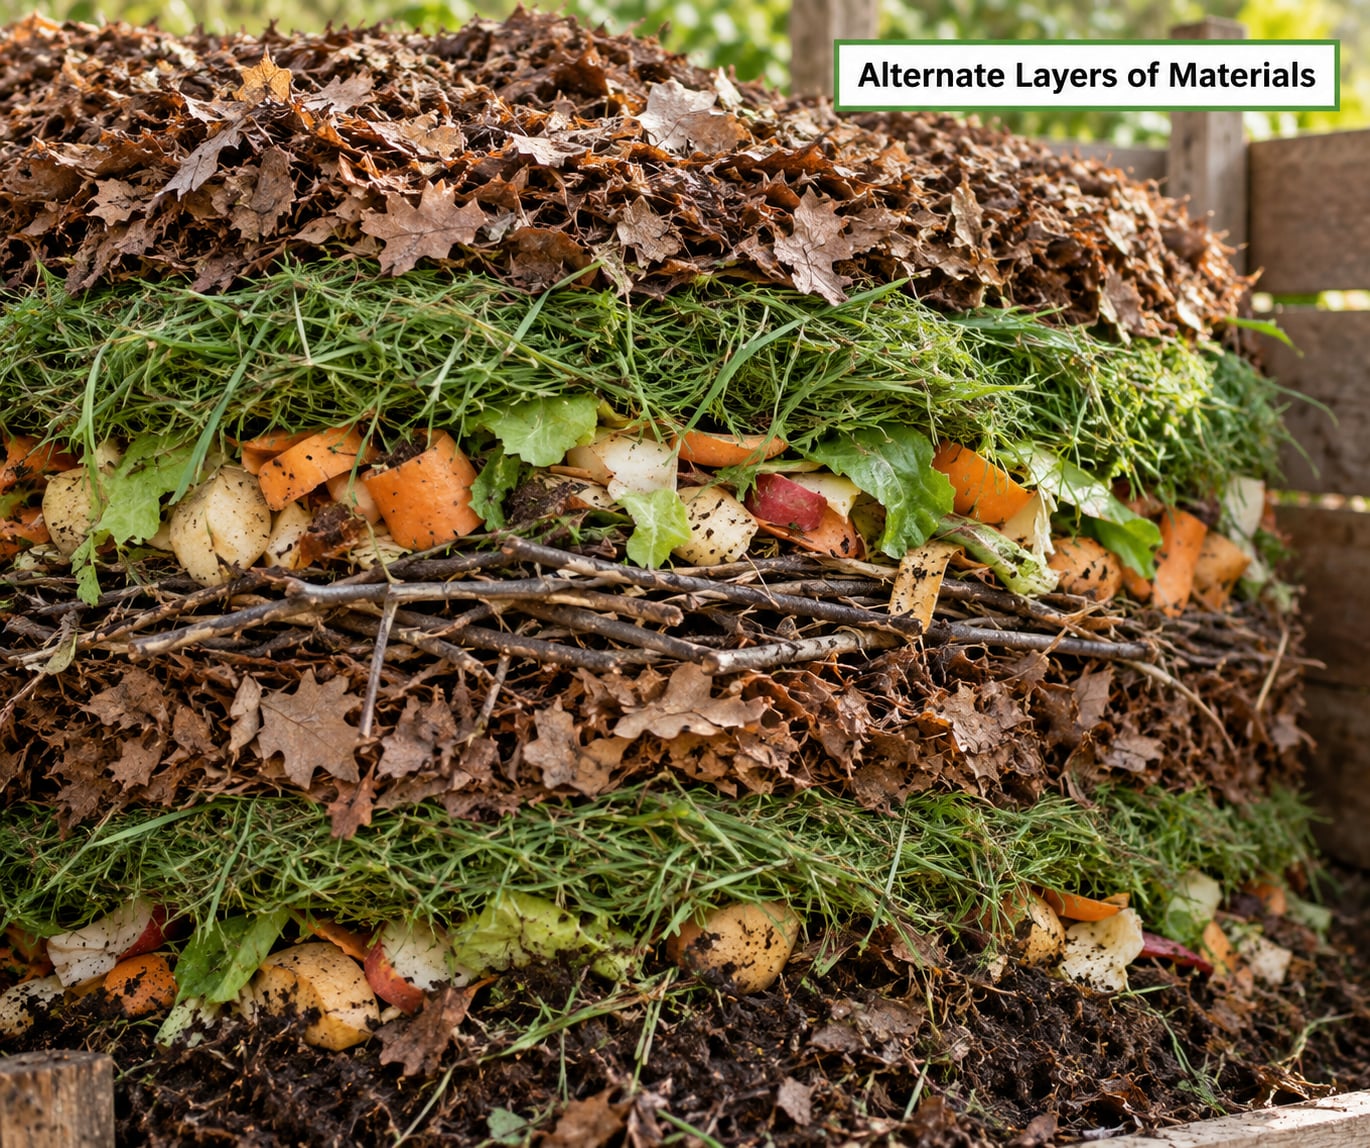
Add a layer of browns, roughly 6 inches deep, then a thinner layer of greens, roughly 2 inches. Bury kitchen scraps inside the browns rather than dropping them on the surface; exposed food is what draws flies, rats and curious dogs. Repeat until the pile reaches about 3 feet in every dimension, which is the minimum size that holds enough heat to cook itself.
A smaller heap loses heat faster than it can generate it, so a 2-foot pile in a warm climate may never get going no matter how well you mix it. If you have limited space, work with a small pile and accept slower, cooler composting rather than fighting the physics.
Cut back peels, coffee filters and stems with scissors, and crumple cardboard by hand. The smaller the pieces, the faster the pile works and the less likely you are to find a whole intact coffee filter months later.
5. Keep the Pile Moist but Not Saturated
Moisture is the setting most beginners miss. A handful of material squeezed firmly should leave only one or two drops, no more. That is the same feel as a wrung-out sponge, and it is the target for the whole pile, not just the surface.
Too dry shows up as a pile that never heats, plus a grey powdery ash smell. Add water and a layer of fresh greens, then turn. Too wet shows up as a slimy anaerobic blob, a sour or ammonia smell, and grey liquid draining out the bottom. Add shredded cardboard or dry leaves in generous handfuls and turn to open up air pockets.
Grass clippings are the usual culprit. Dumped in one thick layer they mat together like wet paper, so mix them through the browns rather than adding them as a single blanket.
6. Turn and Check the Pile
Turn the pile to move cool outer material into the hot centre and refresh the oxygen supply. During the first month, once a week is reasonable; after that, every two to four weeks is plenty. A pitchfork makes this quick, but a shovel works and most beginners already own one.
Active decomposition looks like this: the centre is hot, the material is dark and crumbly, white or grey fungal threads are visible, and the pile has shrunk noticeably in volume. If you have a thermometer, insert it and check after two or three days of building; a healthy hot pile climbs well above body temperature, and a pile that sits at ambient temperature is starving of either nitrogen, water or size.
Turn the outer material inward, water the dry side, and add whatever the pile tells you it needs. That’s the entire maintenance routine for a working pile.
Common Mistakes
Almost every stalled or stinking pile traces back to one of five things. The fixes are cheap, but they only work if you act on the symptom rather than waiting for the pile to sort itself out.
| Problem | Likely cause | Fix |
|---|---|---|
| Pile smells sour or of ammonia | Too wet, or too many greens | Add shredded cardboard or dry leaves by the bucketful, then turn to open air pockets |
| Pile never heats up | Too small, too dry, or short on fresh greens | Build to 3 ft cube, add greens and water, turn, and wait a few days |
| Flies, maggots or rats | Exposed food scraps, especially meat | Bury scraps inside browns, always cap food with a brown layer, avoid meat entirely |
| Cardboard visible after months | Pieces too large, browns packed too densely | Shred all cardboard and mix it rather than laying it in sheets |
| Pile looks grey and dusty | Dry and stalled | Water thoroughly and add fresh greens; wear a mask when handling dusty dry compost |
| Nothing composts, everything survives | Materials excluded, or pile never reached temperature | Check the pile is over 3 ft and mix the contents thoroughly into the hot centre |
Two of the biggest errors are the mirror images of each other. Building a kitchen-scrap-only pile gives you a slimy, stinking anaerobic heap, because scraps are almost pure nitrogen. Building a leaves-only pile gives you a dry heap that does nothing for a year, because there is no nitrogen to feed the decomposers.
Meat, fish, dairy and cooking oils stay out of a home pile. They attract pests, they smell, and they draw animals. Also keep out pet waste and cat litter, diseased plants, weed seeds, and any coated, waxed or printed cardboard. “Biodegradable” plastics usually need industrial composting conditions and will sit unchanged in a backyard pile for years.
Expecting finished compost immediately is the last common mistake, and the most common source of disappointment. A well-built, actively turned hot pile gives you usable compost in roughly 8 to 12 weeks. An untturned cold pile can take 6 to 12 months, and produces perfectly good compost. Cold composting is slower, not worse.
A couple of safety notes worth knowing. A pile that overheats in hot weather with no airflow can smoulder, so never leave a pile against dry timber, and check it after a heatwave. And you do not need a compost activator: a shovelful of finished compost or garden soil from the base of the pile already supplies the bacteria you need.
Finally, when you apply the finished compost, you can simply lay it on top of soil. One to two inches spread across a bed is fine, and worms and rain pull it down over a few weeks. Keep it away from plant stems and crowns, and do not bury seeds under it.
Frequently Asked Questions
How long does it take to make a compost pile at home?
A well-built, actively turned hot pile produces finished compost in roughly 8 to 12 weeks. An untturned cold pile usually takes 6 to 12 months. Both give usable compost; the difference is speed, not quality. Size, moisture, the brown-to-green balance and how often you turn are the four things that change the timeline most.
Can I compost in a container without a yard?
Yes. A countertop worm bin works indoors and is the most common apartment option. Outdoors, a keyhole hole or a short trench two feet deep handles kitchen scraps, and you fill it with the finished compost. Storage containers with drilled holes make compact patio piles that contain odour. Check your lease and local rules first, because vermiculture is restricted in some buildings and cities.
What materials should I avoid putting in a compost pile?
Leave out five categories: meat and fish, dairy and cooking oils, pet waste and cat litter, weed seeds and diseased plants, and coated or printed cardboard along with so-called biodegradable plastics. The first four attract pests and create odour. The last two break down far too slowly in a home pile to be useful.
Why does my compost pile smell bad?
A healthy pile smells like a forest floor. Sour, rotten or ammonia smells mean the pile is too wet, has too many greens, or not enough air. Add dry browns such as shredded cardboard, leaves or sawdust by the bucketful, turn the pile to reintroduce oxygen, and always bury fresh food scraps under a brown layer.
Do I need to turn a compost pile?
Not strictly. Turning speeds decomposition because it moves cooler outer material into the hot centre and refreshes the oxygen supply. Once a week for the first month, then every two to four weeks, is a workable rhythm. If you never turn it, the pile still breaks down, just more slowly, and a pile of that size will be cold rather than hot.
Can I start composting in winter?
You can, but expect it to be slow. Low temperatures are the most commonly reported reason a pile never heats up. You can help by building the pile large, keeping greens and moisture in the mix, and turning it on a mild day. In cold climates a countertop worm bin keeps working at indoor temperatures all year.
Start With a Small, Balanced Pile
If you do only one thing this week, choose a level spot on bare soil near the kitchen and gather three buckets of browns to one bucket of greens. Build it to three feet in every direction, water it until a squeezed handful leaves just a drop or two, and cap every layer of scraps with browns.
Then turn it once a week for the first month. The pile will shrink, darken and start smelling like a forest floor, which is the sign it is working. A couple of months from now you will have compost to top-dress your beds, and you will never buy a bag of soil amendment again.