Reading water means using what the surface tells you — speed, texture, color, foam lines, depth cues — to work out the shape of the riverbed and predict where fish are holding. Learning how to read water when fishing a river is mostly pattern recognition you can practice from the bank. This guide walks through a seven-step process you can run on any river in about fifteen minutes before you make your first cast. It takes a season or two before the readings become automatic, but the steps themselves are learnable on your first trip.
Beginners often describe reading water as something they can feel but not explain. That gap usually comes from skipping the slow scan and jumping straight to casting, so the habit worth building first is patience at the bank.
Table of Contents
- What You Need
- Step-by-Step: How to Read Water When Fishing a River
- Step 1: Read the River from Upstream to Downstream
- Step 2: Identify Seams, Riffles, and Eddies
- Step 3: Match Surface Appearance to Speed and Depth
- Step 4: Map Pools, Runs, and Fish-Holding Water
- Step 5: Use Banks, Tributaries, and Debris as Clues
- Step 6: Choose a Casting Target Based on Water Conditions
- Step 7: Confirm Your Reading and Adjust Your Approach
- Common Mistakes
- Frequently Asked Questions
- How can a beginner practice how to read water when fishing a river?
- Do polarized sunglasses really make river water easier to read?
- Does dark water mean a river is deeper than light water?
- How does the season change the way I should read a river?
- Are seams and eddies always better fishing spots than pools?
- Conclusion
What You Need
Reading water needs less gear than most people carry, but a few items decide whether you can see what the river is telling you.
- Polarized sunglasses. They cut surface glare and let you see the riverbed, submerged structure, and the line between fast and slow water. Amber, copper, and bronze lenses usually beat gray ones on moving water.
- A wading staff. This is the single most useful reading tool, because it probes depth in front of you and stops you from committing to water you misjudged.
- Studded felt or hard-bottom boots. They keep you upright on slick cobble and let you feel the riverbed through the sole.
- A range of terminal tackle. A bobbing rig, a weighted nymph, and something you can drift deep cover. Bright water and clear water need different tools.
- A stream thermometer and a local gauge reading. Temperature tells you which species will hold where; a gauge tells you how high or low the river is running.
- A map or photo of the reach. Contour lines and access points are useful, but the surface always wins over the map.
Learn the local rules before you walk in. Season closures, gear restrictions, and access boundaries are not details you want to discover mid-trip, and many rivers have different rules on opposite banks.
One safety note worth repeating: never step into water above your knees without a staff and a partner watching from the bank. Rivers that look shallow at the entry can drop to chest depth in three strides.
Step-by-Step: How to Read Water When Fishing a River
The process runs from the whole river down to one specific target. Work the steps in order and the cast becomes a decision rather than a guess.
Step 1: Read the River from Upstream to Downstream
Start high on the bank, look at the river as a shape, and scan from the top of the reach toward the bottom. Note where the channel narrows, where it widens, where the color changes, and where the surface texture changes.
This upstream-to-downstream scan is the habit beginners are told to build most often, and it is the one that pays off fastest. You are looking for the broad geometry: is this a braided section or a single channel, are there gravel bars pushing into the flow, where does the main current sit relative to the bank.
How do you tell where the main current is? The deepest, fastest line — the thalweg — shows up as a darker, more uniform band of surface with fewer ripples, and on a bend it presses against the outside bank because the water swings around the curve. Seeing that line first tells you where the deep water is before you look for anything else.
Step 2: Identify Seams, Riffles, and Eddies
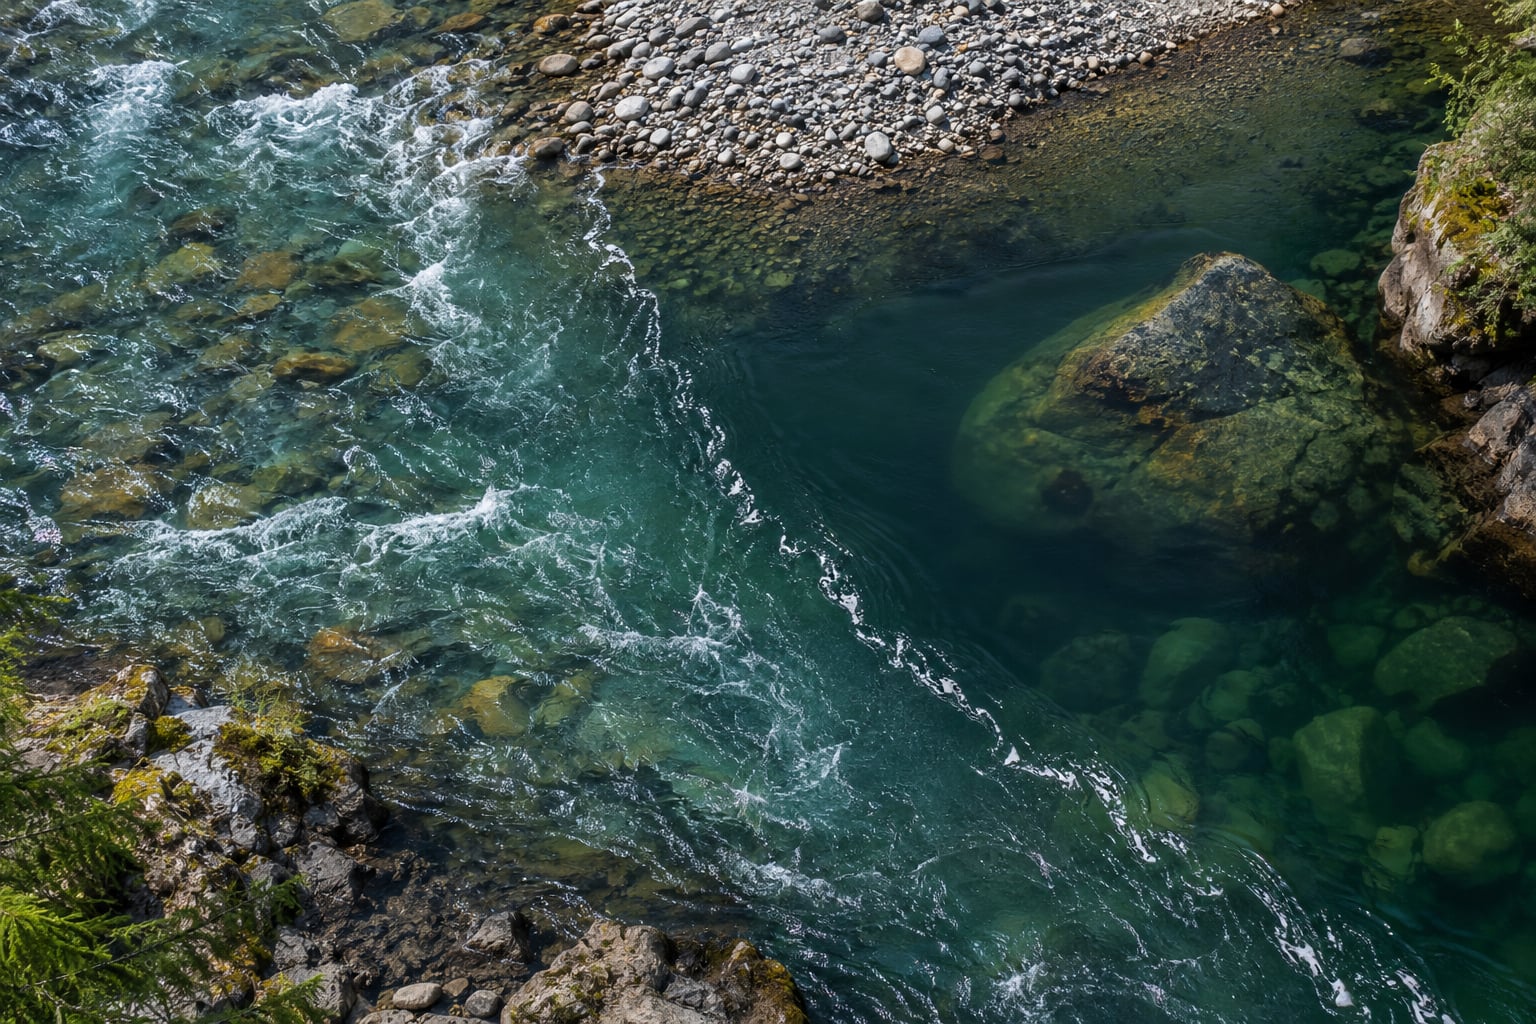
A seam is the boundary where fast water meets slow water, and it is usually visible as a line of bubbles, foam, or a color shift. Fish sit in the slow side of that line and eat what the current delivers.
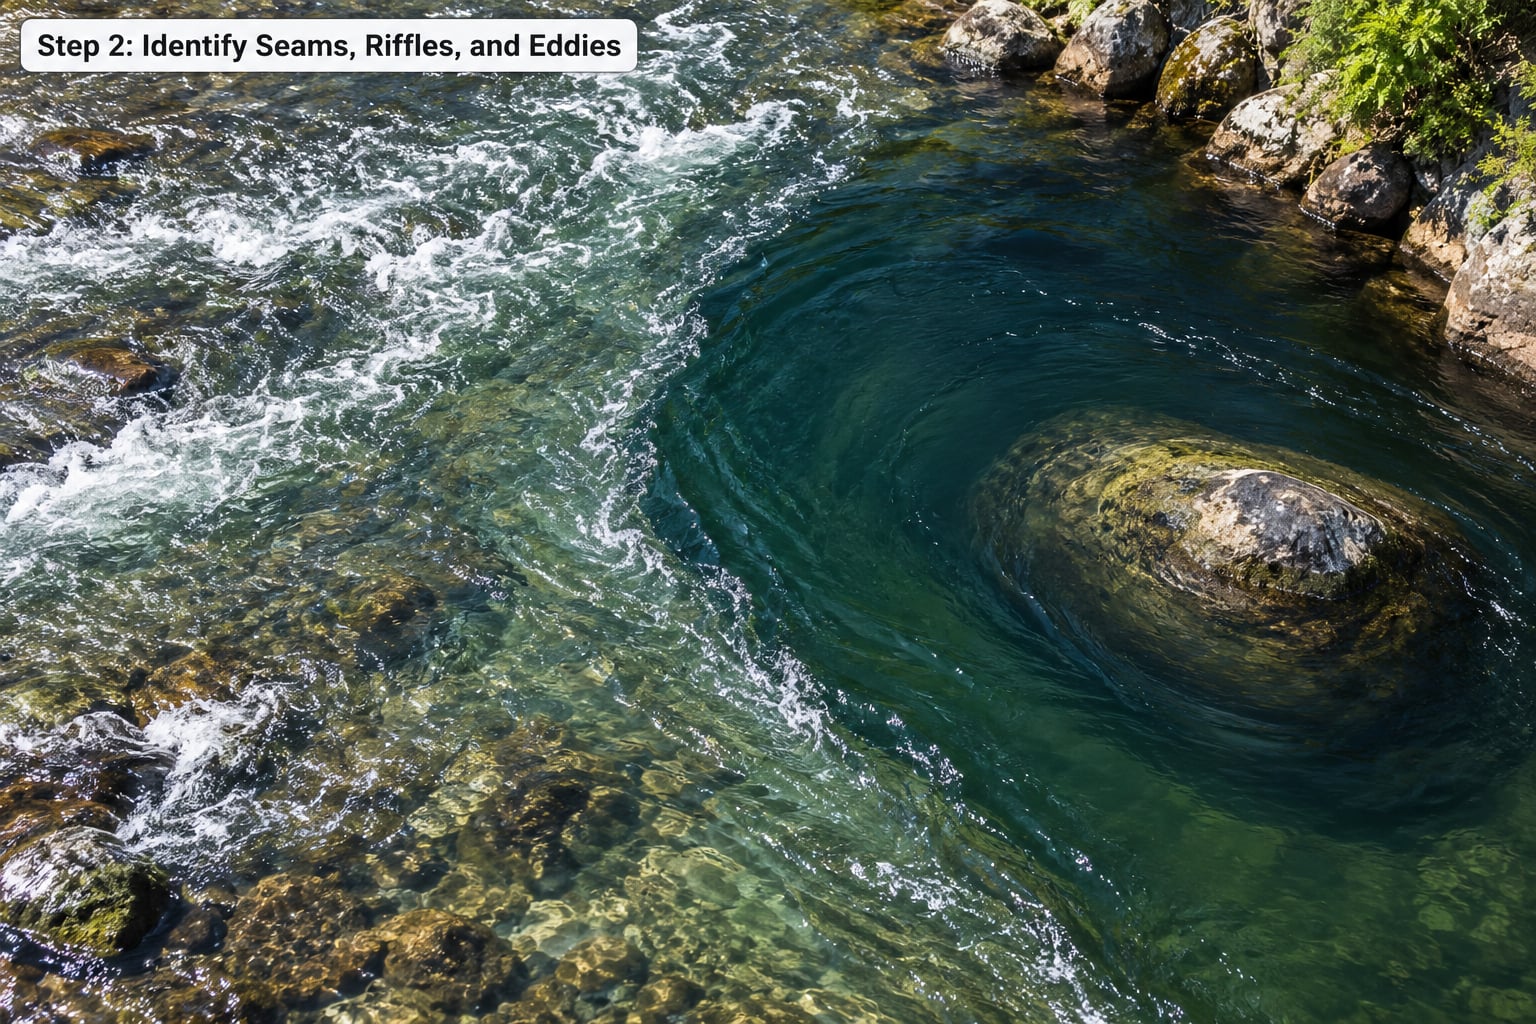
Where the fast current splits around an obstruction, the two sides are called eddies — slower water rotating back upstream against the obstacle. Behind a boulder you often get both: a seam in front where the current divides, and an eddy line behind it.
Riffles are the shallow, broken water where the flow runs fast over gravel or cobble. Look for standing waves, boils, and a choppy, dimpled surface. Fish feed in riffles because food comes through them, but most trout hold in the slower water adjacent to them.
Pocket water is the classic beginner target: a rough tongue of fast water between two smooth slabs. Concentrated insects get trapped there, and fish pick them off while holding in the slower margins.
Step 3: Match Surface Appearance to Speed and Depth
How to read water when fishing a river comes down to a handful of rules about what the surface looks like.
- Choppy, broken, dimpled surface usually means fast, shallow flow over cobble.
- Smooth, glassy, unruffled surface usually means slow, deep current — though it can also mean very shallow slack water in low summer flow.
- Standing waves and boils mean accelerating water that is being forced up and over something.
- A dark band or a smooth line in the middle of rough water usually means a drop-off or a deep channel beneath.
- A V-shaped pattern spreading downstream from a point means shallow gravel pushing into deeper water, and that V is where fish concentrate.
Appearance alone misleads you more than any other cue. Glassy water at the head of a pool is deep; glassy water spread wide across a gravel bar in August is ankle-high. Always cross-check what you see against the bank shape, the riffle above it, and any visible structure.
Polarized lenses are what make these cues usable. Glare off a smooth surface reflects light straight into your eyes and hides the bottom; a polarized filter cancels most of that reflection, so the cobble and the dark seams both pop.
Step 4: Map Pools, Runs, and Fish-Holding Water
Pools are the slow, deep pauses between fast sections; runs are the medium-fast connectors between them. Most trout hold six inches to two feet off the bottom in the pool, close to the seam where the current delivers food.
| Water feature | What it looks like | Likely condition | Best fishing implication |
|---|---|---|---|
| Riffle | Broken, choppy, standing waves | Fast, shallow, cobble bottom | Good for feeding fish; hold adjacent slow margins |
| Run | Smooth, consistent, directional flow | Medium-fast, moderate depth | Work downstream to upstream; fish hold near the bottom |
| Pool | Dark, glassy, slow surface | Slow, deep | Target the far seam, tailout, and drop-offs |
| Seam | Line of bubbles, foam, or color change | Boundary of fast and slow | Drift just inside the slow side of the line |
| Eddy line | Rotating water beside an obstacle | Slow against fast | Target where the eddy meets the main current |
| Tailout | Shallow gravel wedge at pool exit | Fast and shallow | Productive during low and clear water |
Two habits help here. Work a run from the bottom end upstream so debris you kick up drifts into water you have already fished, and give a pool a wide berth on your approach because the fish you spook are the ones you cannot see.
Step 5: Use Banks, Tributaries, and Debris as Clues
Bank shape tells you what is happening out of sight. An undercut bank means fast current has eaten into the edge; fish hold tight under the lip in cool, shaded water. A point bar on the inside of a bend means shallow gravel and slower current. A cut bank on the outside of a bend means the deepest water is right against it.
Tributaries and side channels add cold water, gravel, and insects, and they create a seam where the inflow meets the main river. That junction often out-produces the rest of the run.
Fallen trees and branches are the best cover you will find, and they are also the biggest snag hazard. Fish a tree from downstream or from the bank rather than wading into it, and treat any woody debris as a place not to put your rod tip.
Step 6: Choose a Casting Target Based on Water Conditions
Pick the spot where the water type, the current, the wind, and the sun all agree. In high or off-color water, fish usually move out of the main channel into side channels, backwaters, and seams near the bank, so the safe wade and the productive water are often the same place.
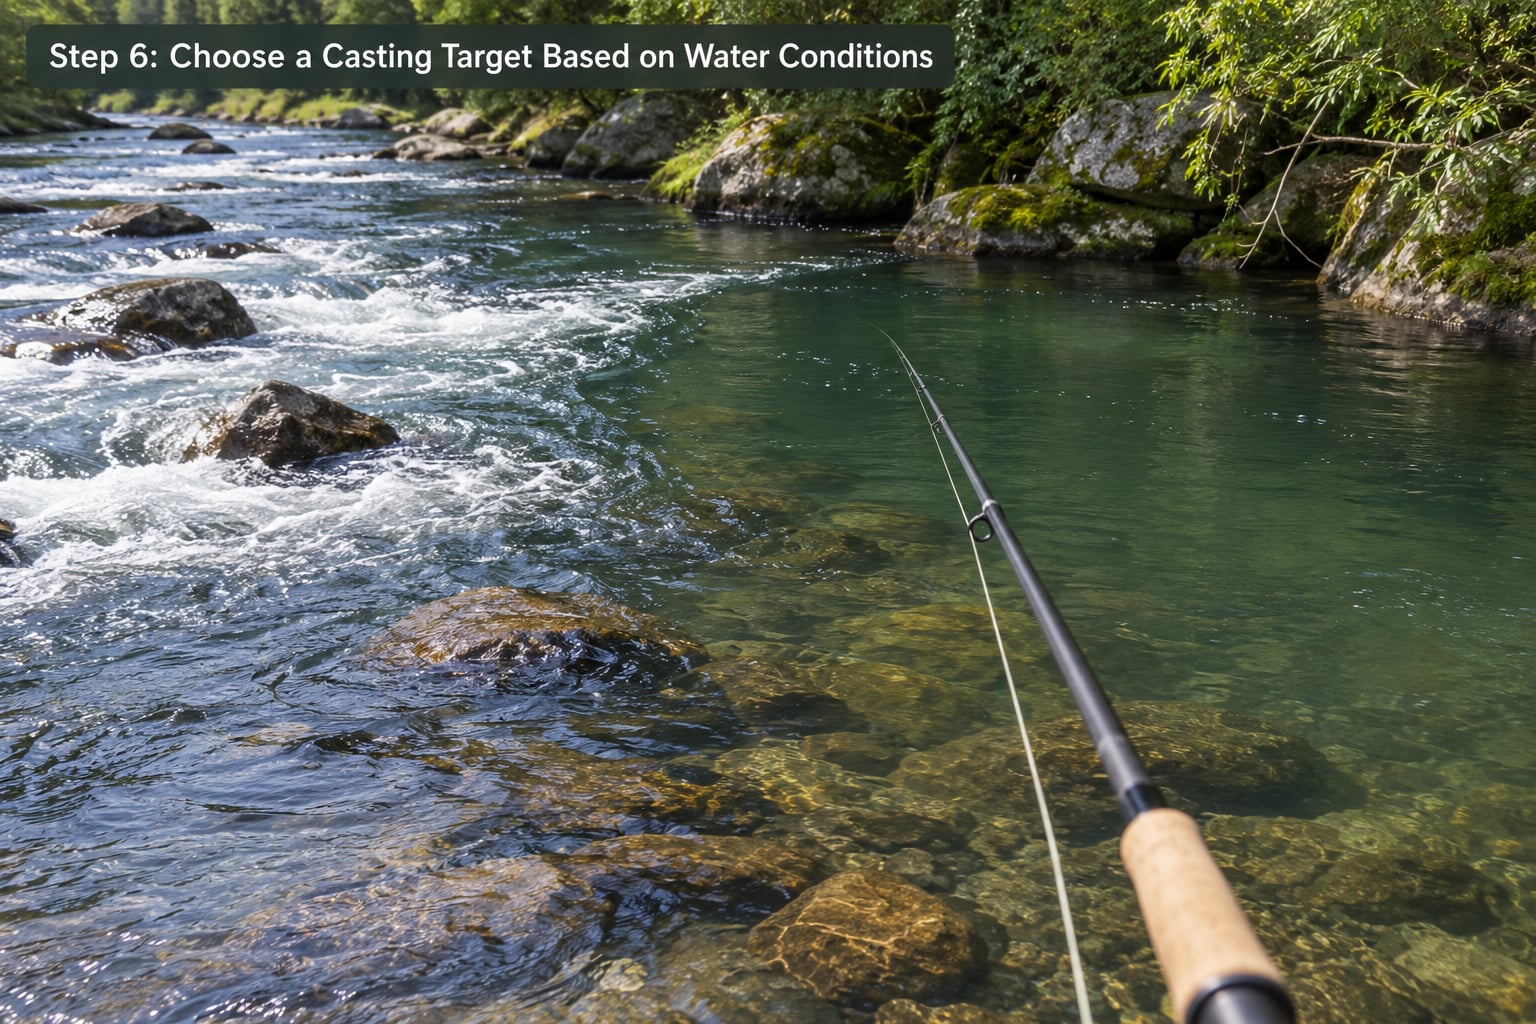
Against that, private water, undercut current, and heavy tree cover look inviting and are the most common places beginners get hurt or lose fish. Turbulent water that looks passable can be hiding a hole, and turbulent water that looks deadly is often fine waist-deep.
Wind and sun matter more than most beginners expect. A tailwind or quartering wind pushes your line and indicator downstream into fast water, so pick a seam whose line you can control. Low sun flattens the surface glare but makes it hard to see the bottom, so give yourself more time on the scan and trust the texture cues over depth cues.
Before committing to a target, verify it. Watch a piece of foam for a few seconds to see whether the current is pushing your line away from the spot or bringing it back, and check that you can land a cast on the far bank or the seam rather than in the tree behind it.
Step 7: Confirm Your Reading and Adjust Your Approach
Test your interpretation instead of trusting it. Start at the most accessible edge of a feature, cast to the nearest part of the seam or pool, and watch where your line lands rather than where you aimed it.
No bites after a few drifts usually means the spot or the presentation, not your life. A line landing well to the side of the seam is a current problem; correct it by moving your casting position downstream so the drift carries into the seam instead of across it. Landing above the fish means the fish are holding tighter to structure than you assumed, so move your target toward the log or boulder. Landing below the seam means you are drifting too fast across the transition.
If the current is running hard and nothing works, step back up to a spot with better control rather than repeating the same cast. And if a feature produces nothing across two different presentations, move on — dead eddies and inside corners of pools look promising and hold nothing.
Common Mistakes
Almost every beginner error comes from skipping a check, not from a lack of skill.
- Treating fast water as deep water. Fast choppy water is usually shallow cobble. Fix: match texture to depth, and probe with your staff before you wade.
- Fishing the whole bank. Casting randomly across a long run spreads your effort. Fix: pick three specific targets on the scan and work them thoroughly.
- Ignoring seams. The slow side of a current break is where drifting food stops. Fix: find one seam and give it ten careful drifts before moving.
- Wading in from below a pool. You push disturbed water into the water fish are holding in. Fix: approach from downstream or work upstream from the bottom end.
- Fishing riffles in cold, clear water. Fish want slower, deeper holding water when temperatures drop. Fix: move to the seam at the head or tail of the pool.
- Reading ripples as depth. Surface texture shows speed, not depth, and a deep smooth channel can be invisible. Fix: look for the dark band and the V-shaped gravel patterns.
- Overlooking season and flow. The same hole is a lie in April and a bust in August. Fix: check the temperature and the gauge reading before you choose your spot.
To train the eye, spend ten minutes on familiar water just reading. Stand still, watch the whole reach upstream to downstream, say your three picks out loud before you move, and note what actually produced fish. Doing that on the same pool every few weeks is how the reading stops being guesswork.
Frequently Asked Questions
How can a beginner practice how to read water when fishing a river?
Pick one familiar pool you have fished before and spend ten minutes reading it without casting. Scan upstream to downstream, say your top three spots out loud, then fish only those three and note which produced fish. Repeat on the same water every few weeks so you can compare what changed in the flow with what worked.
Do polarized sunglasses really make river water easier to read?
Yes, and they matter more than any other piece of reading gear. Polarized lenses cancel most of the glare that reflects off smooth water, which lets you see the riverbed, submerged boulders, drop-offs, and the line between fast and slow current. Warm tints like amber and copper usually give better contrast than gray lenses on moving water.
Does dark water mean a river is deeper than light water?
Often, but not always. Dark, smooth water usually marks deeper, slower current, while light, broken water usually marks shallow fast flow. In low summer water a wide sheet of light water can be ankle-deep, and dark tannin-stained water can be shallow but heavily stained. Cross-check color against riffles, bank shape, and any visible structure before you commit.
How does the season change the way I should read a river?
Season changes where fish hold more than it changes how they look. In spring melt, fish sit in seams, side channels, and slow bank water because the main current is too fast. In summer low water, they concentrate in the deepest pools and the few remaining seams. In autumn they spread back onto the riffles, and in winter they drop to the bottom of the slowest pockets.
Are seams and eddies always better fishing spots than pools?
No. A seam is productive when food is drifting through it, which is common in stained or high water but sparse in clear, cold conditions. A dead eddy behind an obstruction can hold nothing all day. Pools are usually more reliable in clear water, while seams and pocket water take over when the flow rises or the water clouds.
Conclusion
Reading water is a sequence, not a gift: scan upstream to downstream, find the main current, locate the seams, then pick three targets and work them one at a time. On your next trip, give yourself fifteen minutes of reading before the first cast, find one clear current break, and check it from a safe position rather than wading into the middle of it.
That habit is how to read water when fishing a river stops being guesswork and becomes a repeatable routine you can carry to any river you have never seen.