Cold-weather camps do not fail because of one bad night, they fail because of one damp layer, one thin pad, or one decision made too late. Learning how to camp in cold weather without freezing comes down to a system you can repeat: keep your insulation dry, cut off the ground and the wind, and check your own condition before it goes quiet. Most of the work happens before you ever get in the tent.
Below is the full sequence, from the forecast check before you leave to the last hour of the night, with the numbers that matter and a clear line for when the trip should end.
Table of Contents
- What You Need to Stay Warm
- Base, mid, and outer layers
- Skip cotton, every time
- The rest of the kit
- How much R-value you actually need
- Step-by-Step: How to Camp in Cold Weather Without Losing the Night
- Step 1: Check the Forecast and Build a Cold-Weather Plan
- Step 2: Choose a Sheltered Site and Protect the Ground
- Step 3: Dress in Layers and Keep Moisture Out
- Step 4: Build a Warm Shelter and Sleep System
- Step 5: Cook Safely, Eat Enough, and Keep Water Available
- Step 6: Stay Warm Overnight and Monitor Your Condition
- Common Cold-Weather Camping Mistakes
- Wearing cotton
- Underestimating the ground
- Overheating and sweating
- Cooking or heating inside a closed tent
- Packing more gear than you can carry
- Ignoring a forecast that is turning
- Underplanning food
- Waiting to turn back
- Frequently Asked Questions
- How cold is too cold to camp overnight?
- Can a sleeping pad keep you warm in freezing temperatures?
- Is it safe to use a propane heater inside a tent?
- What should I do if my sleeping bag or clothes get wet?
- How long should I check in when camping alone in cold weather?
- What is the most important piece of cold-weather camping gear?
- Start With the Sleep System and the Ground
What You Need to Stay Warm
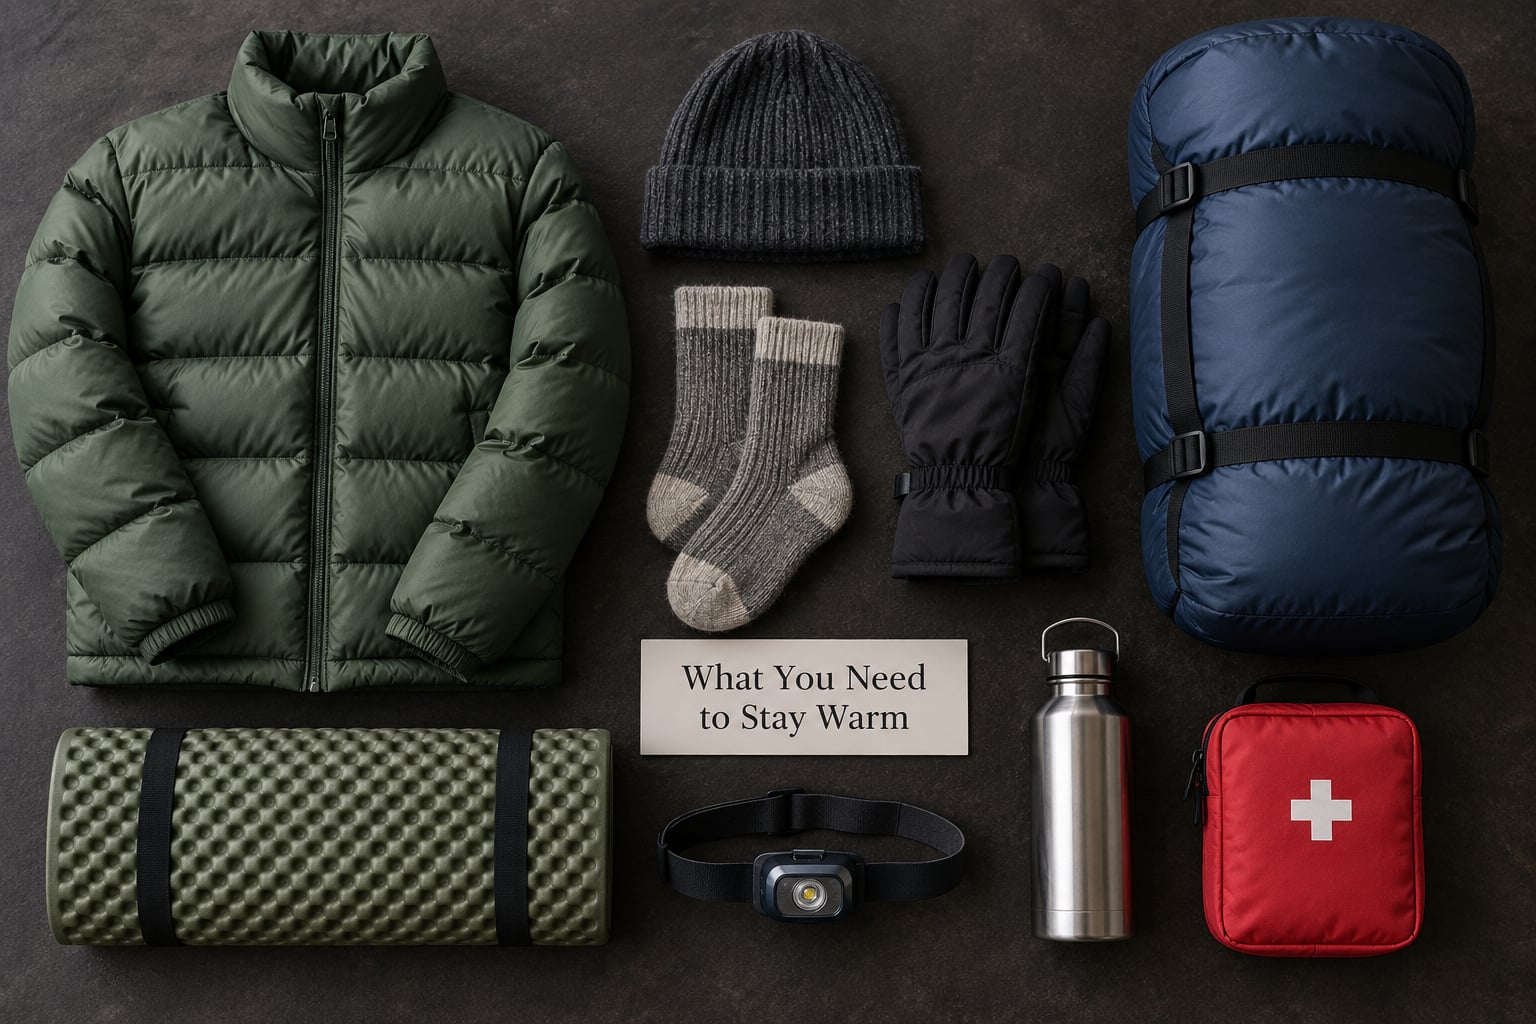
Warmth in a cold camp is a layered system, and each piece has one job. Get one layer wrong and the whole stack underperforms, no matter how good the coat is.
Base, mid, and outer layers
The base layer touches your skin. Its only job is moving sweat off your body before it soaks the layers above. Merino wool and synthetic blends both work; merino resists odour longer, synthetics dry faster.
The mid layer is the actual insulation. Down is warm for its weight and packs small, but it collapses when wet. Synthetic insulation keeps loft when damp and is the safer pick for long, humid trips or for anyone still learning to manage moisture.
The outer layer blocks wind and precipitation. Look for a hood that fits over your hat, sealed seams, and cuffs that close over your gloves, because wind through the neck and wrists is heat you can feel leaving.
Skip cotton, every time
Cotton absorbs sweat, dries slowly, and takes warmth with it. It works fine as a warm-weather layer and it is the wrong choice for anything you might sweat in or sit on. Denim has the same problem at a larger scale.
The rest of the kit
- Shelter: a four-season tent, or a three-season one if winds are forecast to stay light. More on tent choice in Step 4.
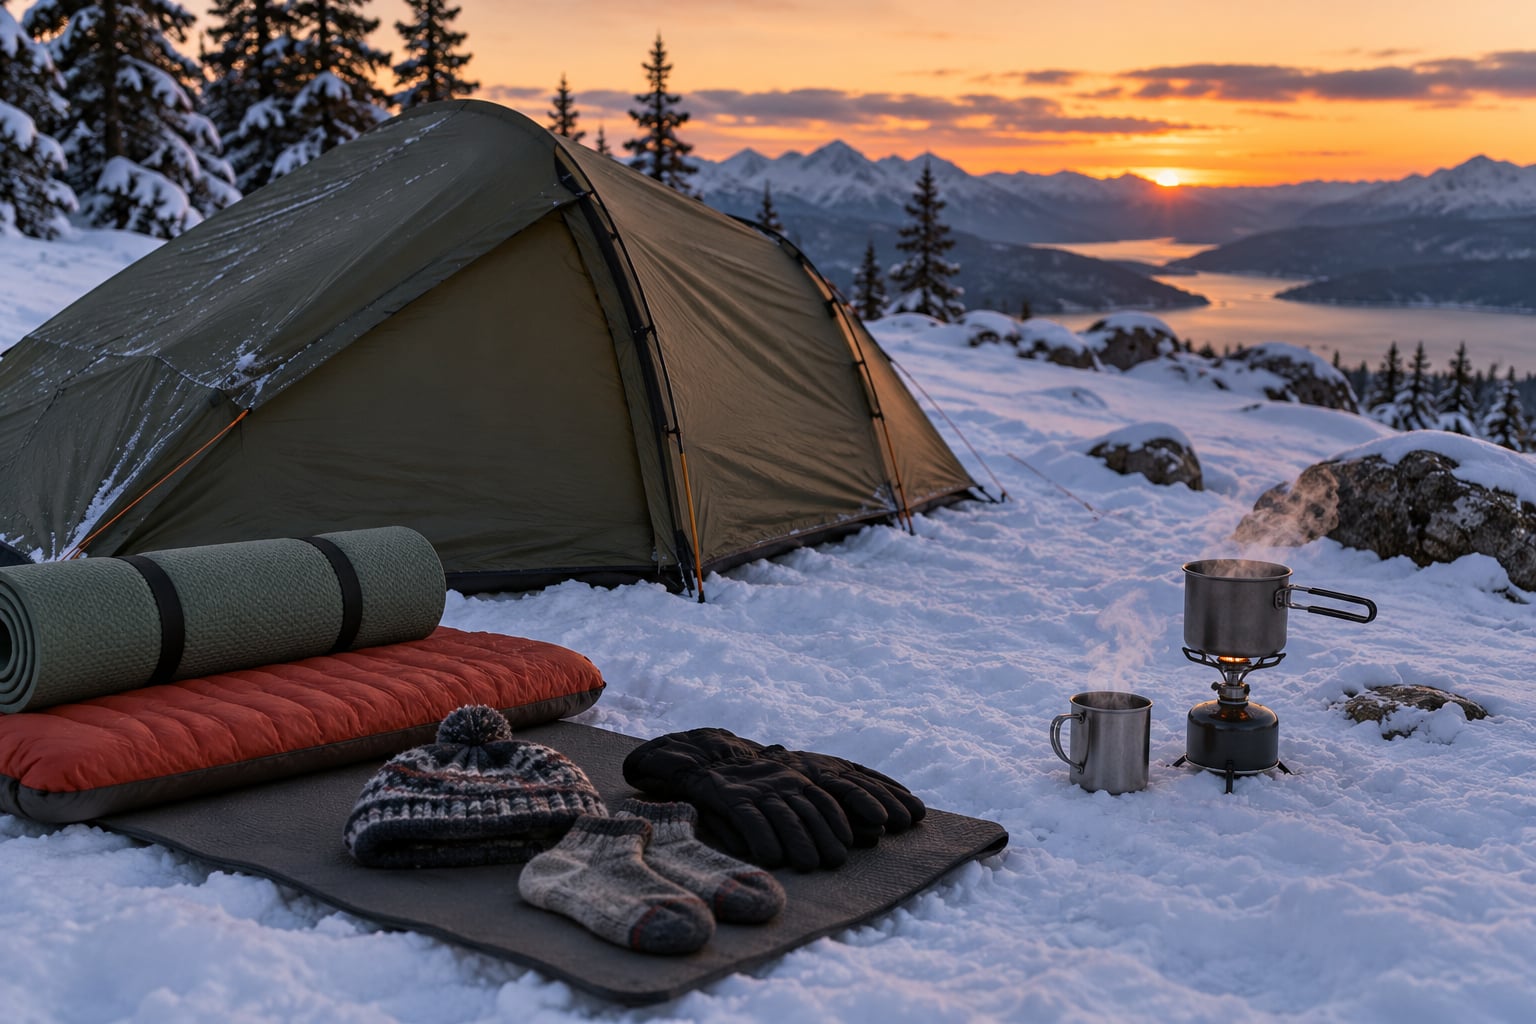
- Sleep system: a sleeping bag with an ISO comfort rating matched to the expected overnight low, plus pads whose combined R-value is well above the ground temperature you expect.
- Extras: a closed-cell foam pad to sit on, a wool or synthetic hat you can pull over your sleeping bag hood, gloves you can change in the dark, spare dry socks, a headlamp with spare batteries, a lighter plus a backup, a first-aid kit, and a way to be found.
- Food and water: high-calorie meals, a stove that works at low temperature, a lighter backup, and insulated containers.
How much R-value you actually need
R-value measures how well a pad resists heat moving from the ground into you. Values are added together, so two pads give you the sum of both. Frozen ground is far more aggressive than most first-timers expect, and this is the single most common reason people are cold despite a good bag.
| Pad setup | Total R-value | What it handles |
|---|---|---|
| Single 3-season inflatable (R 3) | 3 | Shoulder-season nights when the ground is near or above freezing |
| Single winter pad (R 5) | 5 | Most sub-freezing nights for an experienced camper |
| Closed-cell foam R 2.8 plus insulated inflatable R 4 | 6.8 | The standard winter stack, stable when the inflatable fails or gets punctured |
| Two closed-cell foam pads, R 3.4 each | 6.8 | The cheapest dependable option, and impossible to deflate overnight |
| Foam R 5.4 plus winter inflatable R 6 | 11.4 | Deep winter nights on frozen ground |
The rule most winter campers use: aim for a combined R-value of at least 6 for typical frozen-ground camping, and more for deep winter or winter backcountry trips. A cot does not remove the need for insulation underneath.
Step-by-Step: How to Camp in Cold Weather Without Losing the Night
Step 1: Check the Forecast and Build a Cold-Weather Plan
Read five things before you leave: the overnight low, the wind speed, the wind chill, the chance of precipitation or snow loading, and how fast the weather is changing. Daylight hours matter too, because you need enough light to set up before the temperature bottoms out.
Then decide, in writing, three things: your turnaround time, your bailout destination, and the temperature below which you end the trip early. A conservative rule works better than a brave one: if the overnight low is more than a few degrees below what your sleep system was tested to, you move the trip or add insulation rather than reasoning about it.
You know the plan is working when you can say where you will sleep tomorrow if tonight goes wrong. If you cannot name it, you do not have a plan yet.
Step 2: Choose a Sheltered Site and Protect the Ground
Cold air pools. Valleys, creek bottoms, and openings where wind funnels are where people wake up cold. Pick a site below or beside a slope or treeline that blocks the prevailing wind, but well clear of avalanche paths, dead trees, loose rock, and any water you would not want to cross at 2am.
Snow is not floor insulation. Shovel the pad area down to firm ground, pack the snow flat, and lay the closed-cell foam pad down first if you have one, since snow underneath a pad slowly collapses and lets the cold move up.
It is working when your tent door opens into a sheltered area rather than into the wind, and when the ground under your sleeping pad feels hard and even, not soft and hollow.
Step 3: Dress in Layers and Keep Moisture Out
Your biggest cold-weather danger is not the cold itself, it is sweating inside an insulating layer and staying wet into the night. In cold air, you can feel warm and still be losing moisture through your skin and breath.
Use a dry base layer, change out of it before it dampens, and add or remove the mid layer rather than opening everything up. A hat and gloves keep you out of sweating because they contain your heat instead of releasing it. Ventilate a jacket before you get properly wet, because there is no dry clothing in camp that fixes a soaked shell.
Dry sleep clothes that never get worn while moving are the cheapest warmth in the whole kit, and the upgrade people notice first. Most people learning how to camp in cold weather without freezing point to this one change.
It is working when you can stay comfortable without peeling layers off, and when your base layer is dry to the touch when you change in the morning.
Step 4: Build a Warm Shelter and Sleep System
Tent choice matters more than most guides admit. A three-season tent with large mesh panels will hold snow and let wind through; a four-season tent has fewer panels, stronger poles, and usually a vestibule you can close. Snow banks against the sheltered wall and becomes a windbreak, so orient the tent with the broad side to the weather if you can.
Ventilation is the counterintuitive part. Breath moisture has to go somewhere, and in a sealed tent it condenses on the inside of the fabric, soaks your sleeping bag, and can leave you colder in a sealed tent than in an open one. Crack a vent a few centimetres, keep gear away from the walls, and dry any damp fabric in the morning rather than at night.
For the sleep system, check three numbers. The ISO comfort rating on the bag is the one that matters, because it is the temperature at which you are meant to sleep comfortably; the lower limit describes survival for six hours, and most people use it as a comfort rating by mistake. Down means lighter and warmer for its weight, synthetic means it keeps working when damp. A liner adds a real layer of loft without much weight, and it protects the bag you paid for.
Fill any gaps around the pad so air does not circulate underneath the bag, keep the hood cinched around your face, and use the draft collar if the bag has one. It is working when you settle in and the cold stops entering from underneath or from the seams.
Step 5: Cook Safely, Eat Enough, and Keep Water Available
Cold makes you burn more energy at rest, and you need more fuel and more calories than you expect. Eat calorie-dense meals, fats included, in small amounts several times a day rather than one large dinner. A hot meal and a warm drink about an hour before bed help people sleep through the coldest part of the night, and ramen with an egg dropped in or a mug of broth are cheap ways to do it.
Handle water so it stays usable. Fill bottles at the end of the day and keep them inside your sleeping bag, inside an insulated container, or upside down in a sheltered spot. Sleeping with a full bottle is the oldest trick there is, and it keeps your last drink liquid instead of frozen.
Never run a stove, heater, or any burning fuel inside a closed tent. Carbon monoxide builds without warning, and it is the one camping mistake that turns a cold night into an emergency. Cook outside, downwind, with the tent door open, and store fuel where it cannot freeze.
It is working when your fuel is available every time you need it and your water is drinkable first thing in the morning.
Step 6: Stay Warm Overnight and Monitor Your Condition
Use a short routine before you get in. Change into dry sleep clothes, drink something warm, move around for a few minutes to warm up without sweating, and get into the bag before you start shivering. Never get into a cold bag and rely on shivering to warm up, because shivering is your body working, not your body coping.
Keep your core warm: a warm hat, a filled hot water bottle placed safely under covers rather than directly against skin, and a layer over your legs. People ask constantly whether to sleep clothed or naked, and the honest answer is that loose dry clothing works for many, while others sleep warmer with less clothing and fewer damp layers. The test is whether you woke up dry.
Watch for warning signs, and treat them as information rather than as something to push through. Uncontrollable shivering, clumsiness, slowed or slurred speech, unusual fatigue, confusion, and someone who seems irrational or unusually quiet all mean the same thing: stop, get warm, and get sheltered. A person with hypothermia often does not know they have it, so make the call yourself.
If you cannot stop the shivering after getting warm and dry, that is a rescue situation. Turn around early while you still have options, not after the road is closed.
Common Cold-Weather Camping Mistakes
Almost every miserable winter trip traces back to one of these. Each has a simple fix, and none of the fixes require expensive gear.
Wearing cotton
Cotton absorbs sweat and dries so slowly that you end a mild night dangerously cold. Replace it with merino or synthetic for everything you wear while moving, and keep cotton for sitting around camp.
Underestimating the ground
A comfortable bag does nothing about conduction from frozen soil. A combined R-value of 6 or more, ideally foam plus inflatable, is the cheapest fix in winter camping and the one most often skipped.
Overheating and sweating
If you are damp inside your layers, you are already behind. Manage temperature with layers you can open and vent rather than one heavy layer, and change socks before your feet go cold and wet.
Cooking or heating inside a closed tent
Carbon monoxide is colourless and odourless, and a sealed tent concentrates it. Cook outdoors with the door open, and check the label before using any propane device in camp.
Packing more gear than you can carry
A heavy pack slows you down, which keeps you cold. Fewer items worn well beat items you never unpacked, and cheap add-ons like a foam pad, a hat, and dry sleep clothes weigh almost nothing.
Ignoring a forecast that is turning
The fastest way to get hurt is to keep walking because the trip is already booked. Set your turnaround time at the start, check the forecast each morning, and leave early while the road is still open.
Underplanning food
Warmth is not only clothing. Under-eat for two days in the cold and your body has less fuel to produce heat, which shows up at 3am when you cannot get warm.
Waiting to turn back
The last hour of daylight is the most dangerous part of a cold trip, not the first. Make the decision in the morning while you are still warm and still thinking clearly, and say out loud what would change your mind.
Frequently Asked Questions
How cold is too cold to camp overnight?
There is no single number, because the honest answer depends on your sleep system, your shelter, your skill, and how far you are from help. As a working guide, most campers handle single digit nights with a bag at or below 20F, a combined pad R-value of 6 or more, and a four-season tent. Below that, treat it as a training trip close to a road unless you have real winter experience.
Can a sleeping pad keep you warm in freezing temperatures?
Yes, and this is where most people lose the night. Conduction through frozen ground is one of the biggest heat losses you face, and pad R-value is designed to fight it. R-values add together, so a foam pad at R 2.8 stacked with an insulated inflatable at R 4 gives you R 6.8, which is a solid winter setup for most conditions.
Is it safe to use a propane heater inside a tent?
A propane or butane heater burns fuel indoors without enough airflow, so carbon monoxide builds up quietly. Only use a device inside a tent if the manufacturer’s instructions specifically rate it for that tent, and even then keep a vent open. Any stove, lantern, or unrated heater belongs outside with the tent door open.
What should I do if my sleeping bag or clothes get wet?
Get the insulation off your body and start warming a source of heat first, because damp down or synthetic loses most of its loft and stops trapping warmth. Squeeze out what you can, spread the item as open to air as you can manage, and keep it out of its stuff sack overnight. Dry clothes and a warm fire beat a soaked bag.
How long should I check in when camping alone in cold weather?
Tell someone your route and your planned return time before you leave, and agree on how often you will message during daylight hours, commonly every evening. Set a missed check-in threshold, usually twelve hours, and name the person who will contact search and rescue if you do not respond. A satellite messenger or a personal locator beacon is worth carrying alone.
What is the most important piece of cold-weather camping gear?
A sleep system that matches the forecast, meaning a bag with an ISO comfort rating at or below the expected low and a combined pad R-value of 6 or more. Daytime layers can be repaired and adjusted with movement, but sleep is eight hours of motionless heat loss you cannot fix once it goes wrong. Get the system right first, then spend on the rest.
Start With the Sleep System and the Ground
If you only change one thing, fix the sleep system. A bag with an ISO comfort rating that matches your coldest forecast night, stacked pads with a combined R-value of 6 or more, a dry base layer, and a closed vent in a sheltered tent will solve most cold-weather camping complaints before any new jacket does.
Knowing how to camp in cold weather without freezing is mostly repetition around that one decision: check the forecast, turn back early, keep the insulation dry, eat enough, and treat shivering that will not stop as an emergency rather than an inconvenience.