The most common archery form mistake is holding on too hard: squeezing the riser, jamming the string against your face, and muscling the draw instead of letting the bow do the work. Every other error in this guide tends to grow out of that one habit, so fixing the grip makes the rest easier to feel and easier to repeat.
This guide is written for beginner and intermediate target archers shooting either a recurve or a compound. Every mistake below comes with the sign that gives it away, the correction, and a short drill you can run at an indoor range. Most of it needs no gear, no coach and no more than ten minutes a session.
One thing worth saying up front: there is no single correct way to shoot a bow. Traditional, Olympic and compound archers all have valid styles, and everyone at the range has an opinion about everyone else’s release. What matters is that you can put the same shot together twice in a row.
Table of Contents
- Common Archery Form Mistakes at a Glance
- 1. Incorrect Stance and Body Alignment
- 2. Holding the Bow Too Tightly
- 3. Drawing the String to the Wrong Facial Position
- 4. Pulling the Bow Around the Anchor
- 5. Flashing or Pinching the String Release
- 6. Moving the Bow Hand and Bow During the Shot
- 7. Using the Top Shoulder Instead of the Back
- How to Fix Common Archery Form Mistakes Before Full Draw
- 8. Turning the Head or Losing Sight Alignment
- 9. Poor Stance During the Follow-Through
- 10. Changing Form Instead of Making One Correction at a Time
- Frequently Asked Questions
- What is the most common archery form mistake for beginners?
- Should a beginner use a bow release aid to fix form?
- How do I know if my archery anchor point is consistent?
- How long does it take to correct a common archery form mistake?
- When should an archer stop practicing and ask a coach for help?
- Conclusion
Common Archery Form Mistakes at a Glance
Read the signs column before you start changing anything. If you recognise two or three rows at once, fix the top row first, because mistakes stack and the upper one usually hides the lower one.
| Mistake | What it looks like | Correction | Short drill |
|---|---|---|---|
| 1. Bad stance and alignment | Feet uneven, body turned sideways, leaning toward the target | Square, comfortable feet set before the bow goes up | Ten shots with feet taped or marked on the floor |
| 2. Gripping too tightly | Fingers white, grip sliding, sore hand after 30 arrows | Relaxed grip, knuckles near 45 degrees, grip in the thumb meat | Shoot deliberately loose, then check the grip shift after release |
| 3. Wrong facial anchor | String on the nose, or tucked under the jaw at a different spot each shot | Anchor under the eye along the cheekbone, bow level | String-to-nose touch check at full draw |
| 4. Pulling the bow around the anchor | Draw hand creeps toward the eye after full draw | Press the bow hand forward while the string hand stays put | Wall-facing alignment drill with the bow held at full draw |
| 5. Flashing or pinching the release | String slap, pinched nock, bow jumps at the shot | Release aid, then expand the back hand instead of pulling fingers | Short bursts of three arrows, quality over volume |
| 6. Bow hand and bow moving | Sight pin dances, bow cants, bow hand drifts forward | Aim with the face, hold the position until the arrow lands | Freeze at full draw and check the hand against a wall or mirror |
| 7. Top shoulder instead of back | Shoulder shrugged, fatigue after a short session, string left of centre | Set the bow shoulder, relax the upper traps, rotate underneath | Shoulder check before raising the bow, ten slow reps |
| 8. Head turn and sight misalignment | Head tips forward like a rifle, string drifts off the aiming eye | Keep the string over the aiming eye, verify dominance once | Read the group: vertical spread points here |
| 9. Broken follow-through | Stepping back, bow arm dropping, weight on the back foot | Balanced finish, bow arm relaxed to the side | Record the finish position after ten arrows |
| 10. Changing everything at once | New habits every session, group never improves | One correction per block, logged and measured | Thirty-day log of a single variable |
1. Incorrect Stance and Body Alignment
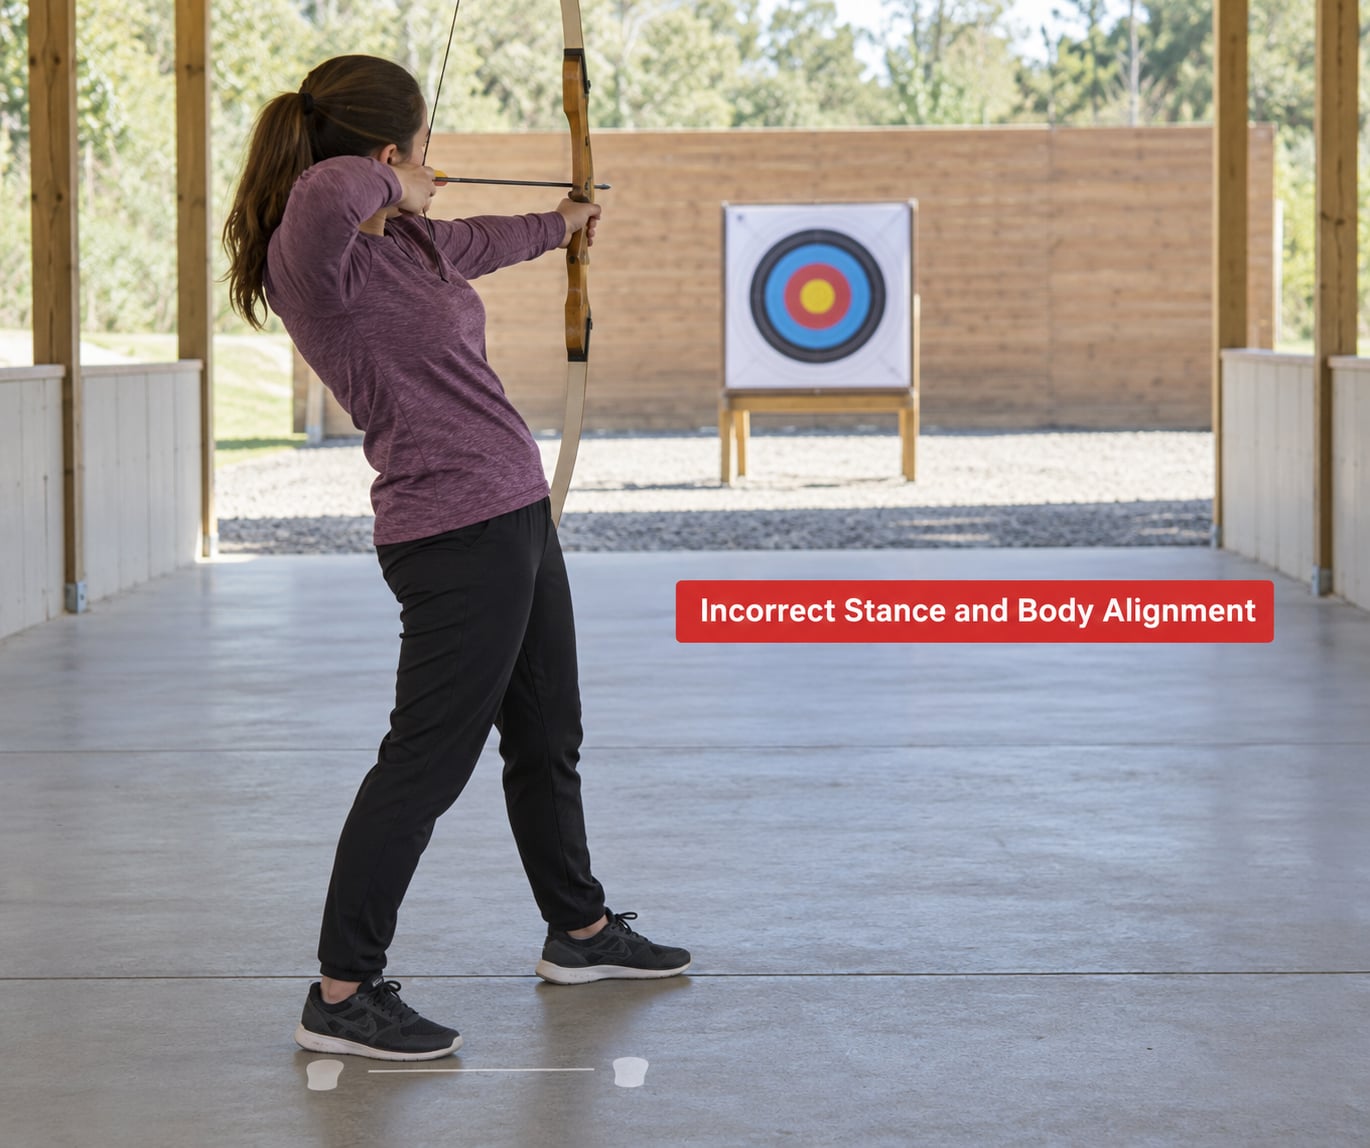
Stance mistakes show up as weight that keeps shifting between shots. One arrow is fine, the next drifts, and the grouping looks random even though your draw feels identical.
Two things cause most of it. The first is foot width: standing with feet too close together leaves you wobbling, and standing too wide makes you rock backwards under tension. Pick a width that feels like a normal relaxed standing posture and stay there.
The second is pointing the body or the target. Turning the hips or the toes toward the target looks natural and it is not, because it loads one side of the draw unevenly. Set your feet, then turn the whole body to face the target as one unit.
How to fix it: mark two spots on the floor with tape or chalk, one for each foot. Stand on them, square up, and check that your weight sits evenly between both heels. Say the word “draw” to yourself only after the stance feels settled.
Do not lock the knees. A tiny, natural bend keeps you balanced and absorbs the pressure of the draw; a locked knee locks the wobble into the shot. Recurve archers should also check string clearance here, since a sloppy stance can push the string into the bow arm on release.
2. Holding the Bow Too Tightly
A tight grip is the quiet mistake. It feels like control, but it is really tension, and tension travels up the bow arm into the shoulder and then into the string hand.
The tell is your hand after a session. If your forearm, thumb or fingers ache, or your grip seems to have shifted slightly on the riser when you look at it, you were squeezing. Hand torque from a rigid grip twists the bow a fraction of a degree at full draw, and that fraction is enough to scatter a group left and right.
How to fix it: let the bow sit in the webbing between your thumb and index finger rather than in the flat of the palm. The pressure comes from the middle three fingers curling around, not from squeezing with the whole hand. Knuckles pointing about 45 degrees to the target is a good visual check, and one side-view phone photo will show you the angle instantly.
Then test it. Shoot a few arrows with a deliberately loose grip, release, and look at where the bow sits now. If the grip has moved, that was all your tension. Bring the bow hand back to life and relax the fingers again.
The bow hand is a fixed point, not a muscle. Its job is to hold the bow still and then go along for the ride, which is why a bow sling is worth learning even for beginners.
3. Drawing the String to the Wrong Facial Position
Beginners often tilt the head forward like sighting down a rifle scope, trying to bring the string to the eye. Instead, the string comes to the face while the head stays upright.
The second problem is anchoring too high. Too high and the sight ring sits at an angle that fights your aiming eye; too low and you are pulling across your face, which irritates the skin and makes consistency harder. Most archers settle somewhere under the eye along the cheekbone, on the same spot every single time.
How to fix it: at full draw, close one eye and touch the string to your nose. If it cannot reach without tipping your chin down, your anchor is too high. A kisser button on the string is the fastest fix, because it turns a fuzzy memory into a physical reference point.
Keep the bow level through this. Level means the top limb and bottom limb sit in the same plane, which is easier to feel than to see. Take a ten-second side-view phone video of three shots; the frame where the string touches your face will tell you more than any mirror.
4. Pulling the Bow Around the Anchor
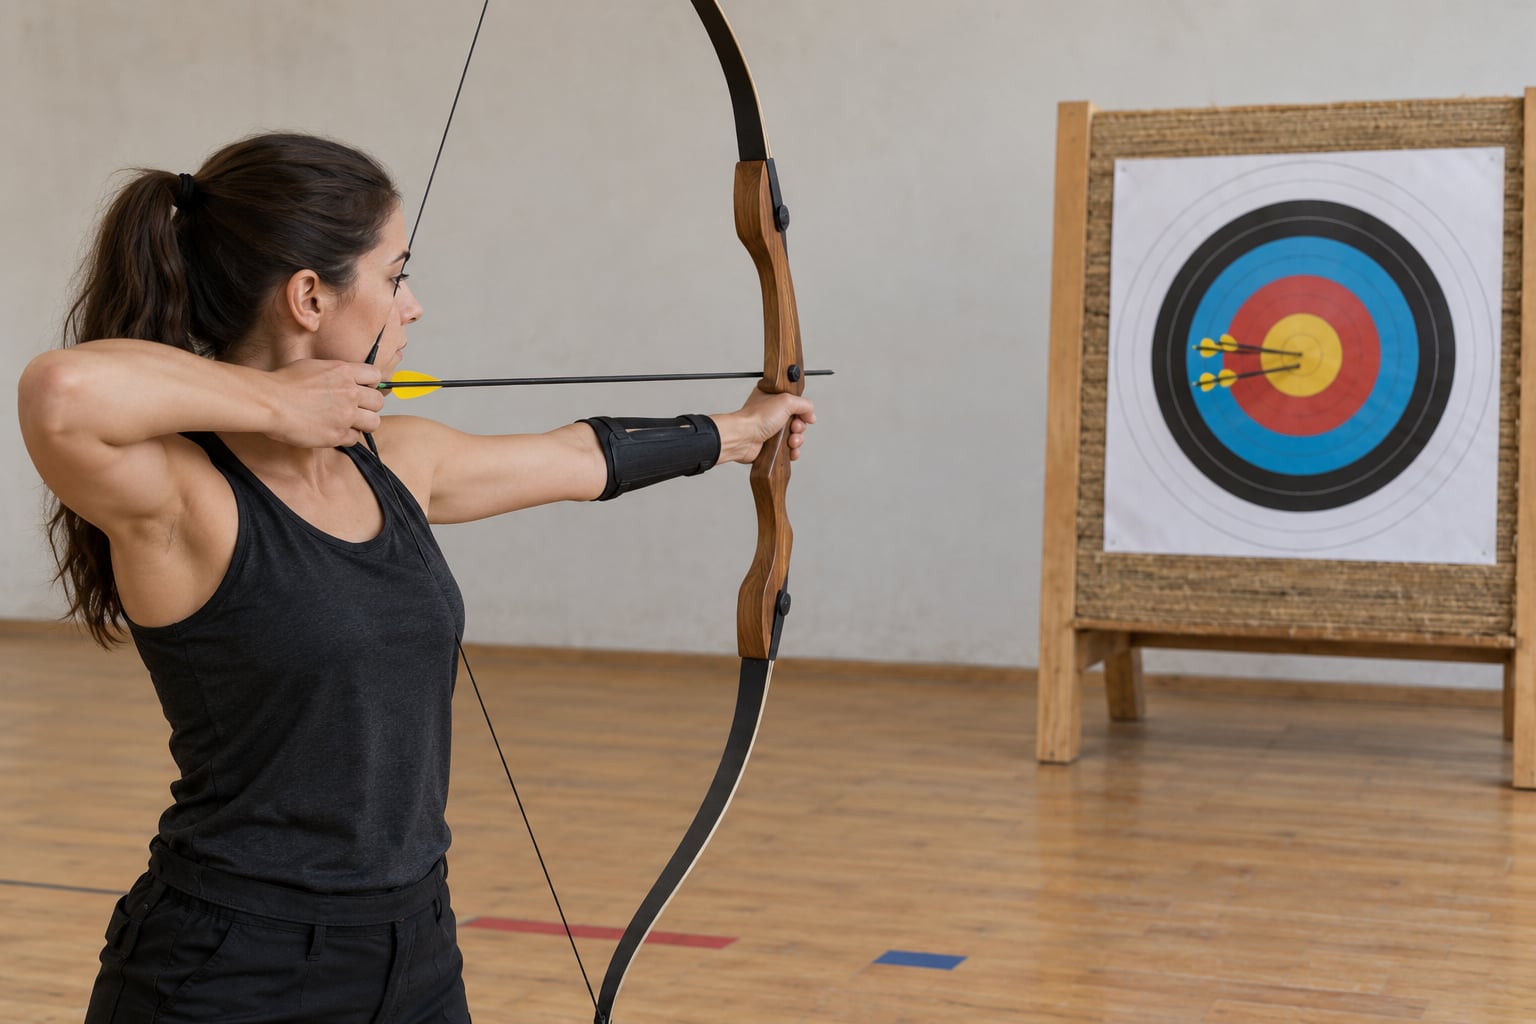
Reaching full draw is not the finish of the draw. A very common error happens next: the archer keeps pulling, the string hand creeps backward toward the shooting eye, and the string slides off the centre of the face.
On a recurve this moves the string hand inside the jaw line and you lose your back tension, so the shot leaves off centre. On a compound the same instinct is worse, because the block hits the back stop and the hand over-rotates into the anchor, putting the arrow down and often right.
Losing back tension and letting the release hand drift off the face are two of the most common causes of off-centreline shooting. It is a small movement that most archers never notice, because it happens after the shot already feels ready.
How to fix it: hold the bow at full draw and face a wall six feet away. Have a partner, or your reflection, check the string hand and the bow hand before you release. Your job at that point is expansion, not more pull. Push the bow hand forward gently while the string hand stays exactly where it is; the draw hand should feel like it is being pulled into the face.
Once that feels right, shoot ten arrows without changing anything else. If your vertical spread tightens noticeably, this was the problem.
5. Flashing or Pinching the String Release
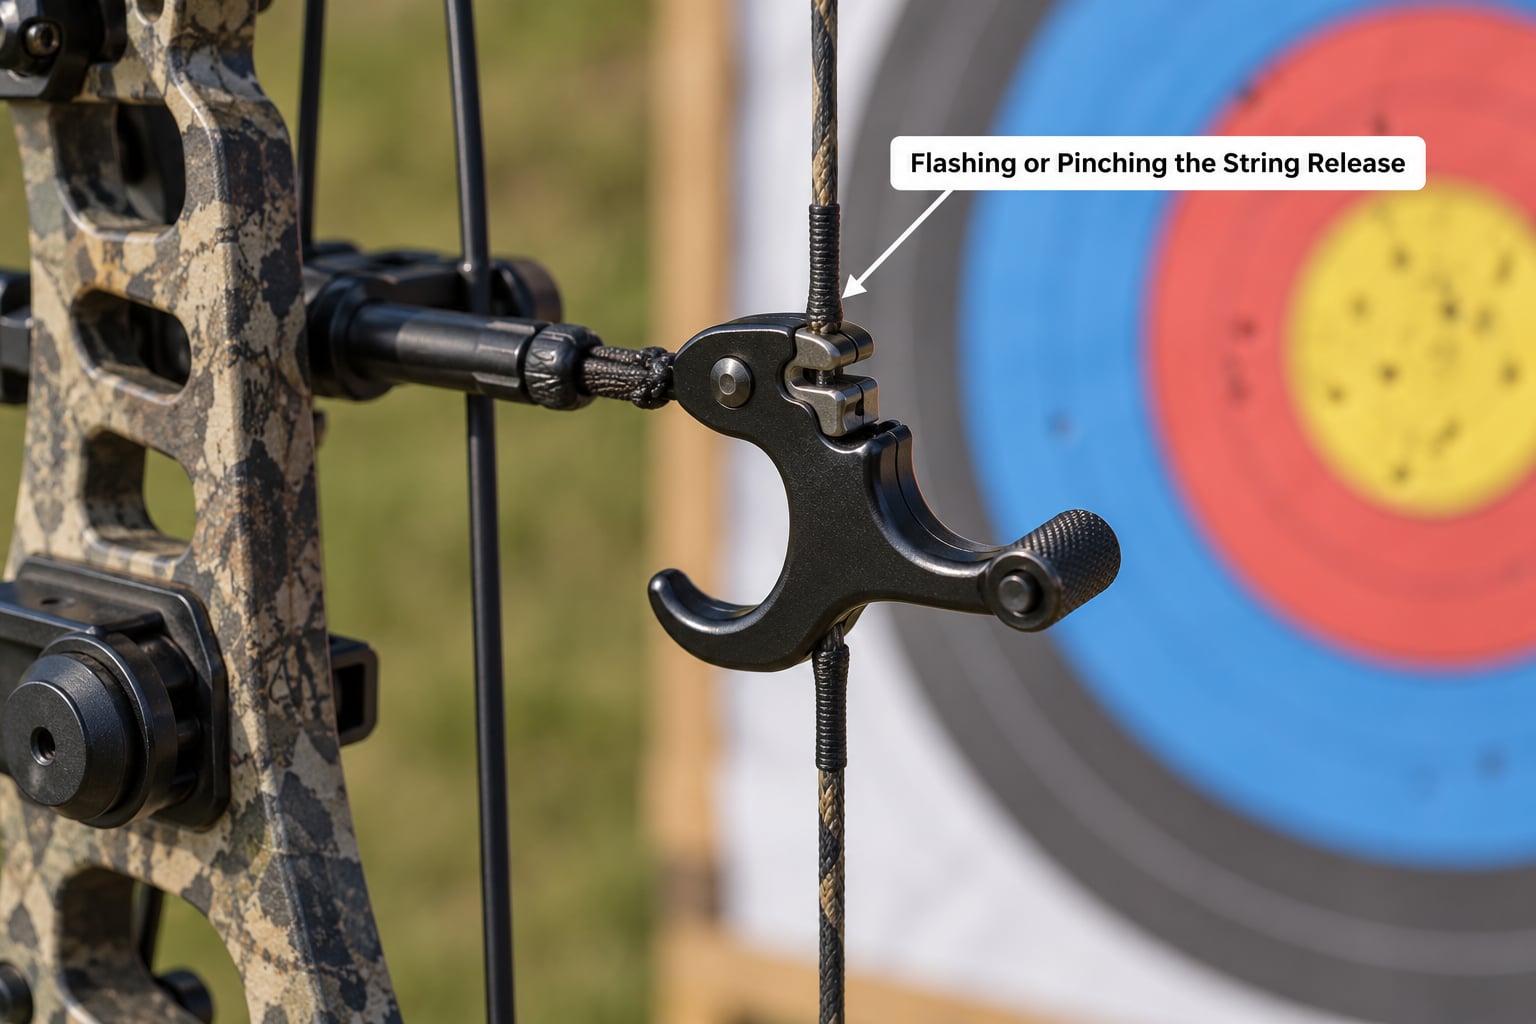
A clean release is boring: the fingers stop gripping and the string travels straight down the sight line. Anything else steals energy. Flinging the release hand off the face rotates the bow. Pinching the nock with the last finger sends the arrow off to the side and often produces string slap on the forearm.
Beginners usually flash because they are bracing for the shot to end. They grip harder, pull harder, then let go all at once. The result is an arrow that leaves fast but lands wherever the bow happened to be pointing.
How to fix it: a release aid is the simplest correction available, and it is not cheating. A mechanical release mounted to the string, or a thumb release on a compound, moves the timing to a tool instead of your fingertips. You still have to let go, but you let go the same way every time.
Then change what you think about. Focus on the string hand moving back into the face as the bow hand goes forward, not on the fingers opening. A few short bursts of three arrows, full recovery between shots, will teach more than fifty arrows fired fast.
Wear an arm guard and finger protection while you work on this. A string slap that stings your forearm teaches your body to flinch at the next shot, and suddenly you have a new form problem you did not ask for.
One safety note while you experiment: never draw without an arrow unless the bow is designed for dry firing, and check the range lane before you nock up.
6. Moving the Bow Hand and Bow During the Shot
The bow hand should arrive at its position and then stay there. Instead, it often nudges forward a fraction, pushes the string across the sight ring and rolls the bow a degree or two in the hand.
This is the mistake people notice most in video. If the sight pin dances during your draw or your release, the bow hand is doing the aiming work instead of the face.
How to fix it: aim with your face, not your hand. Set the string on your anchor, look through the sight ring, and if the pin is off, change your head position rather than swinging the bow around. That single rule removes an entire category of bow-hand wobble.
To check the bow hand itself, set the bow down, put your hand where it goes, and look at it in a mirror or in a phone photo. Most people find the wrist has collapsed inward or the fingers have slid off the shelf. Reset the thumb so the first knuckle lines up with the second, then close the fingers.
Freeze at full draw for ten seconds and check the position before releasing. If your hand moves during the freeze, it will move during the shot.
7. Using the Top Shoulder Instead of the Back
Pulling with the arm, shrugging the shoulder up toward the ear, or trying to muscle the bow to full draw all produce the same fatigue after twenty arrows. The muscles that do the work are larger, further back, and they work far more efficiently.
How to fix it: set your bow shoulder before the bow goes up. Push the shoulder blade down and let the arm hang heavy, then raise the bow and draw with the elbow travelling back rather than up. Rotate underneath the shoulder instead of lifting the whole shoulder toward the string.
Relax the upper traps deliberately between arrows. A shrug you release on purpose is much easier to manage than a shrug you never notice.
How to Fix Common Archery Form Mistakes Before Full Draw
Most of these archery form mistakes can be caught before you ever load the string. Run this short check at the start of every session and you will stop adding errors while trying to fix old ones.
- Feet. Are both feet on their marks and the weight even between them?
- Grip. Is the bow sitting in the webbing with knuckles near 45 degrees, fingers not white?
- Shoulder. Is the bow shoulder down and relaxed, with no shrug?
- Anchor. At draw, does the string touch the same cheek spot every time?
- Bow hand. Is the hand still where it was when you arrived at full draw?
- Head. Is the string running straight from the tip of your nose to the sight ring?
If any answer is no, stop there and fix that one thing. Then draw. Shooting a bad shot teaches your body the bad shot, which is why the check before full draw matters more than anything you do afterwards.
8. Turning the Head or Losing Sight Alignment
A head turn sideways or forward moves the aiming eye off the string line, and the result is a vertical or diagonal miss that looks random on the target but is completely predictable in your video.
Check your eye dominance once, then stop checking it. Most people shoot with the eye that naturally closes first, and the way to confirm it is simple: hold a bow at full draw and close each eye in turn, noting which one keeps the sight ring and string aligned. Test with a coin at arm’s length if you prefer. Deciding once and not re-deciding is the point.
How to fix it: once at anchor, move your head until the string runs directly beneath your aiming eye and lines up with the middle of the sight ring. That alignment is your reference, not the pin, which will move slightly as you settle.
Arrow groups tell you which error you have. A tall vertical spread with tight horizontal grouping almost always points at the anchor or the head position. A wide horizontal spread points at grip tension, hand torque or the release. Diagnosing from the group is faster than guessing from memory.
9. Poor Stance During the Follow-Through
What happens after the arrow leaves decides whether the shot was clean. Many archers step back, drop the weight onto the back foot, or let the bow arm fold downward in the last instant before the arrow lands.
All of it tells your body the shot was rushed. A balanced finish, where the bow arm relaxes toward your side and both feet stay where they started, is the physical proof that you held the shot together until the end.
How to fix it: pick a finish you can repeat without thinking. The one I like is letting the bow arm swing down under control to your side while both feet stay planted. Recurve archers should let the bow roll forward and down rather than catching it with the off hand.
Run it ten times and write down where your bow hand ended up each time. Ten records of the same spot means the finish is automatic. Ten different spots means the shot is still ending on adrenaline, and that is worth fixing before anything else.
10. Changing Form Instead of Making One Correction at a Time
Trying to rebuild an entire technique in one afternoon is why so many beginners plateau. You change your grip, your anchor and your release in the same session, then when the group does not improve you conclude that none of it worked.
Pick one error. One. Practice it for a block of sessions with a number attached, like thirty arrows a week aimed at nothing but a looser grip. Log the group size. When it improves, move to the next error.
A workable order is grip first, because tension distorts everything downstream. Then the anchor, then the release, then the follow-through. Stance and head position come alongside because they are cheap to check and they frame the whole shot.
Quality beats volume at every level. Twenty arrows shot well with a full recovery beat two hundred rushed ones, and they cost you less time. If you want a fast diagnosis, film ten seconds of side view; the quickest way to spot a mistake is almost always a short phone clip rather than memory.
One more habit worth keeping: if someone at the range offers technique advice you did not ask for and it contradicts your coach, ignore it. A method that suits one archer can wreck another’s form, which is exactly why a good coach watches your shot instead of guessing from the lane.
Frequently Asked Questions
What is the most common archery form mistake for beginners?
Holding the bow too tightly is the most common one, and it causes the most damage. A rigid grip twists the bow slightly at full draw, which spreads arrows left and right, and the tension feeds into a shaky bow arm and a rushed release. Relax the grip, set the knuckle angle, and shoot ten arrows before changing anything else.
Should a beginner use a bow release aid to fix form?
Yes, for most beginners it removes a whole layer of variables. A mechanical release mounted on the string or a thumb release on a compound keeps the timing identical shot after shot, so you can focus on the anchor and the follow-through instead of your fingertips. Many archers return to finger releases later, but there is no rule against starting with an aid.
How do I know if my archery anchor point is consistent?
You cannot feel it, so measure it. Film three full-draw positions from the side at arm’s length and compare where the string meets your face each time. Consistent means the same spot on the cheekbone within a few millimetres. If it differs, a kisser button gives you a hard reference instead of relying on memory.
How long does it take to correct a common archery form mistake?
Expect three to six weeks of deliberate practice for the obvious errors such as grip tension or the follow-through. Grip and anchor can move noticeably within about thirty sessions, while deeper changes such as head position take longer. The variable that matters most is repetition at low volume, not how long you think about it between sessions.
When should an archer stop practicing and ask a coach for help?
Stop and ask when you feel pain, not just fatigue. Shoulder, elbow, wrist and finger pain can point to draw weight that is too heavy or to a form fault that is loading the wrong muscles, and both deserve a professional look. It is also worth booking a session if you have corrected form for months with no change, or if your groupings are erratic at any draw weight.
Conclusion
Film ten seconds of side view the next time you shoot and pick the single most visible error on that clip. Correct only that one for a block of sessions, log the group size, and hold off on the next fix until the number moves. Repeat that process and your common archery form mistakes stop costing you accuracy one session at a time.