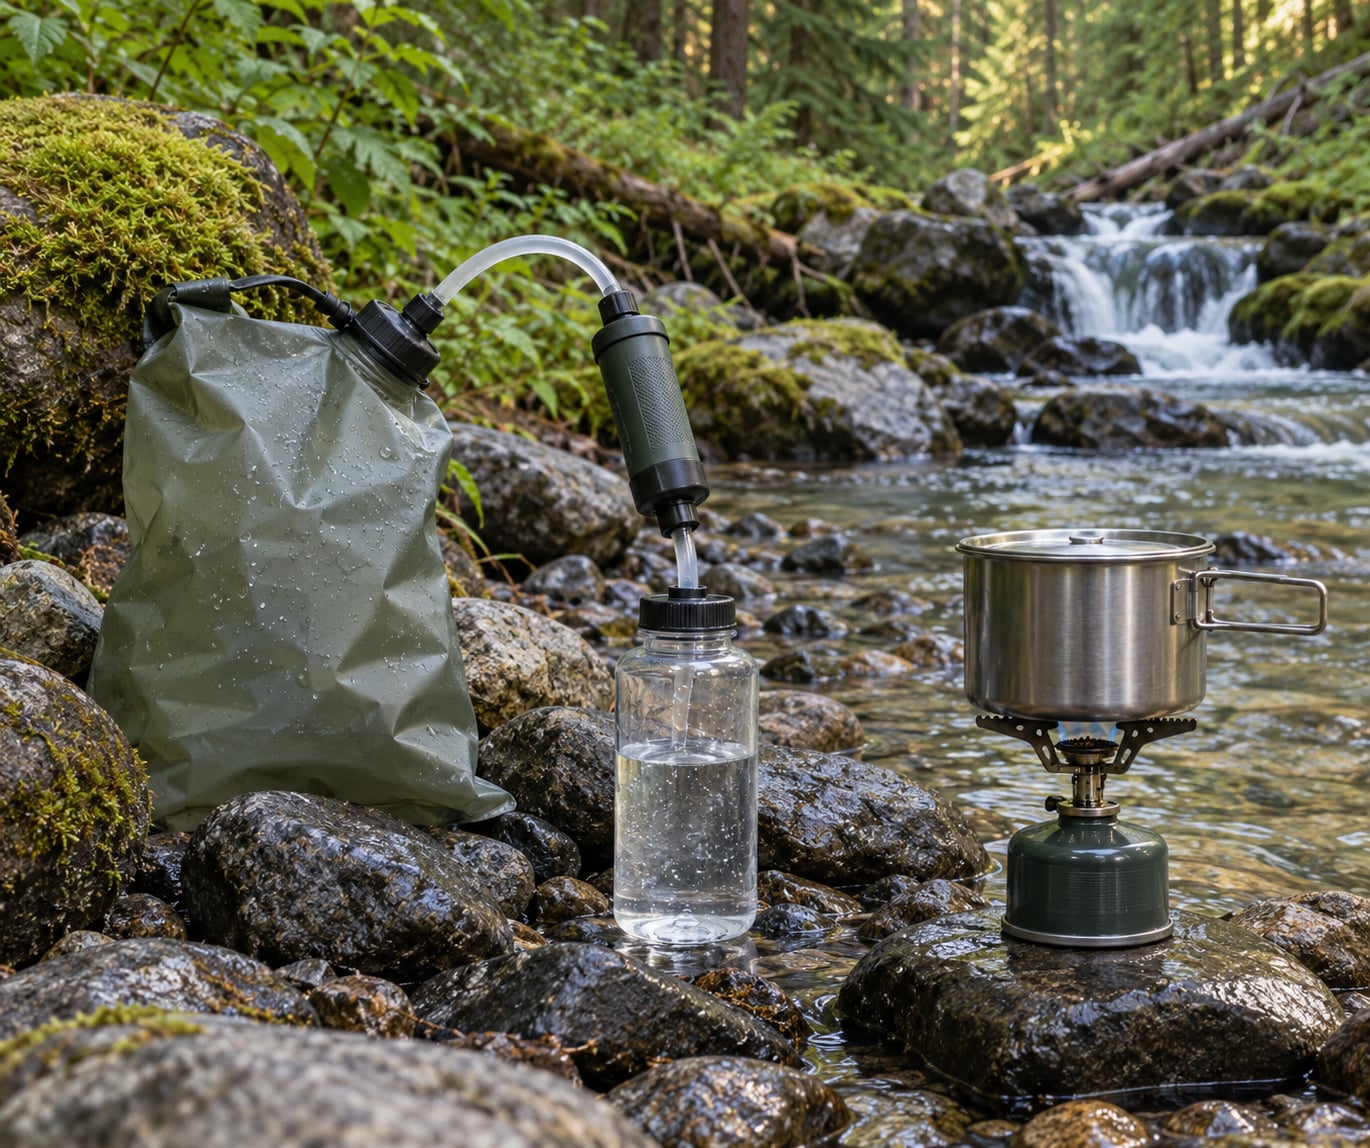
To filter water while backpacking, gather from the cleanest source you can find, run it through a filter or purifier rated to 0.1 to 0.2 microns, and keep the treated water in containers that never touch the raw supply. With a squeeze filter and a collapsible dirty bag, the whole job takes five minutes and costs you about three ounces of pack weight. On a low-to-zero technical trip where the filter might freeze, allow ten minutes of setup per water stop.
The reason to learn this properly is that clear water lies. A cold blue stream coming off a glacier can carry Giardia, and a puddle next to a trail junction can carry something worse. Waterborne illness on a backcountry trip is rarely a dramatic event, which is exactly why it sneaks up on people.
Table of Contents
- What You Need
- Water treatment methods compared
- How to Filter Water While Backpacking: Step-by-Step
- How to Filter Water While Backpacking Safely
- Choose the Right Treatment for the Water Source
- Prepare and Prime the Filter
- Treat and Store the Water
- Water Mistakes That Make People Sick
- Backpacking Water-Safety Tips
- Common Mistakes
- Frequently Asked Questions
- Do backpacking water filters remove viruses and other microbes?
- Can I use a backpacking filter on salty or chemically contaminated water?
- What should I do if my water filter freezes during a trip?
- How often should I replace a backpacking filter cartridge?
- How much treated water should I plan for each person each day?
- Final Checklist
What You Need
Every treatment method exists to remove some combination of four things, and knowing which four is how you pick the right one.
- Bacteria (E. coli, Salmonella, Campylobacter, typhoid) are the smallest of the common problems at roughly 0.5 to 1 micron, so almost any backpacking filter catches them.
- Protozoa (Giardia, Cryptosporidium) sit around 5 to 15 microns and are the reason North American trails demand a filter. Cryptosporidium has a tough outer shell and shrugs off chlorine quite reliably.
- Viruses (norovirus, hepatitis A, rotavirus) fall below 0.02 micron, which physically will not pass through a standard filter membrane. Removing them needs a purifier, chemical treatment, UV, or heat.
- Chemicals and metals (fuel, pesticides, mining runoff) are not a size problem at all. No backpacking filter removes them, so the only answer is not drinking that water.
That last line matters more than people expect. A filter gives you a false sense of security on chemically polluted water, because the output looks and tastes normal.
Beyond contaminant coverage, capacity and weight drive the choice. Flow rate is usually printed in liters per minute, and a figure between 1 and 2 LPM suits a solo hiker drinking 3 to 4 liters a day. Groups should assume each person needs 3 to 4 liters of treated water per day plus a reserve, so a two-person trip needs roughly 8 liters daily output before you even think about cooking water.
Bulk matters as much as weight on long trails. A hollow-fiber squeeze filter takes up no space at all when empty, which is why it has become the default recommendation among long-distance hikers on forums like r/longtrail, while a rigid gravity unit or a battery UV unit stays in the pack for the whole trip.
Water treatment methods compared
| Method | Removes viruses? | Typical weight | Group friendly | Maintenance | Wait time |
|---|---|---|---|---|---|
| Hollow-fiber filter | No | 2-4 oz | Solo and pairs | Backflush often | None |
| Filter with purifier insert | Yes | 3-5 oz | Solo and pairs | Backflush often | None |
| Gravity bag system | No, unless purifier | 10-20 oz | Yes | Occasional | 15-60 min to fill |
| Pump filter | No, unless purifier | 6-10 oz | Yes | Occasional | None |
| Chlorine dioxide drops | Yes | Under 1 oz per 50 doses | Yes | None | 15-30 min |
| UV purifier | Yes | 5-15 oz with batteries | Yes | Batteries | 60-120 sec per liter |
| Boiling | Yes | Nothing extra | Slow | Fuel | 1-3 min per liter |
Two practical notes on that table. Chemical drops cover viruses, bacteria, and protozoa, which makes them the most complete option per gram, but they do nothing for dirt or algae and they taste the way they taste. Boiling kills everything living but leaves dissolved minerals and any chemical pollution exactly where they were.
How to Filter Water While Backpacking: Step-by-Step
How to Filter Water While Backpacking Safely
Start at the source, not at the filter. Walk past the first puddle and look further for water that is moving, clear and free of foam, scum or dead vegetation.
Fill your dirty bag from midstream rather than from the bank, wading knee-deep if the current allows it, and hold the opening upstream of your legs so nothing gets dragged in. Then let the bag hang for a minute or two so heavy sediment settles to the bottom and you can pour the clearer top water off first.
The success check is simple: no bank contact, no visible silt, and the water leaving your filter should run clear at a steady pace. If it looks cloudy coming out, the membrane is being overwhelmed and you need to slow down or pre-filter, not filter harder.
Choose the Right Treatment for the Water Source
Match the method to the risk, and the risk follows geography and human activity rather than appearance.
On North American trails with moderate human traffic, a hollow-fiber filter handles the realistic list, which is bacteria and protozoa. In areas with heavy human waste, sewage contamination, agricultural runoff, or anywhere outside North America and western Europe, run a filter and then a chemical drop, or use a purifier from the start.
When in doubt about a suspect source, the layered approach costs almost nothing: filter for sediment and clarity, then dose chlorine dioxide and wait. One drop treats a liter, and the usual wait is 30 minutes. Treat in a clear bottle you can see through so you notice cloudiness or color change, and never mix drops into a dirty bag where leftover sediment can absorb the active ingredient before it reaches the water.
Prepare and Prime the Filter
A new hollow-fiber filter needs work before its first real use, and skipping this is a common cause of disappointing flow rates.
Attach the outlet hose to the container you will drink from and the inlet to the dirty bag. Backflush by squeezing the clean side or attaching a syringe to the inlet port, pushing clean water backwards through the element until it runs clear, usually 30 seconds to a minute. Then run a quart of clean water forward through the filter to flush loose carbon particles off the element.
Look for steady flow from the outlet within a few seconds of the first squeeze, no dripping at the fittings, and a hose that reaches the bottom of your container. If you filtered at home before the trip, rinse the element again after it has sat in the pack.
A few setup habits separate a system that works from one that frustrates you. Run the outlet hose along the inside of your bottle or bag so it always stays submerged as the level drops, because an end-of-line bubble stops flow until you shake the container. Keep the inlet side above any water you have already collected so you cannot back-contaminate treated water through a disconnected hose.
Do not overtighten the fittings while troubleshooting a leak. Hollow-fiber inlet fittings crack when forced, and a cracked inlet fitting is a trip-ending failure in the backcountry. Hand-tight plus a gentle quarter turn is enough, and if it still weeps the seal is usually fine and the problem is the hose not being seated fully.
If your system has an activated carbon core, treat it as a taste and odor layer rather than a safety layer. Carbon blocks eventually saturate, and a saturated core makes water taste flat while doing nothing for bacteria. Hollow fiber does the real filtering; the carbon just makes the water drinkable enough that people actually drink it.
Treat and Store the Water
Filtering faster than the membrane can handle is the leading cause of clogged elements. Squeeze steadily and let the flow come to you instead of forcing it, and expect roughly one liter per minute or better from a healthy clean element.
Fill clean containers only from the clean side of your setup. Label or color-code them if you also carry untreated water for cooking or dishwashing, because mixing those up in the dark is how people make themselves sick on a trip where nobody else is drinking from the same source.
Store treated water out of direct sun in a sealed container, and treat only what you will drink within a day. Water left in a bladder for a week picks up taste and bacteria even after filtering, and the rolled-up hose on the inlet side is a trap for dirt that will find its way into the element.
Water Mistakes That Make People Sick
Nearly every giardia case I have heard traced to the trail starts the same way: something looked fine, so nobody treated it. The corrections are quick once you know them.
Treat water from above treeline and from snowmelt, both of which people often skip because the water looks pristine. Avoid any source within about 200 feet of campsites, stock tanks, corrals, roads, mines and dead zones such as beaver ponds full of silt.
Glacial flour deserves its own warning. Rock dust ground up by the glacier gives meltwater a cloudy, milky look and enough fine sediment to clog a filter in a single filling. Let it settle for a long time or pre-filter through several layers, and expect glacial runoff to cost you more filter time than any other water you will drink.
Do not assume your filter made pond water safe. Pond water carries sediment and often chemical runoff, and sediment is what destroys the element.
Backpacking Water-Safety Tips
Carry two independent methods. A filter plus a handful of chlorine dioxide drops costs almost nothing and covers the case where the filter clogs, freezes or breaks. On trips where you camp below freezing, a chemical backup is not optional.
Keep a wet filter from freezing overnight by packing it inside your sleeping bag or between clothing layers rather than in the side pocket where it will chill to freezing by morning. Water frozen inside a hollow-fiber element can crack the membrane, and it will leak afterward instead of filtering.
Store chemical drops sealed, dry and out of the heat, and follow the wait time on the label rather than your own judgement. For boiling, one minute at low elevation covers most backcountry water, and above roughly 2,000 m or 6,500 feet extend that to three minutes.
Plan extra capacity for a group. When one person has giardia, the treatment capacity of the whole party needs to jump for several days.
Common Mistakes
These are the errors that show up again and again, with the fix for each.
- Drinking clear water untreated. Clarity means nothing. Giardia cysts and fecal bacteria are far below what your eye can resolve.
- Treating cloudy or silty water without a pre-filter. Run it through a coffee filter, a bandana, a clean sock or a paper towel first, or the element will clump and slow to a trickle within minutes.
- Buying a filter for a virus region. Filters stop bacteria and protozoa and pass viruses straight through. In high-human-activity areas and outside North America, use a purifier or add chemical drops.
- Ignoring backflushing. Clogging is the number one reported complaint on hiking forums, and it is almost always fixable in a minute with a reverse flush of clean water.
- Leaving the filter wet in a cold bag overnight. Ice damages hollow fiber permanently. Keep it warm and dry, or plan to use chemicals.
- Using one method only. Redundancy is the difference between a nuisance and a ruined trip.
- Letting treated water sit in a bladder for days. Drain it, treat fresh, and label your clean bottles so the dirty ones stay separate.
Frequently Asked Questions
Do backpacking water filters remove viruses and other microbes?
Standard backpacking filters remove bacteria and protozoa such as Giardia and Cryptosporidium, but most do not remove viruses. Viruses are smaller than the pores of a hollow-fiber membrane and pass through. Where virus risk is real, including outside North America and western Europe and near sewage or heavy human activity, use a purifier, add chlorine dioxide drops after filtering, or boil the water for one to three minutes depending on elevation.
Can I use a backpacking filter on salty or chemically contaminated water?
A filter removes organisms and sediment, not dissolved substances, so salty, acidic or chemically polluted water passes through it unchanged and the output can look and taste normal. That makes it easy to drink something you should not. The only safe response is to skip the source entirely and walk to another, or carry enough treated water to bypass it. No amount of filtering or purifying fixes chemical contamination.
What should I do if my water filter freezes during a trip?
If a filter froze, assume the hollow-fiber membrane is cracked and test it by running water through and watching for leaks or a change in clarity. Frozen elements usually fail rather than recover. For the rest of the trip, switch to chlorine dioxide drops or boiling, keep the damaged unit out of your drinking water, and get it replaced before you rely on it again. Prevention is easier than repair.
How often should I replace a backpacking filter cartridge?
A hollow-fiber cartridge has no fixed expiry, and most hikers run the same element for years. Replace it when the manufacturer says to based on volume filtered, or earlier if cleaning and backflushing no longer restore flow, if you cannot remember when it was last opened, or if it has frozen while wet. Brands publish lifetime gallon figures for a reason, and cartridge life drops fast with silty water.
How much treated water should I plan for each person each day?
Plan on 3 to 4 liters of treated water per person per day for drinking and cooking, and add more for hot weather, high altitude or a long day without a reliable source. Beginners often overpack out of fear and then carry heavy water for the entire trip. Check the flow rate of your filter, since anything under 1 liter per minute will slow you down more than the weight will.
Final Checklist
Assess the source first. Moving and clear beats still and clear, and no source near camps, roads or livestock is worth the gamble. Then select treatment capacity that covers 4 liters per person per day with a spare liter, and confirm your method matches the region, using a purifier or chemical layer anywhere viruses are plausible.
Test the setup before you need it. Backflush the element at home, run it through a liter of clean water, and pack the dirty bag and hoses where you can reach them without unpacking everything. Every day, take water from the cleanest source available, pre-filter anything silty, filter slowly, and keep clean bottles labeled and separate from the dirty supply.
Add drops to any water you are not certain about, and keep the filter warm and dry at night. That last habit is the difference between a unit that lasts five years and one you replace in the backcountry.