How to layer clothing for cold weather hiking comes down to three pieces: a moisture-wicking base layer, an insulating midlayer, and a weatherproof shell you can open, vent, and peel off as the day changes. Get those three right and you can handle a 20-degree swing between the trailhead and a windy ridge without carrying a second closet. The system takes about ten minutes to put together at the car.
The part most guides skip is what happens after mile four. You start warm, you climb hard, you strip a layer, you stop for a snack twenty minutes later and the wind finds every gap. Layering is less about picking the best jacket and more about staying able to change your mind while you walk.
Table of Contents
- What You Need
- Base layer: moves sweat off your skin
- Midlayer: traps the heat you already made
- Shell: blocks wind and precipitation, lets vapor out
- Optional pieces worth carrying
- Accessories that decide how warm you feel
- Step-by-Step: How to Layer Clothing on the Trail
- How to Layer Clothing for Cold Weather Hiking: Start With a Dry Base Layer
- Add an Insulating Midlayer You Can Control
- Put On a Breathable, Weatherproof Shell
- Close the Gaps at the Head, Hands, Neck, and Feet
- Adjust Layers Before and During the Hike
- Common Layering Mistakes (and the Fix for Each)
- Frequently Asked Questions
- How many layers should I wear for cold weather hiking?
- Should I wear cotton while hiking in cold weather?
- Is a waterproof jacket enough for winter hiking?
- How do I prevent sweating while wearing insulating layers?
- What should I do if my clothes get wet during a cold hike?
What You Need
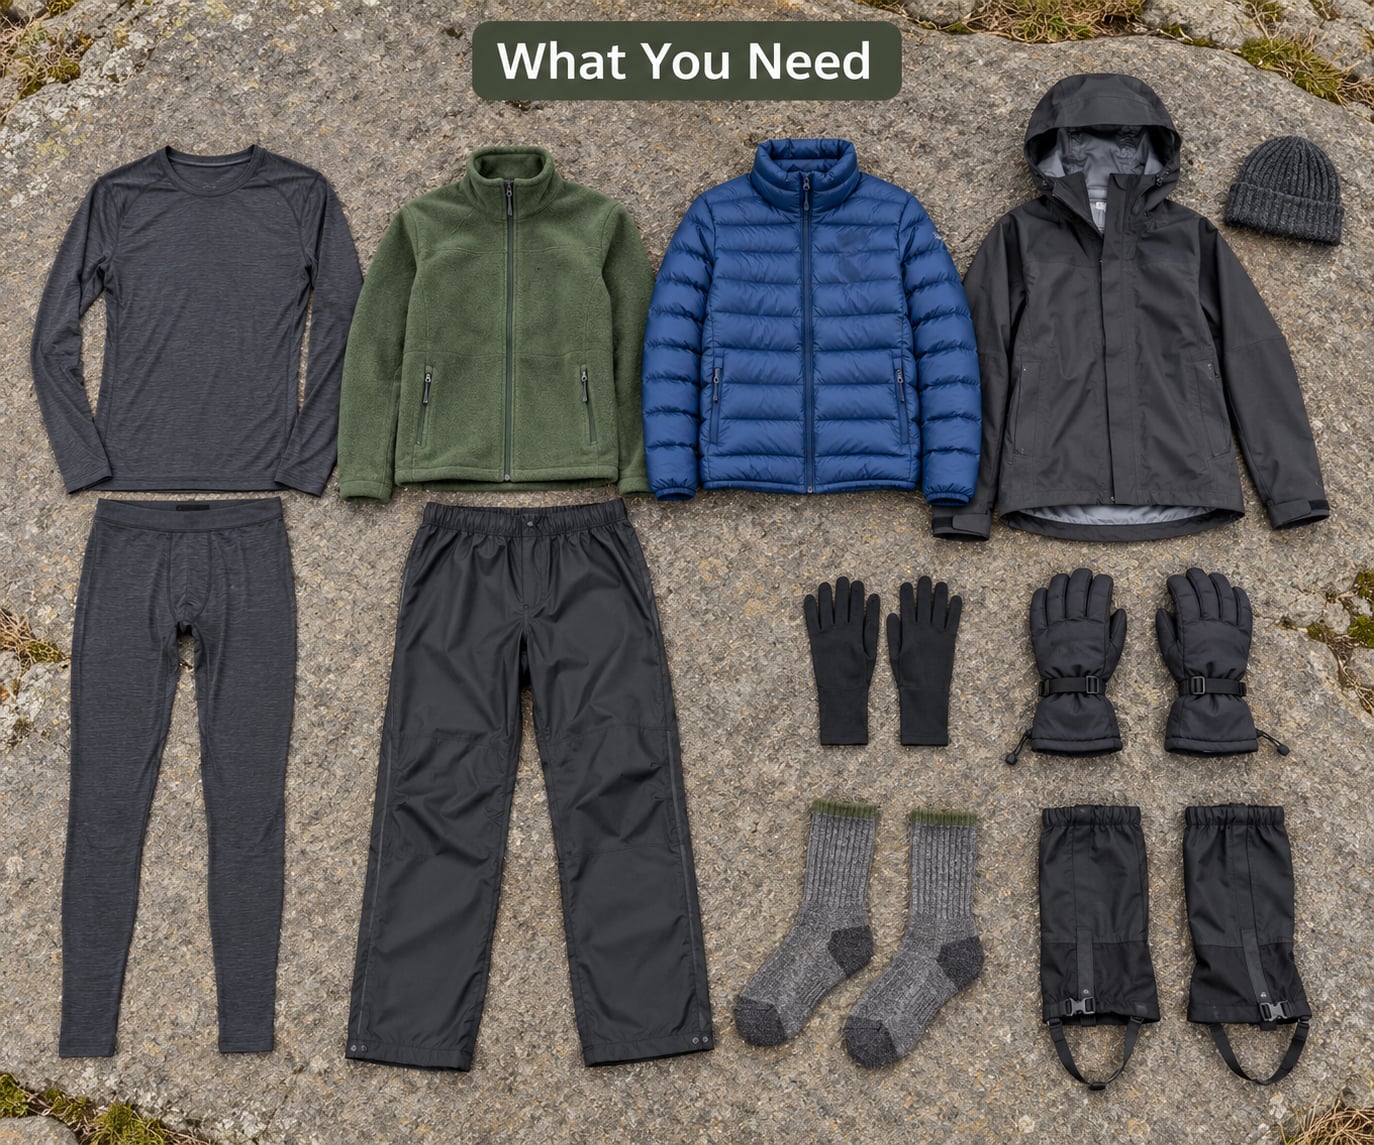
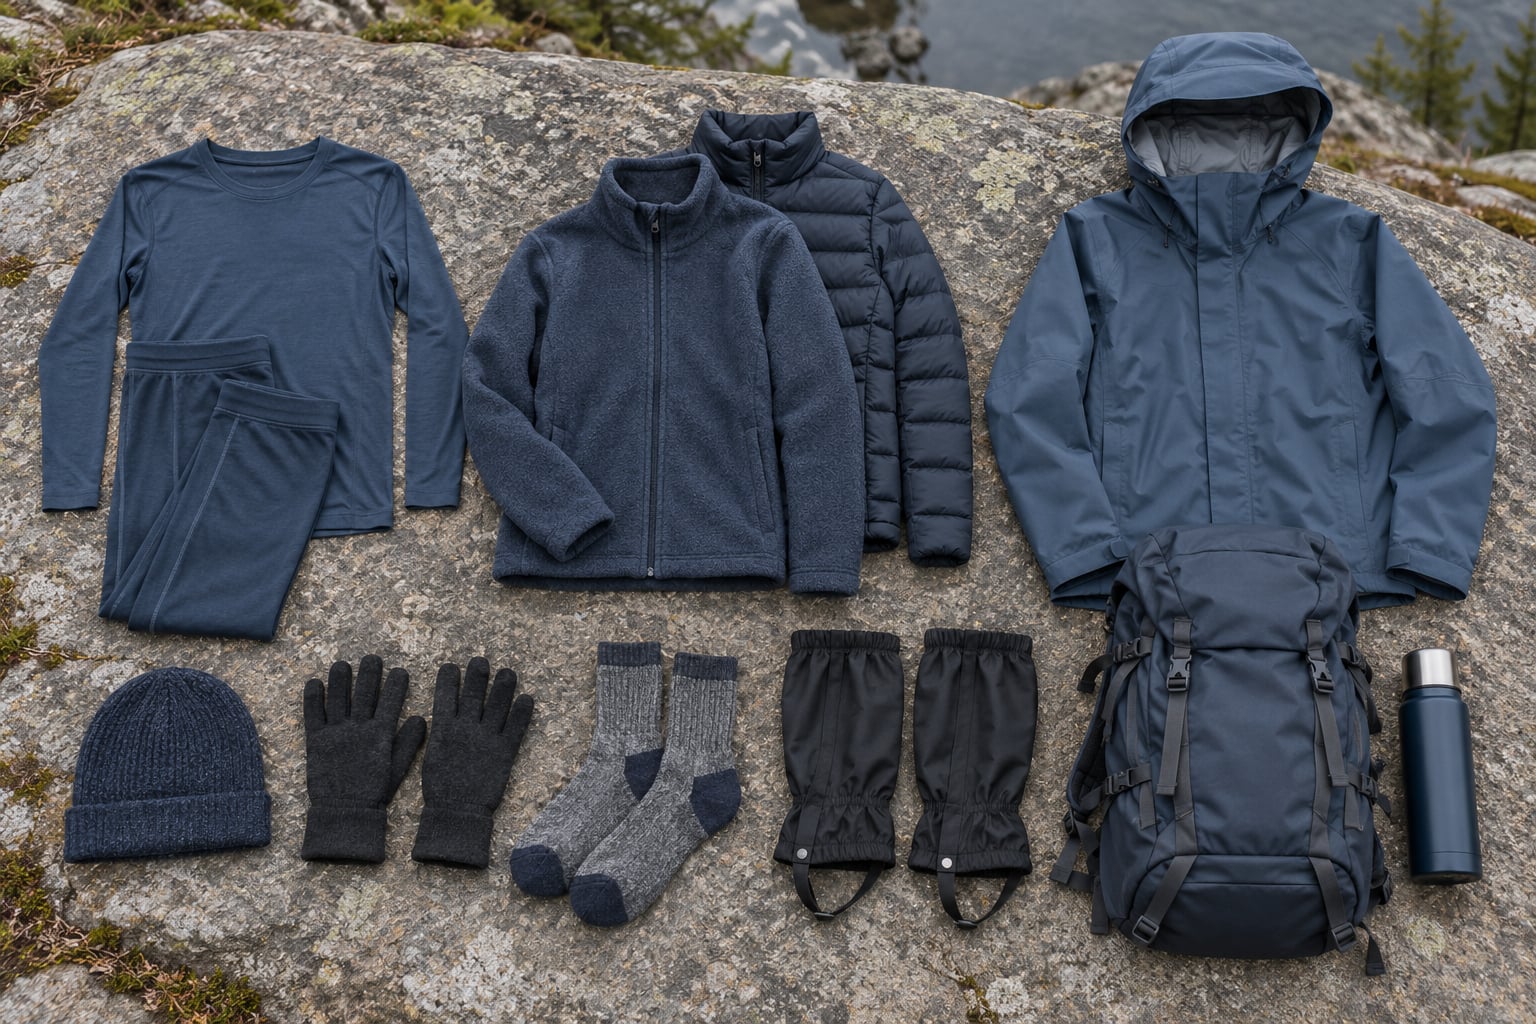
Three layers do all the work. Each one has a single job, and the job does not change with the weather. Once someone tells you a jacket is both insulating and waterproof, you have lost the system.
Base layer: moves sweat off your skin
A base layer touches skin, so its only real job is moisture management. Merino wool, polyester, or a merino-poly blend; lightweight weight for moving fast, midweight for slower winter days. Fit is close and skin-tight without cutting off circulation or limiting your shoulder reach.
Midlayer: traps the heat you already made
The insulating layer is the one you add and remove most. Fleece grid or brushed fleece for breathability and fast drying, a light down or synthetic puffy for standing still at a viewpoint or a summit push, and a midweight synthetic for wet, damp cold where down loses its loft.
Shell: blocks wind and precipitation, lets vapor out
A hardshell with taped seams and a waterproof breathable membrane handles rain, snow, and wind. A softshell or windshirt handles wind alone and breathes better, which is why it earns its place on a dry cold day. Check the hood, the cuff closure, and the pit zips before you commit.
Optional pieces worth carrying
- A spare base layer top in your pack, in case the first one gets soaked.
- A lightweight puffy that compresses into a stuff sack, so it adds warmth without eating pack space.
- Softshell or wind-resistant pants that slide over your normal hiking trousers for windier ridgelines.
- A second pair of wool socks. Nothing helps a cold walk like dry feet.
Accessories that decide how warm you feel
A knit hat, a neck gaiter, glove liners with insulated shells over them, wool socks, and gaiters for deep snow. Most heat escapes from your head, neck, and hands, so these small pieces usually deliver more warmth per gram than a heavier jacket. Microspikes belong in your pack too when ice is possible; they are not an optional accessory.
Step-by-Step: How to Layer Clothing on the Trail
How to Layer Clothing for Cold Weather Hiking: Start With a Dry Base Layer
Put on your base layer first, before your midlayer and shell, and choose the weight that matches how hard you expect to move. Lightweight for a fast, high-output day; midweight for a slow hike with heavy pack weight or frequent stops.
Skip cotton entirely. Cotton absorbs sweat, holds it against your skin, dries slowly, and loses most of its insulating value once wet. That combination is how hikers end up chilled in air temperature that should feel comfortable.
For genuinely severe cold, add a second base layer top rather than one heavy one. Two thin layers wick better and give you something to vent without exposing your skin.
Success check: reach both arms overhead, bend forward, and pick up your pack. If anything pulls, rides up, or leaves a gap of cold air at your waist, the fit is wrong now and you can still fix it at home.
Add an Insulating Midlayer You Can Control
The midlayer goes over your base and under your shell. Pick fleece when you will keep moving and expect to sweat, a puffy when you will stop often or hold still in the cold, and synthetic insulation when the forecast includes wet snow or drizzle.
Bulk matters more than brand. A midlayer that compresses easily gives you more warmth per gram than a stiff, heavy jacket, and one you can unzip from the bottom lets you dump heat fast on a climb.
A vest works well as a midlayer for high-output days. It warms your core and leaves your arms free to dump heat. Many hikers carry one as their adjustable layer and keep a shell for weather.
Success check: you should be slightly cool standing still at the trailhead. If you are warm and already perspiring before the first mile, you have one layer too many on.
Put On a Breathable, Weatherproof Shell
The shell closes the system. Its job is to stop wind and precipitation while letting water vapor move outward, which is what keeps you from feeling clammy inside three layers.
Before you leave home, open and close the main zipper, work the hood over your hat, and check that the cuffs cinch tight over your glove liners without cutting off blood flow. Open the pit zips while you climb hard; that is the difference between a breathable membrane and a sauna.
Also check that the shell has room for the midlayer underneath. Reach, squat, and walk a few steps. A shell that binds across the shoulders or rides up over your hips will not vent, and you will end up stripping it and wearing only your midlayer in the rain.
Success check: zip to the chin in the wind and stay comfortable for five minutes. If you feel trapped heat instead of blocked wind, the breathability is not keeping up with your effort level.
Close the Gaps at the Head, Hands, Neck, and Feet
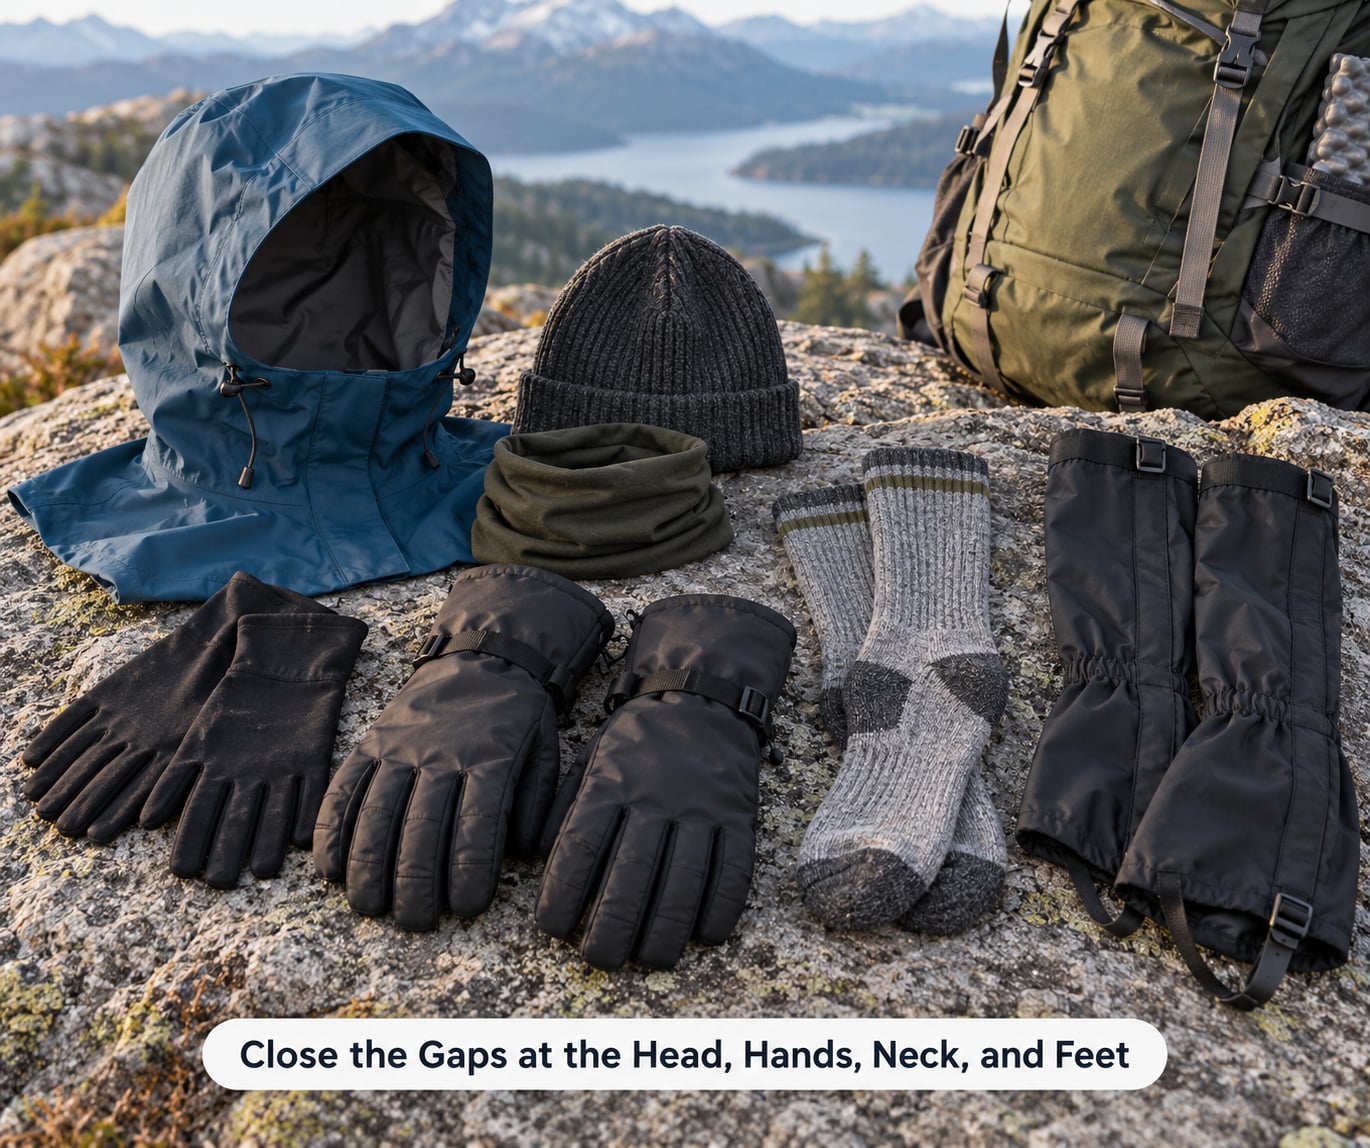
Warm air leaks out at the neck and rises off the head, so those two spots get attention first. Wear a knit hat under your hood rather than a bulky one, and pull the hood down before you secure it around your face.
For hands, use the liner-plus-shell system: a thin liner glove for dexterity and moisture control, with an insulated shell glove over it. Switch to shell-only gloves for a high-output climb, and liners plus shells when you stop. Mittens cut wind better, gloves handle poles and rocks better.
For feet, wool socks stay warm when slightly damp. Carry a spare pair in a dry bag, change at the first sign of a wet foot, and put gaiters on when snow is deep enough to reach your shins. Cold feet end a hike faster than a cold face.
Success check: stand in the wind for two minutes with your hands at your sides. If your neck and wrists feel noticeably colder than your torso, close those gaps before you walk.
Adjust Layers Before and During the Hike
Check your forecast, the wind speed, and the expected output at the trailhead. Then use one simple pattern on the trail: add, vent, or remove. Never carry a decision you have not made yet.
- Before you start: stand still for two minutes. Warm and dry means right. Cold means add a layer. Perspiring means remove one.
- On climbs: vent early. Open the shell, unzip the midlayer, swap insulated gloves for liners, and stow what you removed where you can reach it.
- At rest stops: add a layer before you sit down, not after you start shivering. Put your hat on and pull your sleeves down as you stop.
- On descents: add back what you removed. You are working less and losing heat fast, and this is where most hikers get cold.
Make the change at the moment you notice it, not twenty minutes later when you are already clammy or already shivering. Your body gives you a clear signal and it goes quiet quickly once you ignore it.
Success check: you should feel cool at the start of a break and warm again within a few minutes of stopping.
Common Layering Mistakes (and the Fix for Each)
Wearing cotton. Cotton holds sweat, dries slowly, and chills you once wet. Fix: replace your base layer with merino or polyester, and treat any cotton shirt as an outer layer worn over something wicking.
Choosing a loose base layer. Baggy fabric lets air circulate against your skin and slows heat transfer. Fix: a close, non-compressive fit that still allows full shoulder movement.
Overpacking every layer at the trailhead. Overdressing means you sweat inside the first mile, and wet insulation loses much of its warmth. Fix: aim to feel slightly cool when you start moving.
Ignoring fit gaps. A jacket that does not meet the trousers, or cuffs that ride up, vent your heat straight out. Fix: test the full system with your real layers on, at home, in a mirror and while bent over.
Overheating indoors or in the car. Sitting still in a warm vehicle before the hike soaks the base layer with sweat. Fix: keep extra layers on, bagged, and change into them right before you walk.
Leaving insulation wet. Wet down loses loft and stays wet for days; wet fleece takes hours to dry in cold air. Fix: carry a dry puffy in a waterproof bag as your storm insulation, and treat wet down as an emergency layer.
Skipping the weather check. A system built for a sunny 35-degree morning fails when wind picks up or the front arrives early. Fix: check the forecast, the wind, and the layer you would grab if the forecast turned wrong.
Two cold-weather safety habits matter more than any fabric choice. Carry a dry spare base layer and an insulating layer sealed in your pack, and treat persistent shivering, clumsiness, slurred speech, or confusion in you or a companion as an emergency. Turn around, get out of the wind, add every layer, and start warming up immediately.
Frequently Asked Questions
How many layers should I wear for cold weather hiking?
Three is the working number for cold weather hiking: a moisture-wicking base layer, an insulating midlayer, and a weatherproof shell. A fourth optional piece, a compressible puffy carried dry in your pack, covers wet cold and long stops. The count matters less than whether each layer has one job and whether you can vent or remove the middle two while moving.
Should I wear cotton while hiking in cold weather?
No. Cotton absorbs perspiration, holds it against your skin, and dries so slowly that it pulls heat out of you once damp. It is fine as an outer shirt over a wicking base, but never as the layer touching skin. Merino wool, polyester, or a blend will move sweat away and dry between breaks, which is what keeps you comfortable in real winter conditions.
Is a waterproof jacket enough for winter hiking?
A waterproof jacket handles wind and precipitation, but on its own it leaves you cold the moment you stop moving and it traps vapor unless you can vent it. Add an insulating midlayer underneath so the shell has something to block wind around. Learn where the pit zips are, and check that the shell fits over that midlayer without binding at the shoulders.
How do I prevent sweating while wearing insulating layers?
Vent early and vent often. Before a climb, unzip the shell, open the pit zips, unzip the midlayer from the bottom, and switch insulated gloves for liners. Carry layers you removed in an easy-to-reach pocket so putting one back on takes seconds. In the field, the routine behind how to layer clothing for cold weather hiking is simple: add, vent, or remove the moment you feel the change.
What should I do if my clothes get wet during a cold hike?
Stop, get out of the wind, and change the layer touching your skin first, because wet base fabric steals heat fastest. Pull on your dry puffy from the pack and put your shell back on over it to trap warmth. Never try to warm wet insulation by moving harder; that makes you wetter. If you have no dry layer, dry what you can, keep moving slowly, and turn back toward the trailhead.
Start with the layer touching your skin, because that choice decides whether the other two work. Get a close-fitting merino or polyester base layer that you can wear for a whole day without feeling clammy, then build the midlayer and shell around it.
Do it before the trailhead, not at the first rest stop. Dress in your full system at home, walk around, reach overhead, and check for gaps and binding. If it works in your living room, it will work on the ridge.