If you want to know how to set up surround sound speakers, the whole job comes down to three phases: position each channel where the mix expects it, wire every channel to its labelled terminal, then let the receiver’s calibration mic set the levels and delays. A typical 5.1 setup takes about two hours including cable routing, and most of that time is spent on placement rather than plugging anything in. If you can only do one thing well, place the speakers properly. Placement decides the soundstage; the receiver menus just tidy it up.
Table of Contents
- What You Need
- Step-by-Step
- 1. Choose the Right Speaker Layout for Your Room
- 2. Position the Speakers Before Connecting Them
- 3. Connect the Speakers to the Receiver or Amplifier
- 4. How to Set Up Surround Sound Speakers in the Receiver
- 5. Set Speaker Distance, Level, and Phase
- 6. Run Room Calibration
- 7. Test with Movies, Music, and Dialogue
- Common Mistakes
- Frequently Asked Questions
- Do surround speakers need to match the front speakers?
- Can I set up surround sound speakers without a subwoofer?
- Should surround speakers be wired or wireless?
- Where should I place surround speakers in a small room?
- Why do my surround sound speakers sound quieter than the front speakers?
- Can I use surround speakers as Bluetooth speakers?
- Conclusion
What You Need
The gear list is shorter than most people expect. You need a receiver or amplifier, the speakers themselves, wire, and about an hour of patience.
- A receiver or amplifier with enough speaker terminals. Count them before you buy speakers. A 5.1 system needs five speaker terminals plus a subwoofer output; a 7.1 system needs seven.
- Front left and right speakers, a center channel speaker, and a pair of surrounds. Height speakers are optional and only matter if your receiver has Atmos processing.
- A powered subwoofer with its own plug and cable. This is the one piece you cannot power from a receiver.
- Speaker wire, 16-gauge for runs under about 40 feet and 14-gauge for anything longer. Buy more than you think you need, because a run that comes up short stops the whole job.
- Banana plugs or bare wire, plus an RCA subwoofer cable if the sub has no wireless kit.
- HDMI cables, one per source plus one for the TV return path.
- A tape measure, a flashlight, and the setup microphone that came with the receiver.
- The receiver manual. Menu names differ between brands, so the manual is the authority for your model.
Two rules before you touch a cable. Switch the receiver off at the wall and unplug it, rather than relying on the standby light. And never let a bare copper strand bridge the red and black terminals, because that is a short circuit and it can take out an amplifier channel.
Step-by-Step
1. Choose the Right Speaker Layout for Your Room
Start by picking a layout your room can actually hold. Channel counts confuse beginners because the numbers describe discrete audio channels, not the speakers you can see.
5.1 means five full-range speakers plus one bass channel. That is two fronts, one center, two surrounds, and a subwoofer. It is the sweet spot for most living rooms and the layout I would start with.
7.1 adds two more speakers behind the listening position for the rear channels. In a long rectangular room with the seat well forward of the back wall, it works. In a short room, those rears end up crammed against a wall and add cost without adding much.
5.1.2 is 5.1 with two height or ceiling speakers, which is what Dolby Atmos uses. The extra numbers after the dot are the overhead channels.
Match the layout to your receiver. A receiver with five terminals cannot drive a 7.1 layout, and buying two extra surrounds you cannot connect is the most common wasted expense in home theater. For a small apartment or a typical living room, 5.1 gives you most of the effect with the least furniture arguing back.
2. Position the Speakers Before Connecting Them
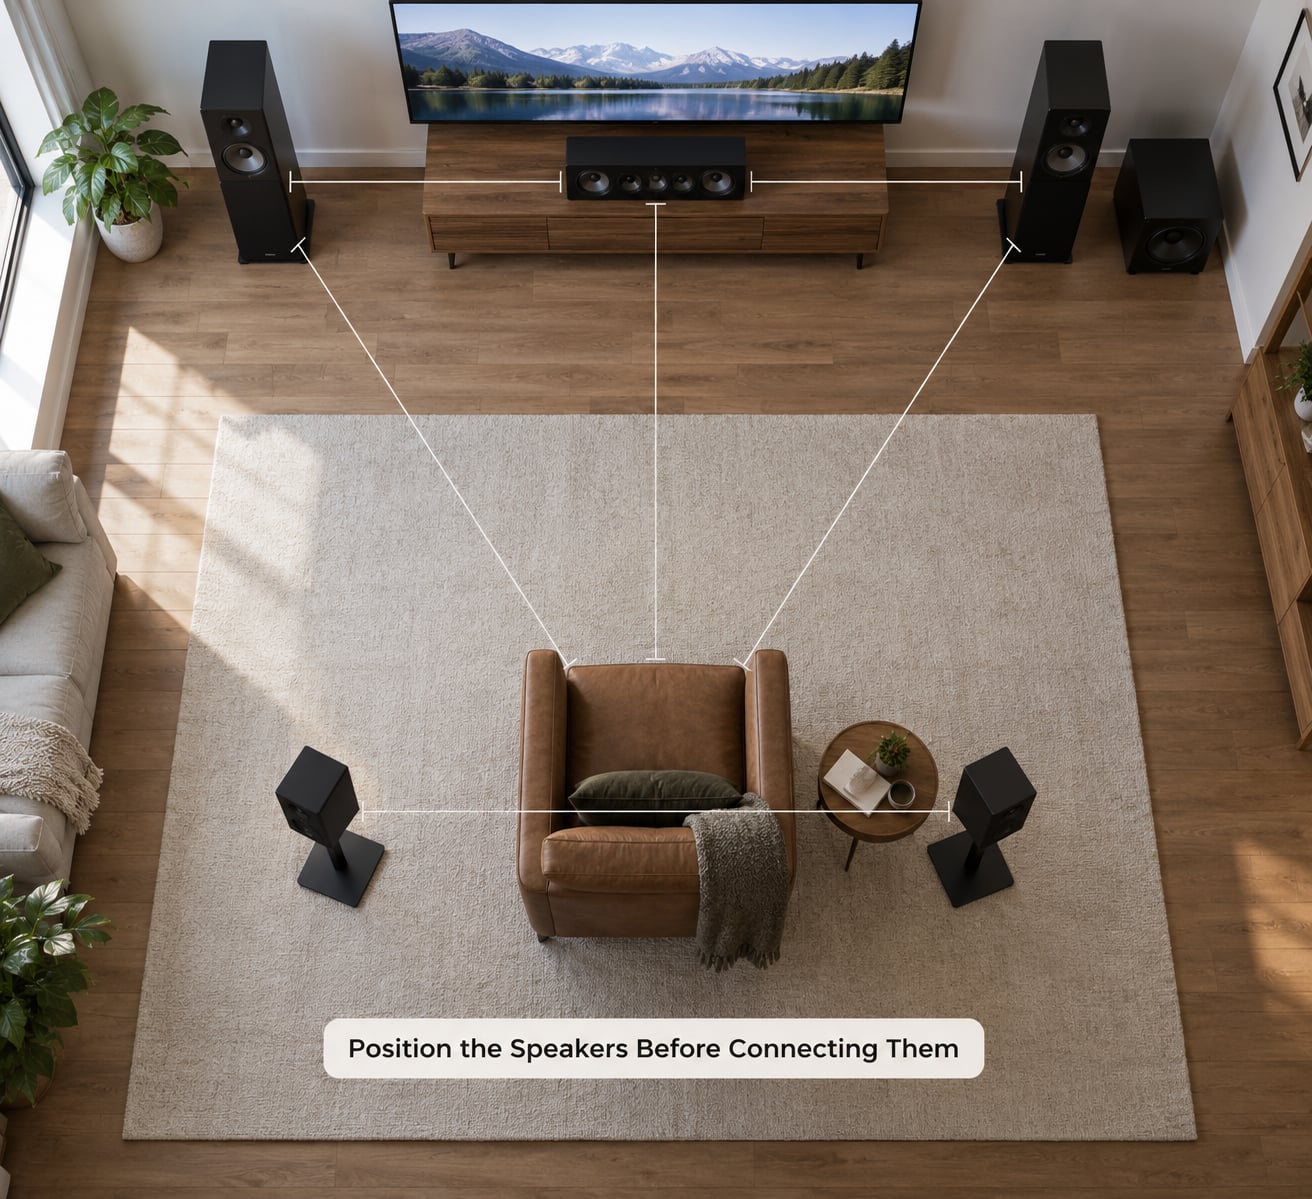
Move the speakers into position first and listen from your normal seat before running a single cable. Every measurement below is measured from your head while you are seated, not from the wall.
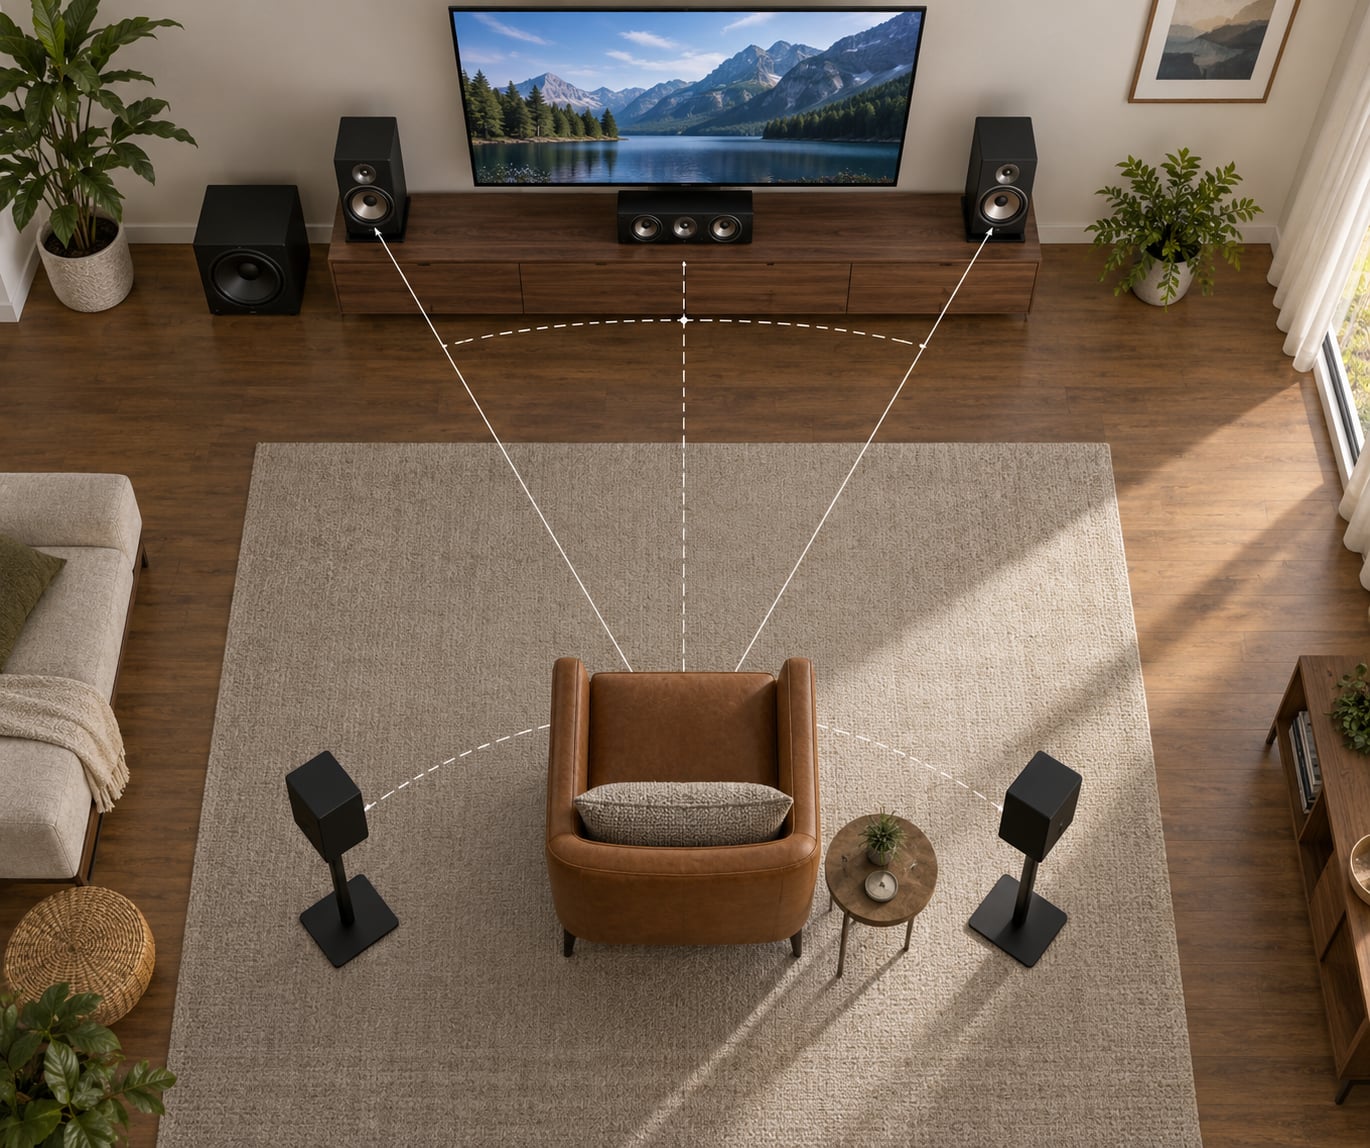
- Front left and right: place them about 22 to 30 degrees off the center line of the listening position, and keep them even with the screen. Both speakers should be exactly the same distance from you, and each should be the same distance from the center speaker.
- Center channel: directly in front of you, either just below or just above the screen. Move it closer to your seat by a foot or two if it sits inside a deep cabinet. Dialogue comes from this speaker, so its position matters more than any other.
- Surrounds: to the left and right of you, about 100 to 110 degrees from center, roughly 3 feet above ear level when seated. If you have rear channels instead, place them behind you, angled toward the seat.
- Subwoofer: along the front wall or a side wall, close to a corner if you have the floor area. Start a few feet out from the wall and leave the port or driver unobstructed.
The 83 percent rule is the shortcut most guides mention: sit at 83 percent of the room’s depth, directly on the center line, and place the surrounds to the sides of that position. In a 20-foot-deep room that puts you 16.6 feet back from the front wall. It is a starting point, not a law, and I move the seat whenever a room’s furniture makes the geometry silly.
Regulars on r/hometheater consistently tell beginners to start with 5.1 and put the surrounds beside the listening position rather than behind it. If a door, window or sofa blocks the ideal spot, pull the seating away from the rear wall instead of cramming the speaker somewhere impossible. Reflections off a wall behind your head will cost you more than the speaker placement gains.
| Channel | Ideal location | Height | Angle from center |
|---|---|---|---|
| Front left and right | Even with the screen | Seated ear level | 22-30 degrees |
| Center | Directly in front of the seat | Just below or above the screen | 0 degrees |
| Surrounds | Beside the listening position | 1-2 feet above ear level | 100-110 degrees |
| Rear surrounds (7.1) | Behind the seat | 1-2 feet above ear level | 135-150 degrees |
| Subwoofer | Front or side wall, near a corner | Floor level | Not applicable |
3. Connect the Speakers to the Receiver or Amplifier
With the receiver unplugged, run your speaker wire from each speaker to the matching terminal on the back panel. Receivers label these clearly: front left, front right, center, surround left, surround right, and so on. The labels are your wiring diagram, so read them instead of guessing.
Strip about 1/4 inch of jacket off the end of each wire. More than that exposes enough bare copper to touch the other terminal and short the channel out. Twist the strands tight so no wisp escapes.
Match polarity on both ends. The red or plus terminal on the speaker goes to the red or plus terminal on the receiver, and black to black. Getting one speaker backwards on a pair cancels some of the low output and makes the soundstage collapse toward the other side, and it is a maddening fault to diagnose because everything else sounds fine.
Banana plugs make a cleaner contact than loose bare wire, especially if you ever move the receiver. Tighten the terminal screw until the wire is gripped, not crushed.
For the subwoofer, look for the LFE or subwoofer pre-out on the receiver and run an RCA cable to the input on the sub. Turn the sub’s own volume control up to about halfway for now, then let calibration handle the rest. Do not run speaker wire to a sub; it is a powered unit and takes a line-level signal.
If you inherited in-wall wiring from a previous owner, do not trust the labels on it. Connect one speaker at a time and use the receiver’s test tones to identify which channel each wire is. Speaker wire has no standard color code, so that guesswork is unavoidable, and mapping it once takes about ten minutes.
4. How to Set Up Surround Sound Speakers in the Receiver
This is where you tell the receiver what it has connected. Menu names vary between brands, but the path is nearly always Speaker Setup or Speaker Configuration, usually under the Setup or System menu.
Set each connected channel to the correct role. Front, center and surround speakers are normally configured as Small, which lets the receiver’s bass management handle the low end. Only mark a channel Large if it genuinely cannot output bass, which is rare outside of very old or very small drivers.
Set the crossover frequency, the point where the receiver hands bass off to the subwoofer. 80 Hz is the standard starting point for a 5.1 system. Raising it to 100 Hz moves more of the low range to the sub and can help a room that booms, while dropping to 60 Hz sounds tighter on small speakers.
Set the subwoofer to enabled and its level somewhere in the middle. Then disable any terminal you are not using, so the receiver does not send power to an empty one. Powering an unconnected channel wastes a little energy and confuses later troubleshooting.
Finally, point the receiver at your TV. On most models that is one HDMI cable from the TV’s eARC or ARC input to the receiver’s main HDMI out, with the receiver input set to that same source. That single cable carries both picture and sound back to the TV. If you skip it, you get the receiver’s menu without video.
5. Set Speaker Distance, Level, and Phase
Measure from your seat to the front of each speaker with the tape measure and enter those numbers. A good estimate for the surrounds is 10 to 12 feet if they sit beside you, and more if they are behind you. The receiver uses distance to delay closer channels so everything arrives at your ears at the same moment.
Set every channel’s level trim to the same value, typically zero, before you adjust anything else. That gives you a neutral baseline. Calibration can then nudge channels up or down from there.
Phase control on most receivers affects the subwoofer rather than the full-range speakers. Leave it at zero degrees unless the bass sounds thin or hollow at your seat. If the sub is against a wall and the bass is weak, try the 180 degree setting, which swaps the sub’s timing. One of the two positions will sound better in your specific room; listen to the same familiar track after each change.
Community advice on the audio forums is consistent here: move the subwoofer around the room and re-listen each time. A sub that sounds boomy in one corner can sound tight in another, and no amount of menu tweaking beats moving four inches of furniture.
6. Run Room Calibration
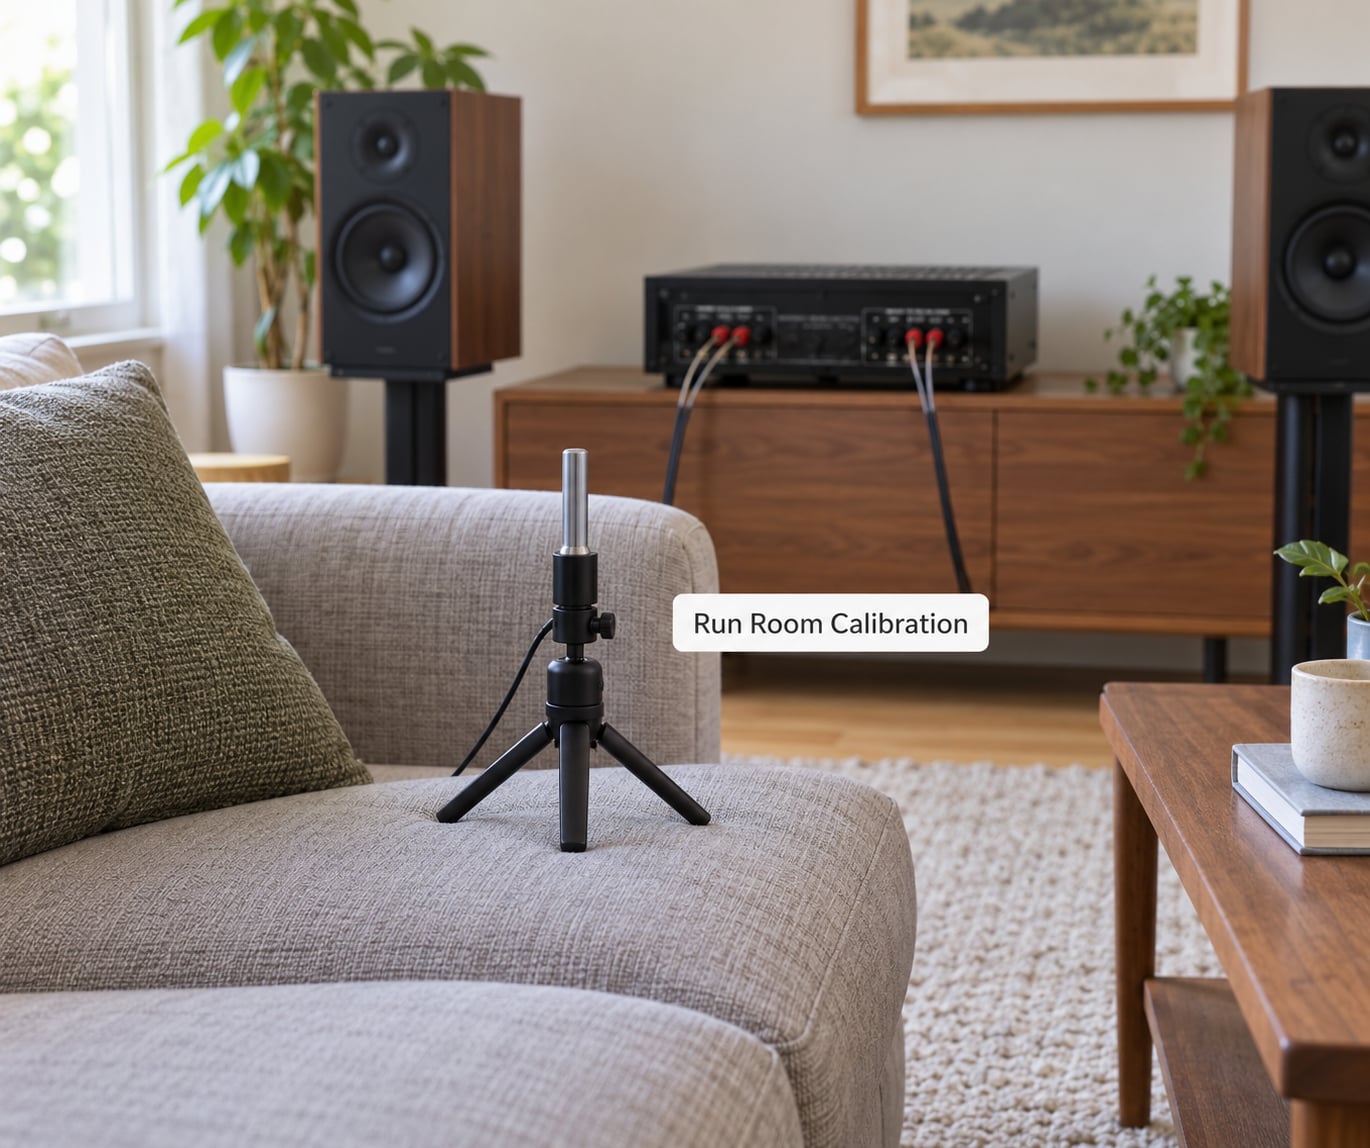
Most receivers ship with an automatic room calibration routine. The setup microphone plays test tones and measures the level and arrival time of each channel so it can set the trims and delays for you.
Set the microphone on a sofa cushion or a stand at the ear height of someone seated in the main listening position. Do not put it on a coffee table or on the floor, and do not leave it on an armrest where the cushion absorbs sound unevenly. Keep the room reasonably quiet and stay out of the way while the sweep runs.
Run the calibration more than once. The first pass often overshoots the subwoofer in a small, reflective room, so a second run gives you a better read. Compare the results after each pass before you save them.
Read the report the receiver generates. It will usually flag a few things: a channel that failed, a speaker that seems reversed, an unusually long delay, or a subwoofer level well above the others. A phase warning almost always means one speaker has its polarity backwards, so go check that wire before you touch a setting.
If the report shows excessive bass from the surrounds, those channels are probably set to Large when they should be Small. If the fronts sound hollow, the opposite is true and the sub is handling less than it should.
7. Test with Movies, Music, and Dialogue
Save the calibration results, then put on content you know well. A film you have seen a dozen times tells you immediately when a sound is coming from the wrong place, because you already know where that car should be.
Check four things. First, direction: during a car chase, does the engine pan left to right across the front stage and behind you? Second, dialogue: is every line of speech coming from the center speaker, at the same volume as the effects? Third, bass: does the sub add weight without masking voices? Fourth, lip sync: when someone speaks on screen, are the words landing in step with their mouth?
Test from your normal seat, because that is where the calibration was tuned. If you like it from the sofa but it falls apart from the dining table, that is fine and expected. If a problem only shows up from one side of the room, note it and check that channel’s level and distance values.
Finally, try the system’s all-speaker and stereo modes. Some content is mixed in two channels, and you want to know the system still sounds right when you switch.
Common Mistakes
Nearly every disappointing surround system traces back to one of a handful of setup errors. Here are the ones that come up most often, with the fix for each.
- Surrounds placed too far behind you. Push them forward until they sit beside or slightly behind your shoulders. Too far back and they read as a separate event instead of wrapping around the scene.
- Positive and negative swapped on one speaker. Some low output cancels and the image drifts to one side. Power off, recheck the red-to-red and black-to-black connections, then recalibrate.
- Speakers marked Large when they should be Small. Bass management needs Small on your full-range speakers so the sub handles the low end. Otherwise your surrounds are fighting the subwoofer.
- Calibration skipped entirely. Even ten minutes of setup makes a bigger difference than most people expect. Run the sweep before you decide the system is not worth it.
- The subwoofer blocked or pushed into a sealed corner. Leave clearance around the port or driver and keep a few inches from any wall behind it.
- Unknown legacy wiring mapped by guesswork. In-wall speaker wire has no standard color code. Test each channel one at a time and write the mapping down for whoever moves next.
- Wireless rears left half-paired in the app. If a sound bar system keeps reporting an unavailable room, remove the orphaned room and re-pair from the device settings rather than factory resetting everything first.
- Speaker-level mismatch left uncorrected. If the surrounds sound quieter, raise that channel’s level trim a few dB rather than turning the whole system down and losing the center channel’s clarity.
Frequently Asked Questions
Do surround speakers need to match the front speakers?
They should be similar in tonal character, but they do not have to be the identical model. Matching the brand and series helps because the drivers share a voice and the soundstage feels unified. If you mix brands, keep the tonal range close and avoid pairing very bright speakers with very warm ones, since the mismatch is easier to hear on surround effects during a film.
Can I set up surround sound speakers without a subwoofer?
Yes, and most receivers let you run one without a sub. Set the subwoofer to disabled and make sure your main channels are configured as Small with a crossover the receiver can still manage, or as Large if you want full-range output from the mains. You will lose the deep effects in films, but surround positioning and dialogue clarity work exactly the same.
Should surround speakers be wired or wireless?
Wired gives you the most reliable, lowest-latency sound, and it is the only route to a full 5.1 or 7.1 layout with a receiver. Wireless rear speakers are faster to install and avoid opening walls, which matters if you rent, but they depend on power outlets near each speaker and can add a small delay. For a room you own, wire it. For a rental, wireless rears are the sensible call.
Where should I place surround speakers in a small room?
Put them to the sides of your listening position, roughly 100 to 110 degrees from center, about 3 feet above ear level. In a tight room, move the seat away from the back wall before you sacrifice the surround positions, since a rear wall close behind your head creates the reflections that muddy the sound most. If a door blocks the spot, move the speaker forward rather than cramming it into the corner.
Why do my surround sound speakers sound quieter than the front speakers?
Two causes are common. Either the surround channel level trim in your receiver menu is set lower than the others, or that speaker has a reversed polarity connection, which cuts its output and makes it seem thin and distant. Check the level trim first, then power off and confirm red connects to red and black to black on that channel. Rerun calibration after either fix.
Can I use surround speakers as Bluetooth speakers?
Only if they have their own Bluetooth receiver built in, and most passive bookshelf and in-wall speakers do not. Those take a wired line-level signal from an amplifier or receiver and need power from a speaker terminal. Active wireless speakers can stream on their own, but then they are no longer being driven by your receiver. Check whether your model lists Bluetooth before buying on that assumption.
Conclusion
The first thing to do is measure your room and place the speakers, because no menu setting can rescue surrounds that are behind the couch. Then wire each channel to its labelled terminal, set the roles in the receiver’s speaker menu, and run the calibration microphone twice before you save the results. Once it is done, sit in your normal listening position and play something you know well, since that seat is the only one the system was tuned for. Get that one seat right and the rest of the room will follow.